


Integrating Jenkins and Jira creates a powerful, automated feedback loop for your CI/CD pipeline. This integration provides a comprehensive solution for real-time issue reporting and management, streamlining the process of identifying, tracking, and resolving problems that arise during the software development lifecycle. Here's a breakdown of the key advantages:
Automated Issue Creation: Jenkins can be configured to automatically create Jira tickets for any failed builds, test failures, or identified bugs. This eliminates manual reporting and ensures that issues are captured promptly and accurately. The Jira ticket can include detailed information from the Jenkins build, such as console logs, error messages, and affected files, providing developers with the context they need to diagnose and fix the problem quickly.
Real-time Visibility: With Jenkins pushing build information directly to Jira, DevOps teams gain real-time visibility into the health and stability of their CI/CD pipeline. Jira dashboards and reports can be used to track the number of open issues, their severity, and their status, providing valuable insights into the development process.
Improved Collaboration: The integration fosters collaboration by providing a centralized platform for managing build-related issues. Developers, testers, and project managers can all access the same information in Jira, facilitating communication and ensuring that everyone is on the same page. Jira workflows can be used to assign issues to specific individuals, track progress, and ensure that issues are resolved in a timely manner.
Efficient Issue Resolution: By providing developers with detailed information about build failures and bugs directly within Jira, the integration streamlines the process of issue resolution. Developers can quickly identify the root cause of a problem and implement the necessary fixes. Once the fix is deployed, Jenkins can automatically update the Jira ticket to reflect the successful build, closing the feedback loop.
Enhanced Project Management: Jira can be used to project manage the fixes required to get applications into production. Teams can use Jira sprints and boards to prioritize issues, track progress, and ensure that releases are delivered on schedule. The integration with Jenkins provides valuable data for project planning and resource allocation.
In short, integrating Jenkins and Jira empowers DevOps teams to build, test, and deploy software more efficiently and effectively. By automating issue reporting and providing real-time visibility into the CI/CD pipeline, this integration helps to reduce development time, improve software quality, and accelerate the delivery of new features to market.
Step 1 : Create and connecting to an EC2 instance using Amazon Instance Connect
- In the AWS Management Console search bar, enter EC2, and click the EC2 result under Services:
2. To see available instances, click Instances in the left-hand menu:
The instances list page will open, then you can create an instance named
cicd.platform.instance

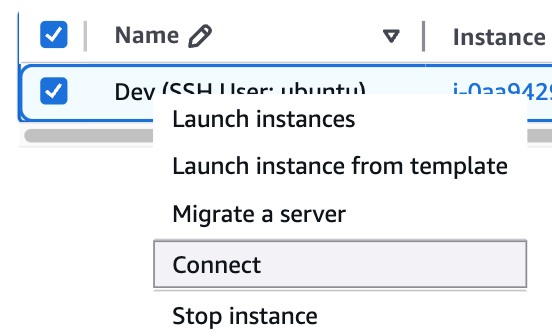
3. Once the instance is created you can right-click the instance named
cicd.platform.instance
, and click Connect:
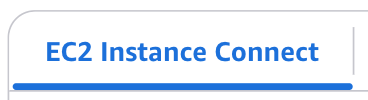
The Connect to your instance form will load.
4. In the form, ensure the EC2 Instance Connect tab is selected:
You will see the instance's Instance ID and Public IPv4 address displayed.
5. In the User name textbox, enter
ec2-user
.
6. To connect to the instance using a browser-based shell, click Connect:

Step 2 : Launch Jenkins and Jira Docker Container
Here we will complete the provisioning of your Jenkins and Jira CICD and issue management environment. To do so, you will need to SSH into the cicd.platform.instance and perform a git clone of the repository located on GitHub at: https://github.com/cloudacademy/devops-jenkins-jira, opens in a new tab.
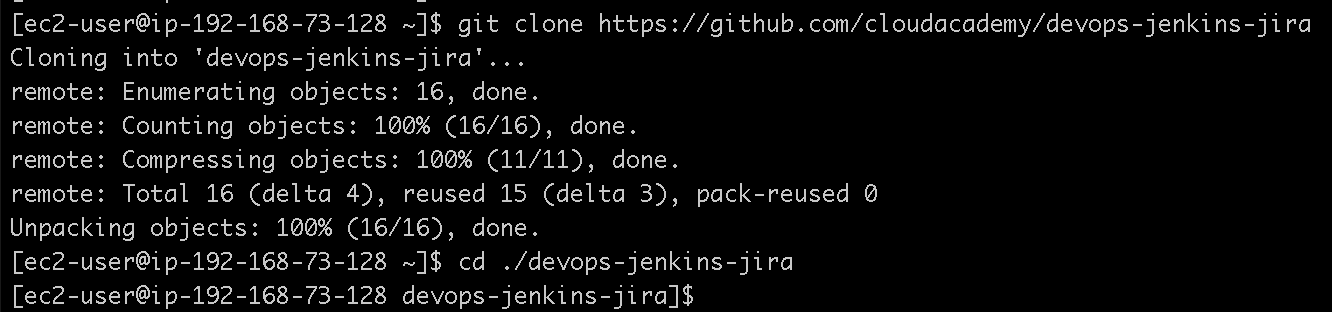
1. Use the git command to clone the GitHub hosted DevOps Jenkins+Jira Integration repository:
git clone https://github.com/cloudacademy/devops-jenkins-jira2
cd ./devops-jenkins-jira
2. Query the initial local docker environment:
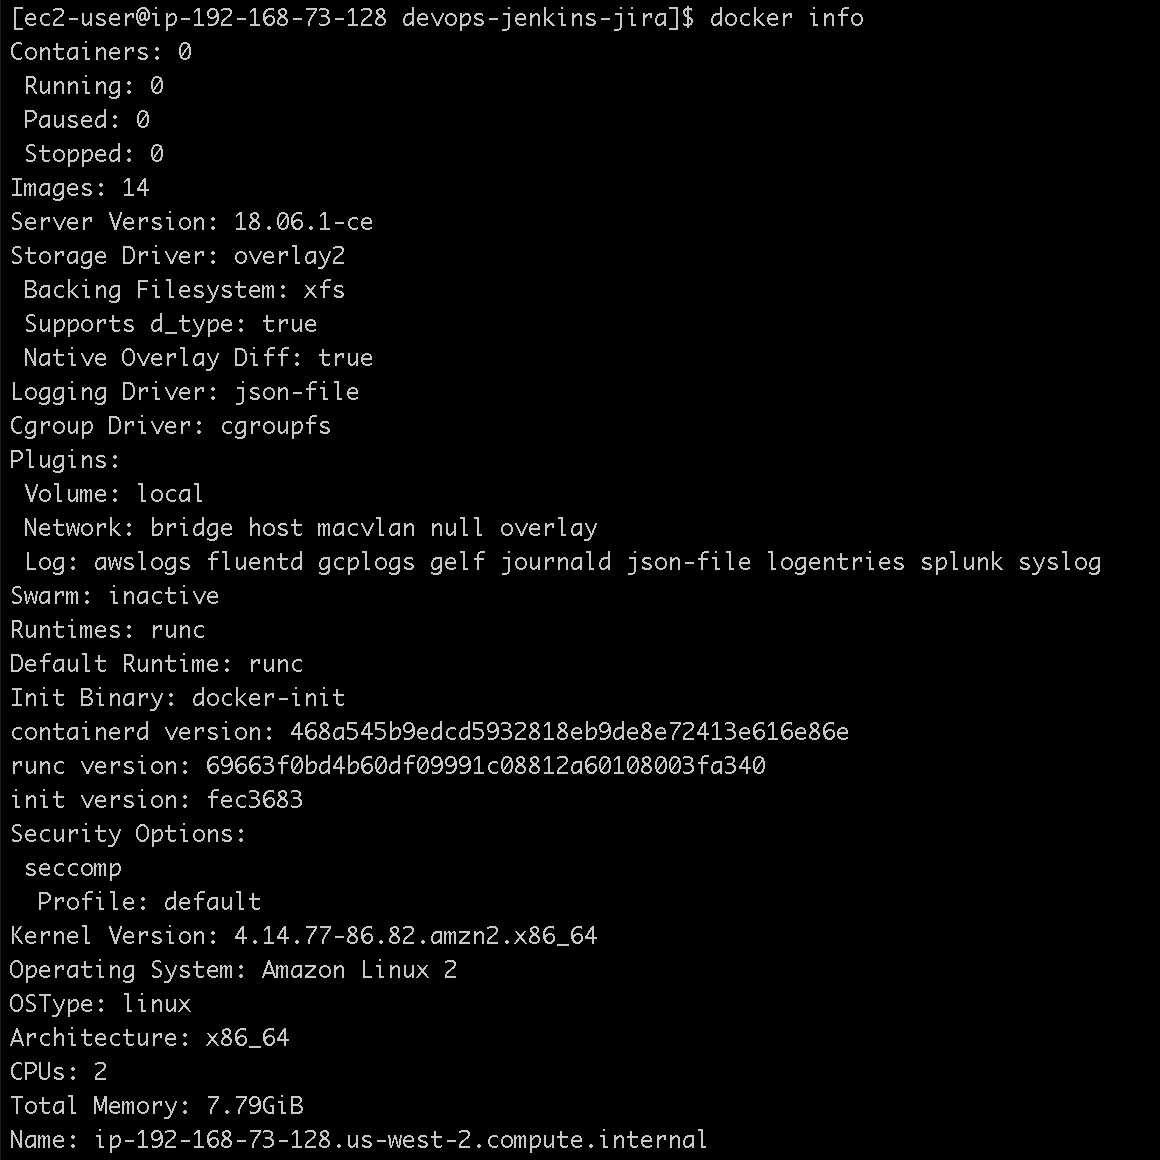
- Confirm that no docker containers are running
docker ps -a

cd ~/devops-jenkins-jira/2ls -l
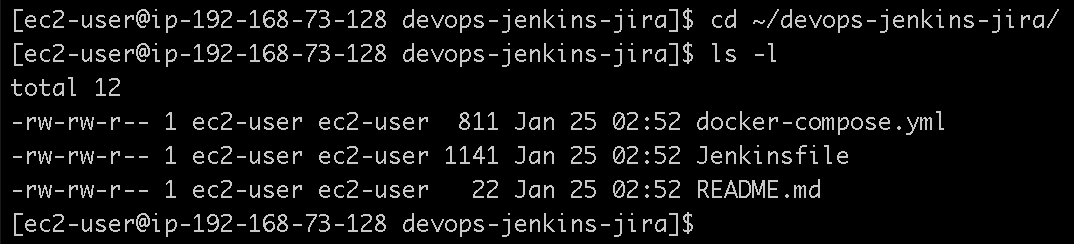
5. Examine the docker compose configuration within the docker-compose.yml file:
cat docker-compose.yml
You will see the contents of the file displayed. This docker compose file defines three services. The Jira and Jenkins services are exposed on ports 8888 and 8080 respectively. The socat service facilitates communication between the Jenkins service and docker running on the host.
Note that the Jenkins service is a privileged container. It has elevated permissions for demonstration purposes in this tutorial. In a non-lab environment, you will want to persist your Jenkins data between service restarts, which means you would set up a volume with specific permissions. Privileged should be avoided when possible to reduce the likelihood of security issues.
6. Launch the Jenkins and Jira docker environment. Running these commands will grab the latest Jenkins docker image, and then launch the docker environment with logging enabled. The docker compose container provisioning process typically takes 1-2 minutes to complete. Upon conclusion, three docker containers will be launched Jenkins, Jira, and Socat:
docker pull jenkins/jenkins:lts
docker-compose up -d && docker-compose logs -f
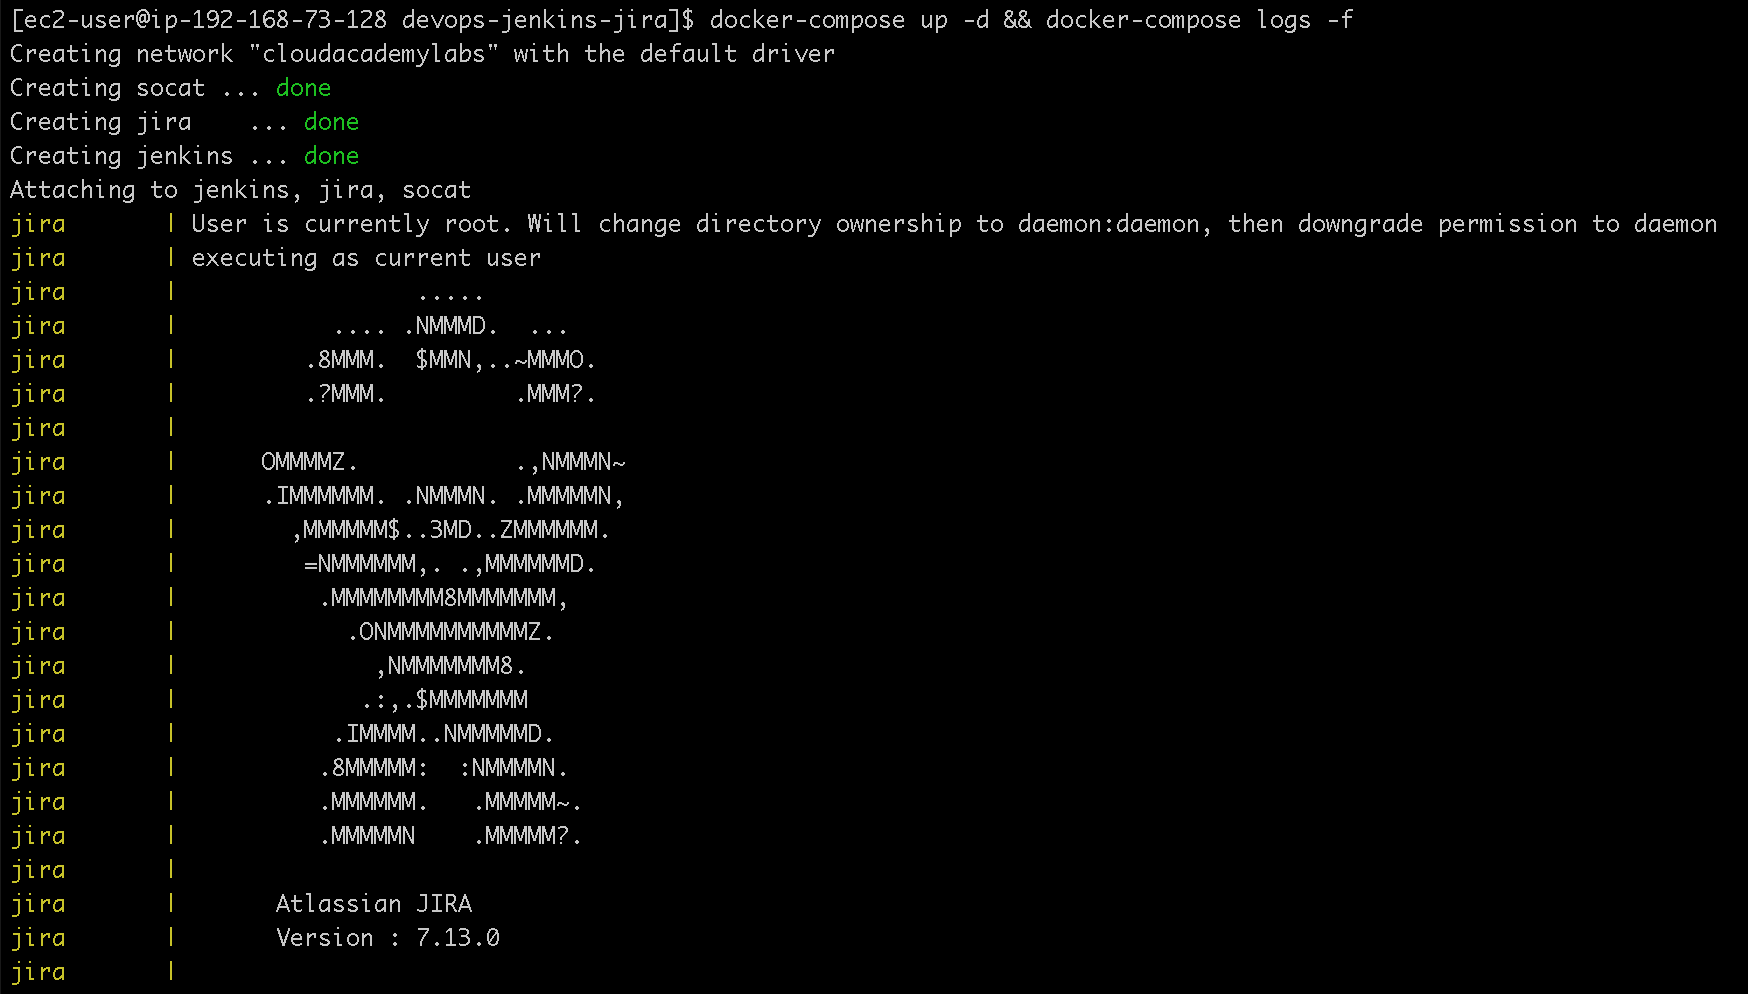
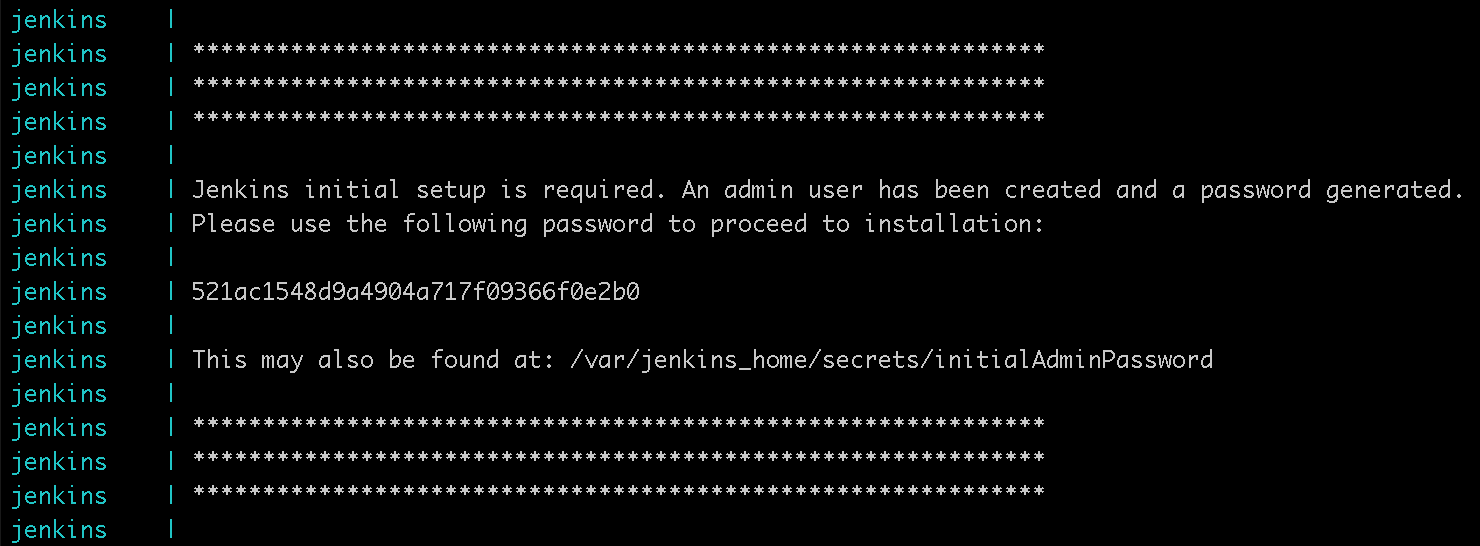
During the launching process, the Jenkins container will print out the initial admin password. This is required to complete the Jenkins installation process later on. You do not need to capture this as you will query for it in the following step after the full docker environment has been successfully provisioned:
The container launching process completes with several messages about the memory allocation used by Jira:

7. Once the container provisioning process has completed successfully, exit the docker-compose log tailing process by using the Ctrl+C key sequence. Ignore the Error: Aborting message; this is just the result of exiting the docker-compose log tailing process:

8. Confirm that the Jenkins, Jira, and Socat docker containers are up and running:
docker ps -a --format "table {{.Names}}\t{{.Status}}"

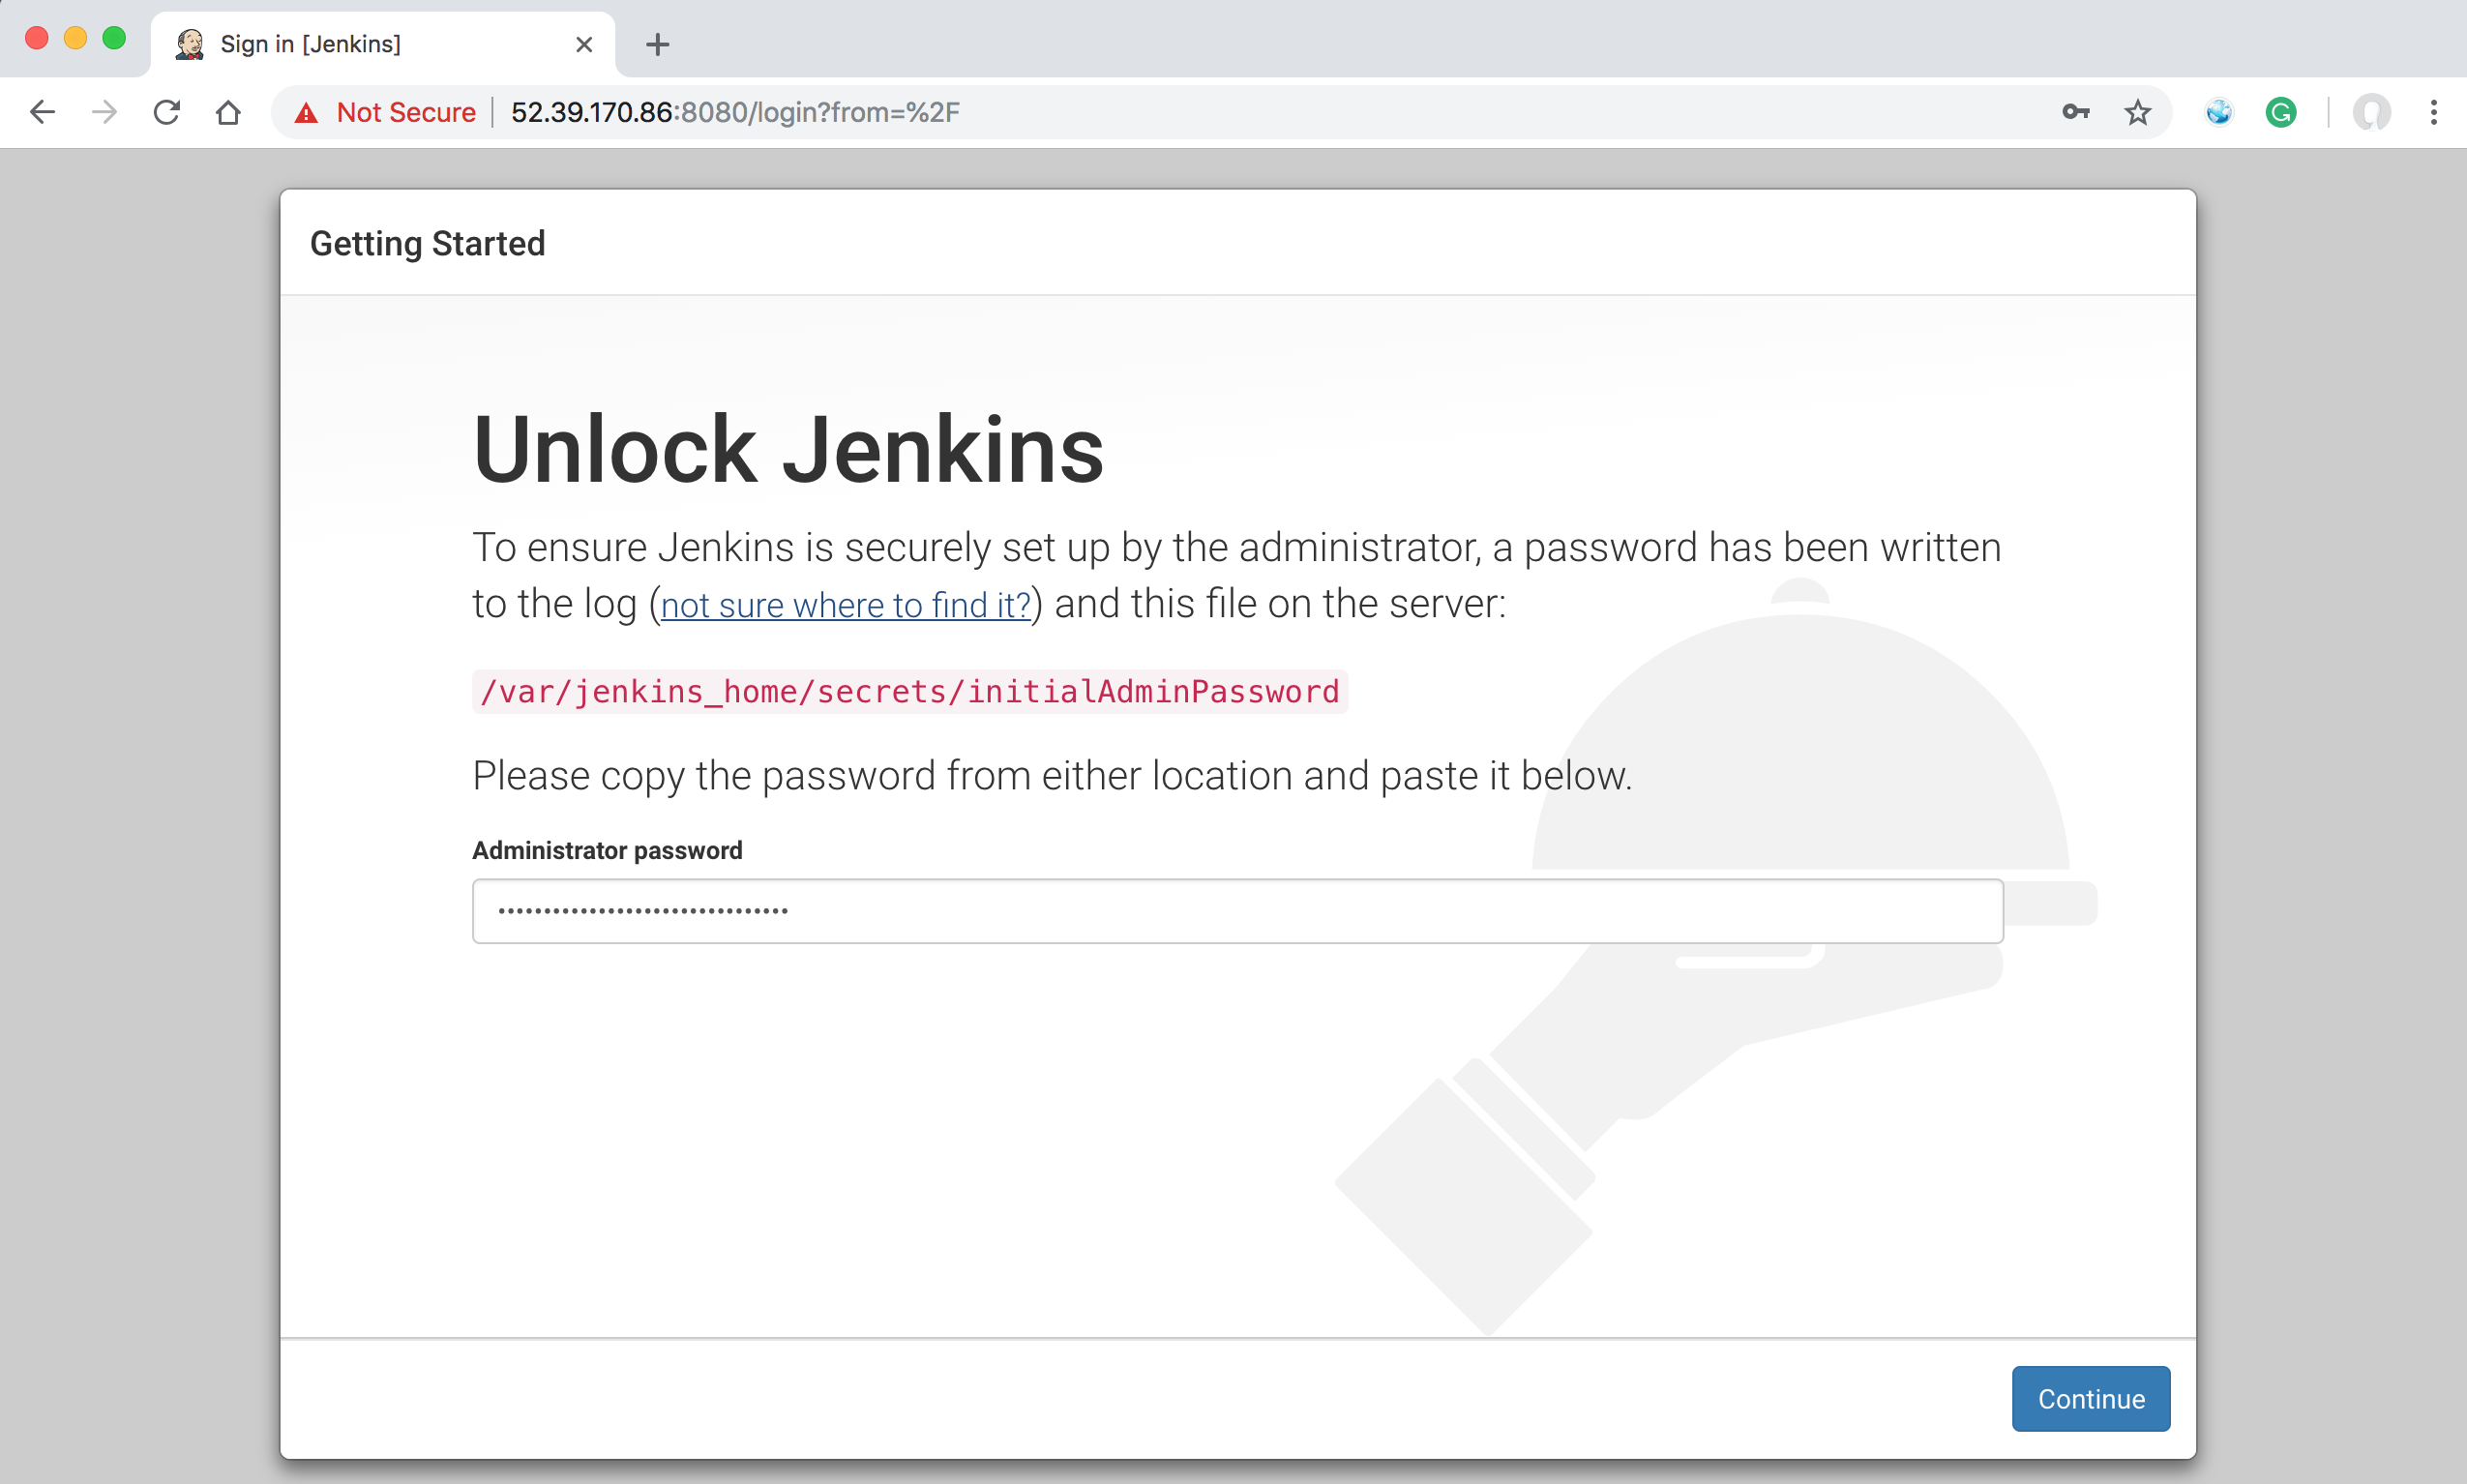
9. Query for the Jenkins initial admin password. This will be required later on to complete the Jenkins installation. Make sure you copy-and-paste it somewhere so you can later reference it:
docker exec -it jenkins cat /var/jenkins_home/secrets/initialAdminPassword

Step 4 : Log in to Jira and Complete Default Installation
Note: To complete this lab step, you will be required to generate a trial license on the Atlassian website, which is used to activate the Jira application. This will require you to either have an existing Atlassian user account or create a new Atlassian user account.
On the home page click on the settings icon then Licensing;

Then one the licenses page click New Trial License;

Then select Jira from the product dropdown, and then Jira Software (Data Center) from the results.


Fill the form with Organization Name: test123, and get your server id from going to your Jira instance with;
http://instanceip-address:8888 selecting Set it up for me and click Continue to MyAtlassian.
When the new page loads, click on the address bar and scroll to the end of the url for the SERVER_ID:

after using the SERVER ID, click Generate License wait for the licenses page to load. COpy and note the license key.

1. The Jira docker container has been configured to listen for inbound connections on port 8888. Using your browser, navigate to the Jira home page:
http://instanceip-address:8888
Use the public IP address assigned to the cicd.platform.instance EC2 instance.

2. On the Jira setup screen, select I’ll set it up myself and click Next.
On the Database Setup screen, choose Built In then Next

- On the Setup application Screen, leave all defaults and click Next,

- Now on this screen, Input your License Key and click next.

5. Enter the following settings and click Next:

Email:
admin@here.com
Username:
Admin
Password:
qwerty123
6. Enter the following settings and click Next. Click through any remaining defaults, Jira will then perform the final setup actions:
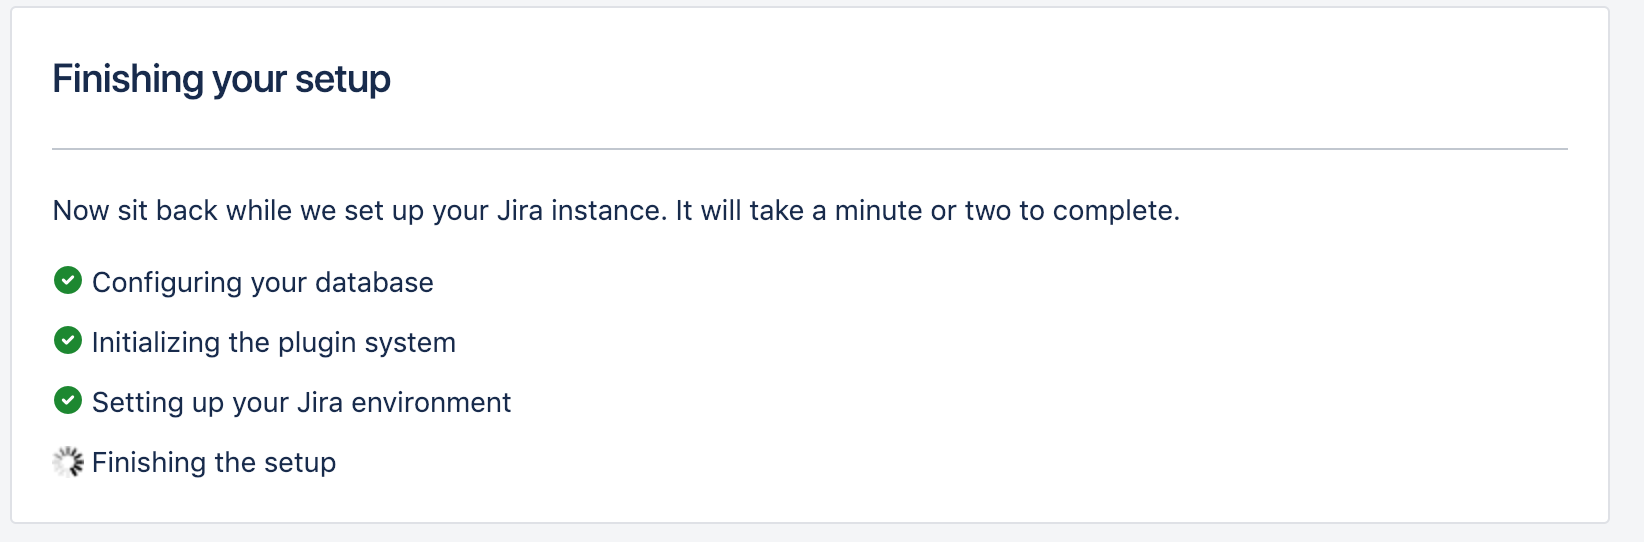
- After Jira has finished setting up, you will be presented with the Jira is ready to go! screen:
8. Click Let's get started:
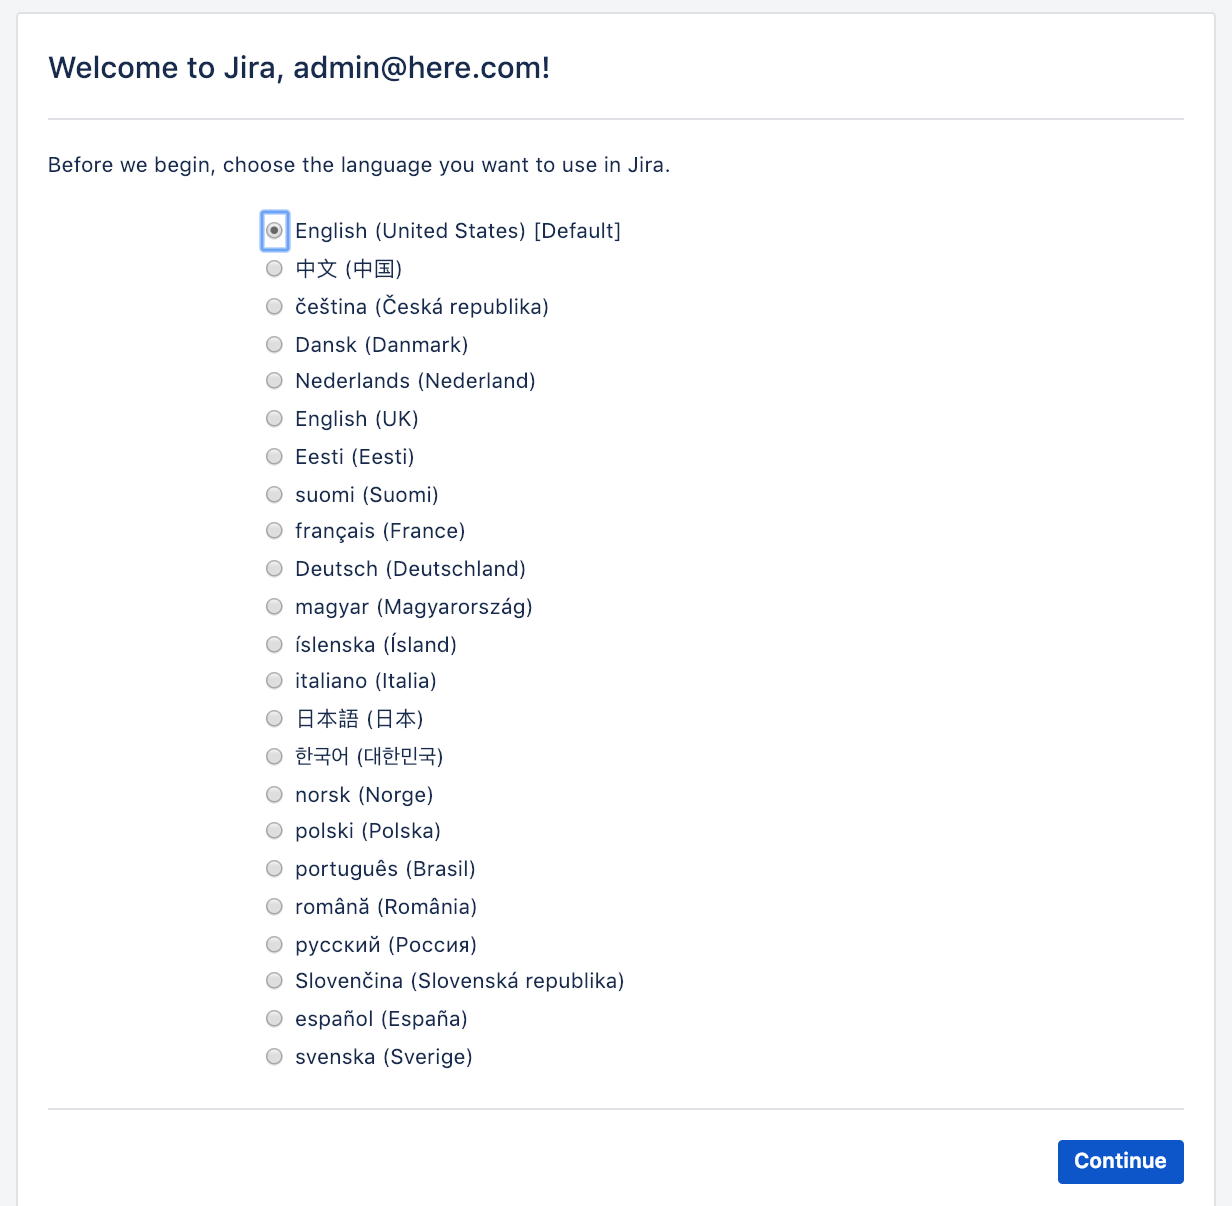
9. On the Welcome to Jira- Language page, accept the default language and click Continue to proceed:

10. On the Welcome to Jira - Avatar page, click Next to proceed:
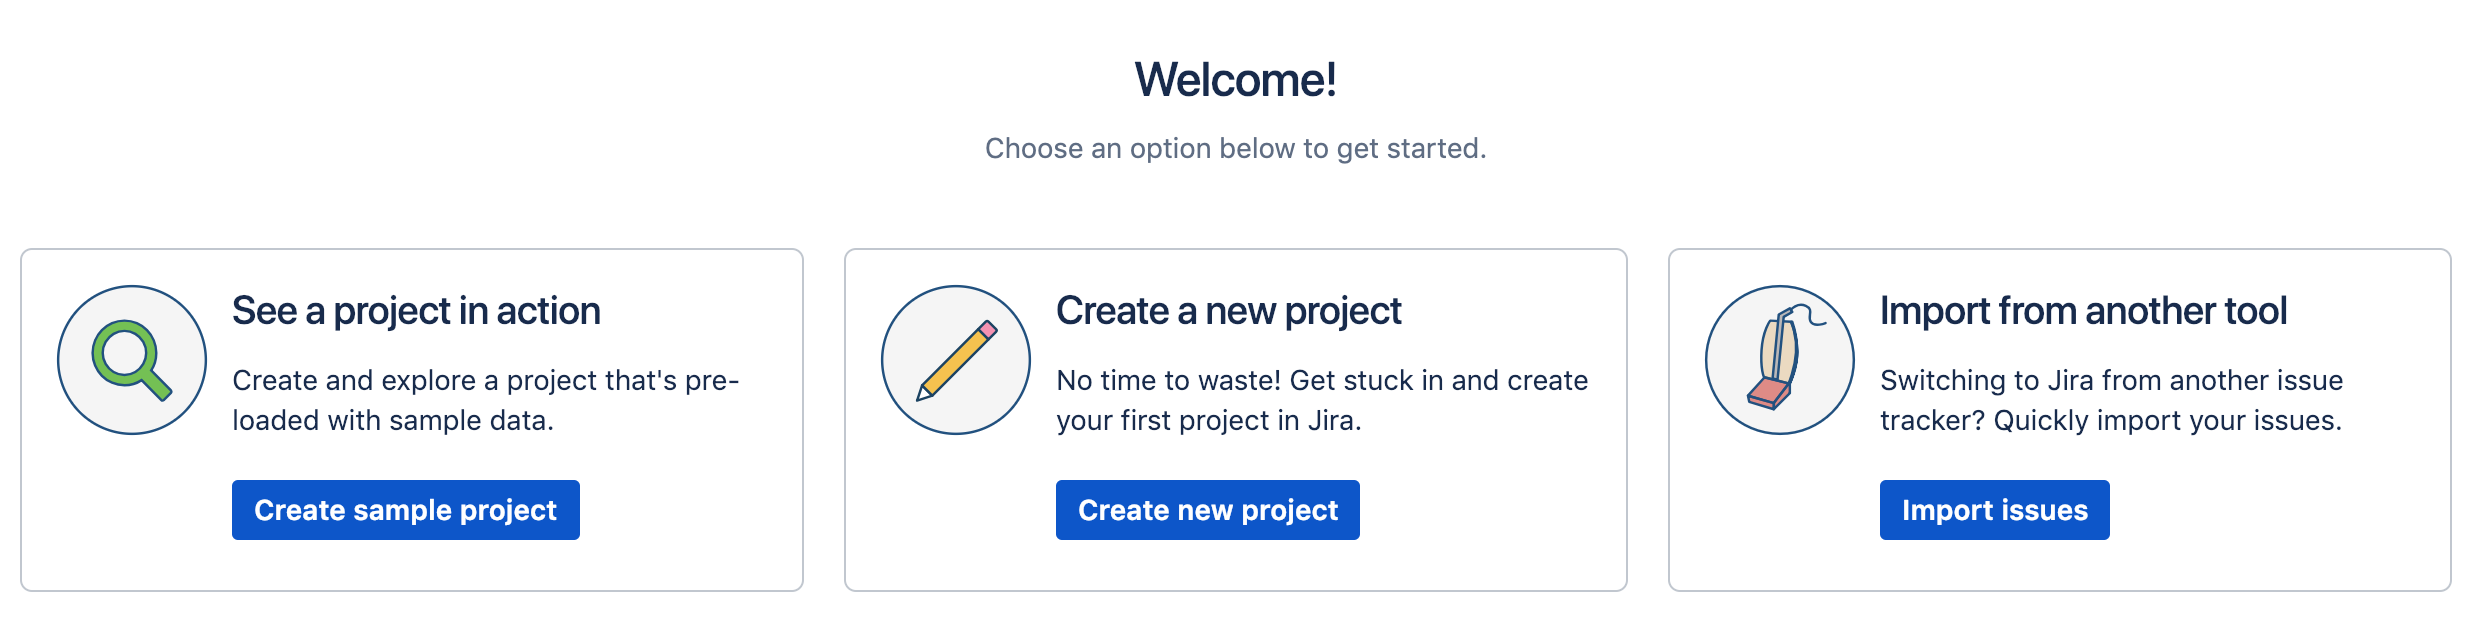
11. On the Welcome! page, click Create sample project to create a pre-configured Jira project:
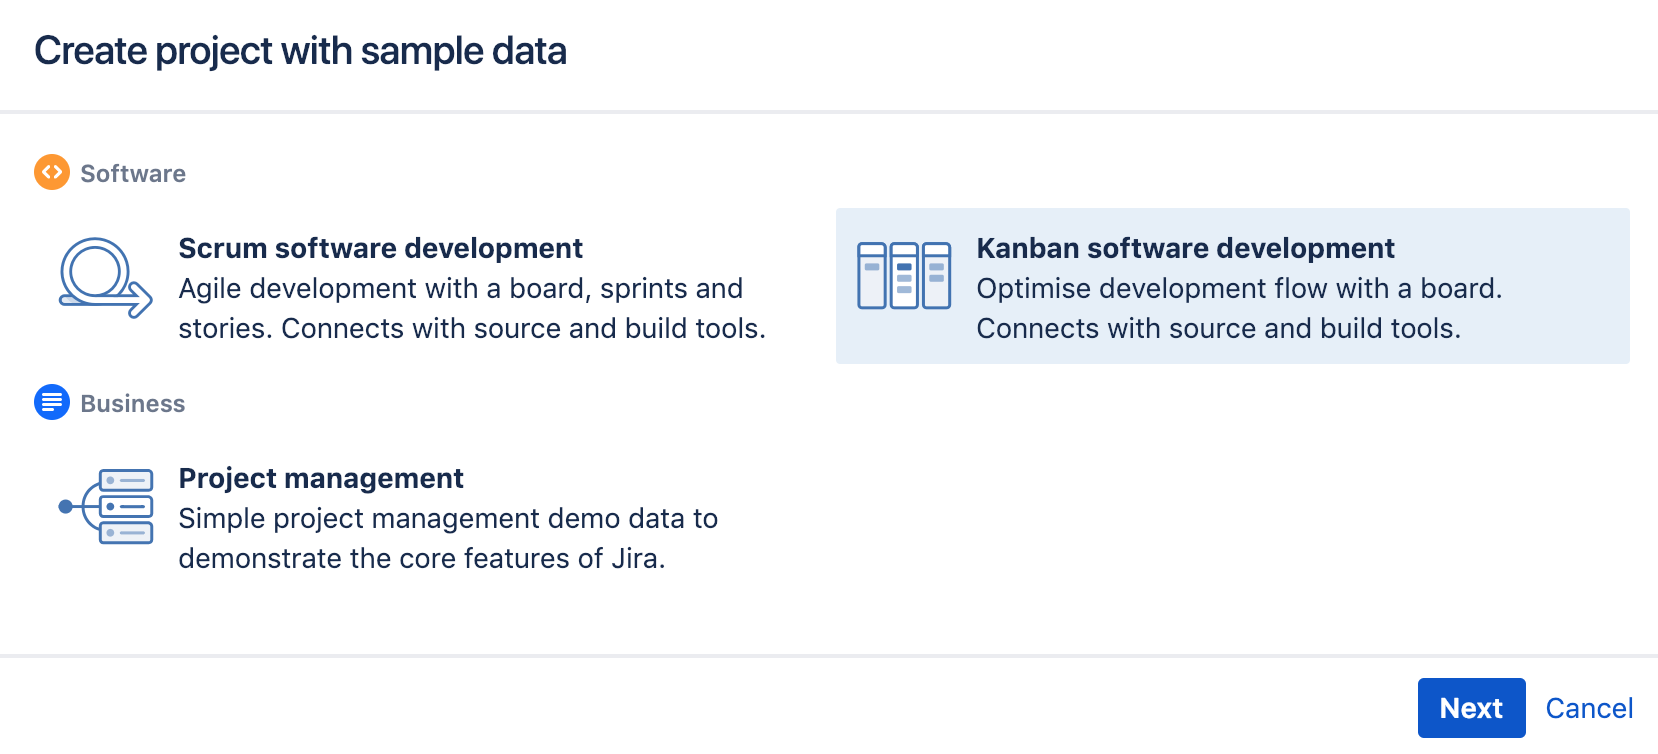
12. On the Create project with sample data popup window, select Kanban software development and click Next:
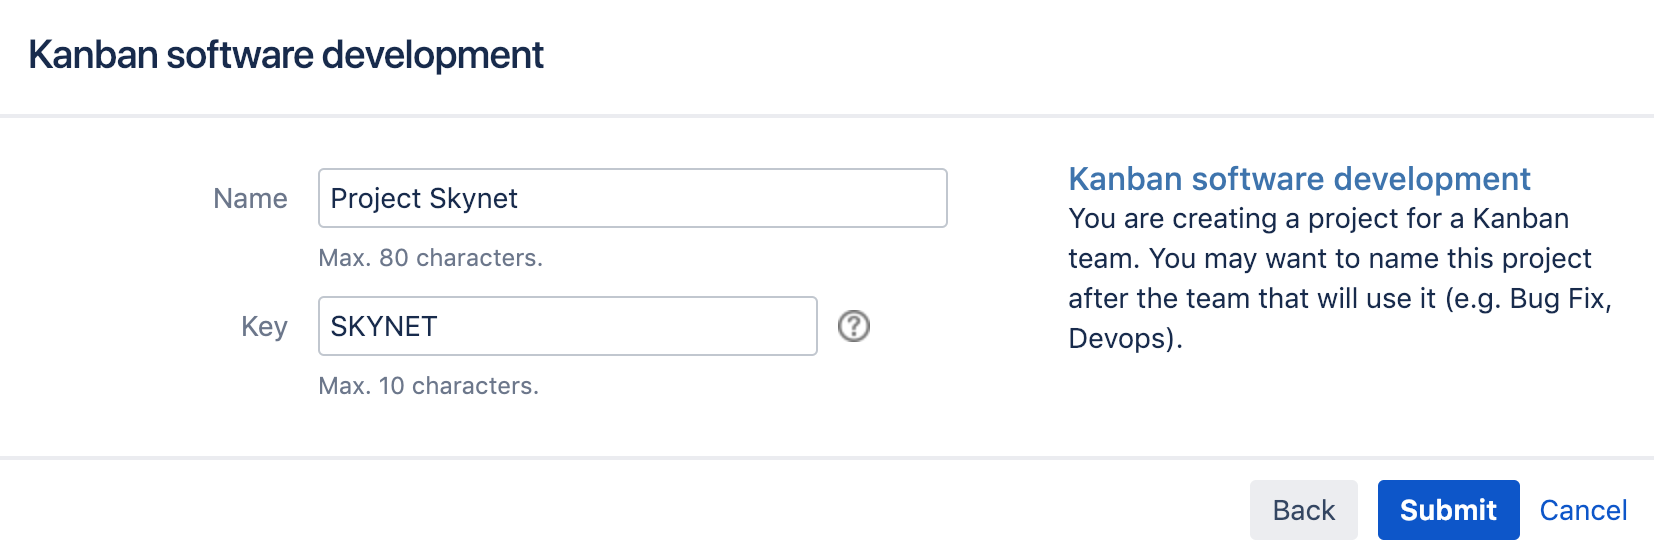
13. On the Kanban software development popup window, set the following values and click Submit:
Name:
Project Skynet
Key:
SKYNET
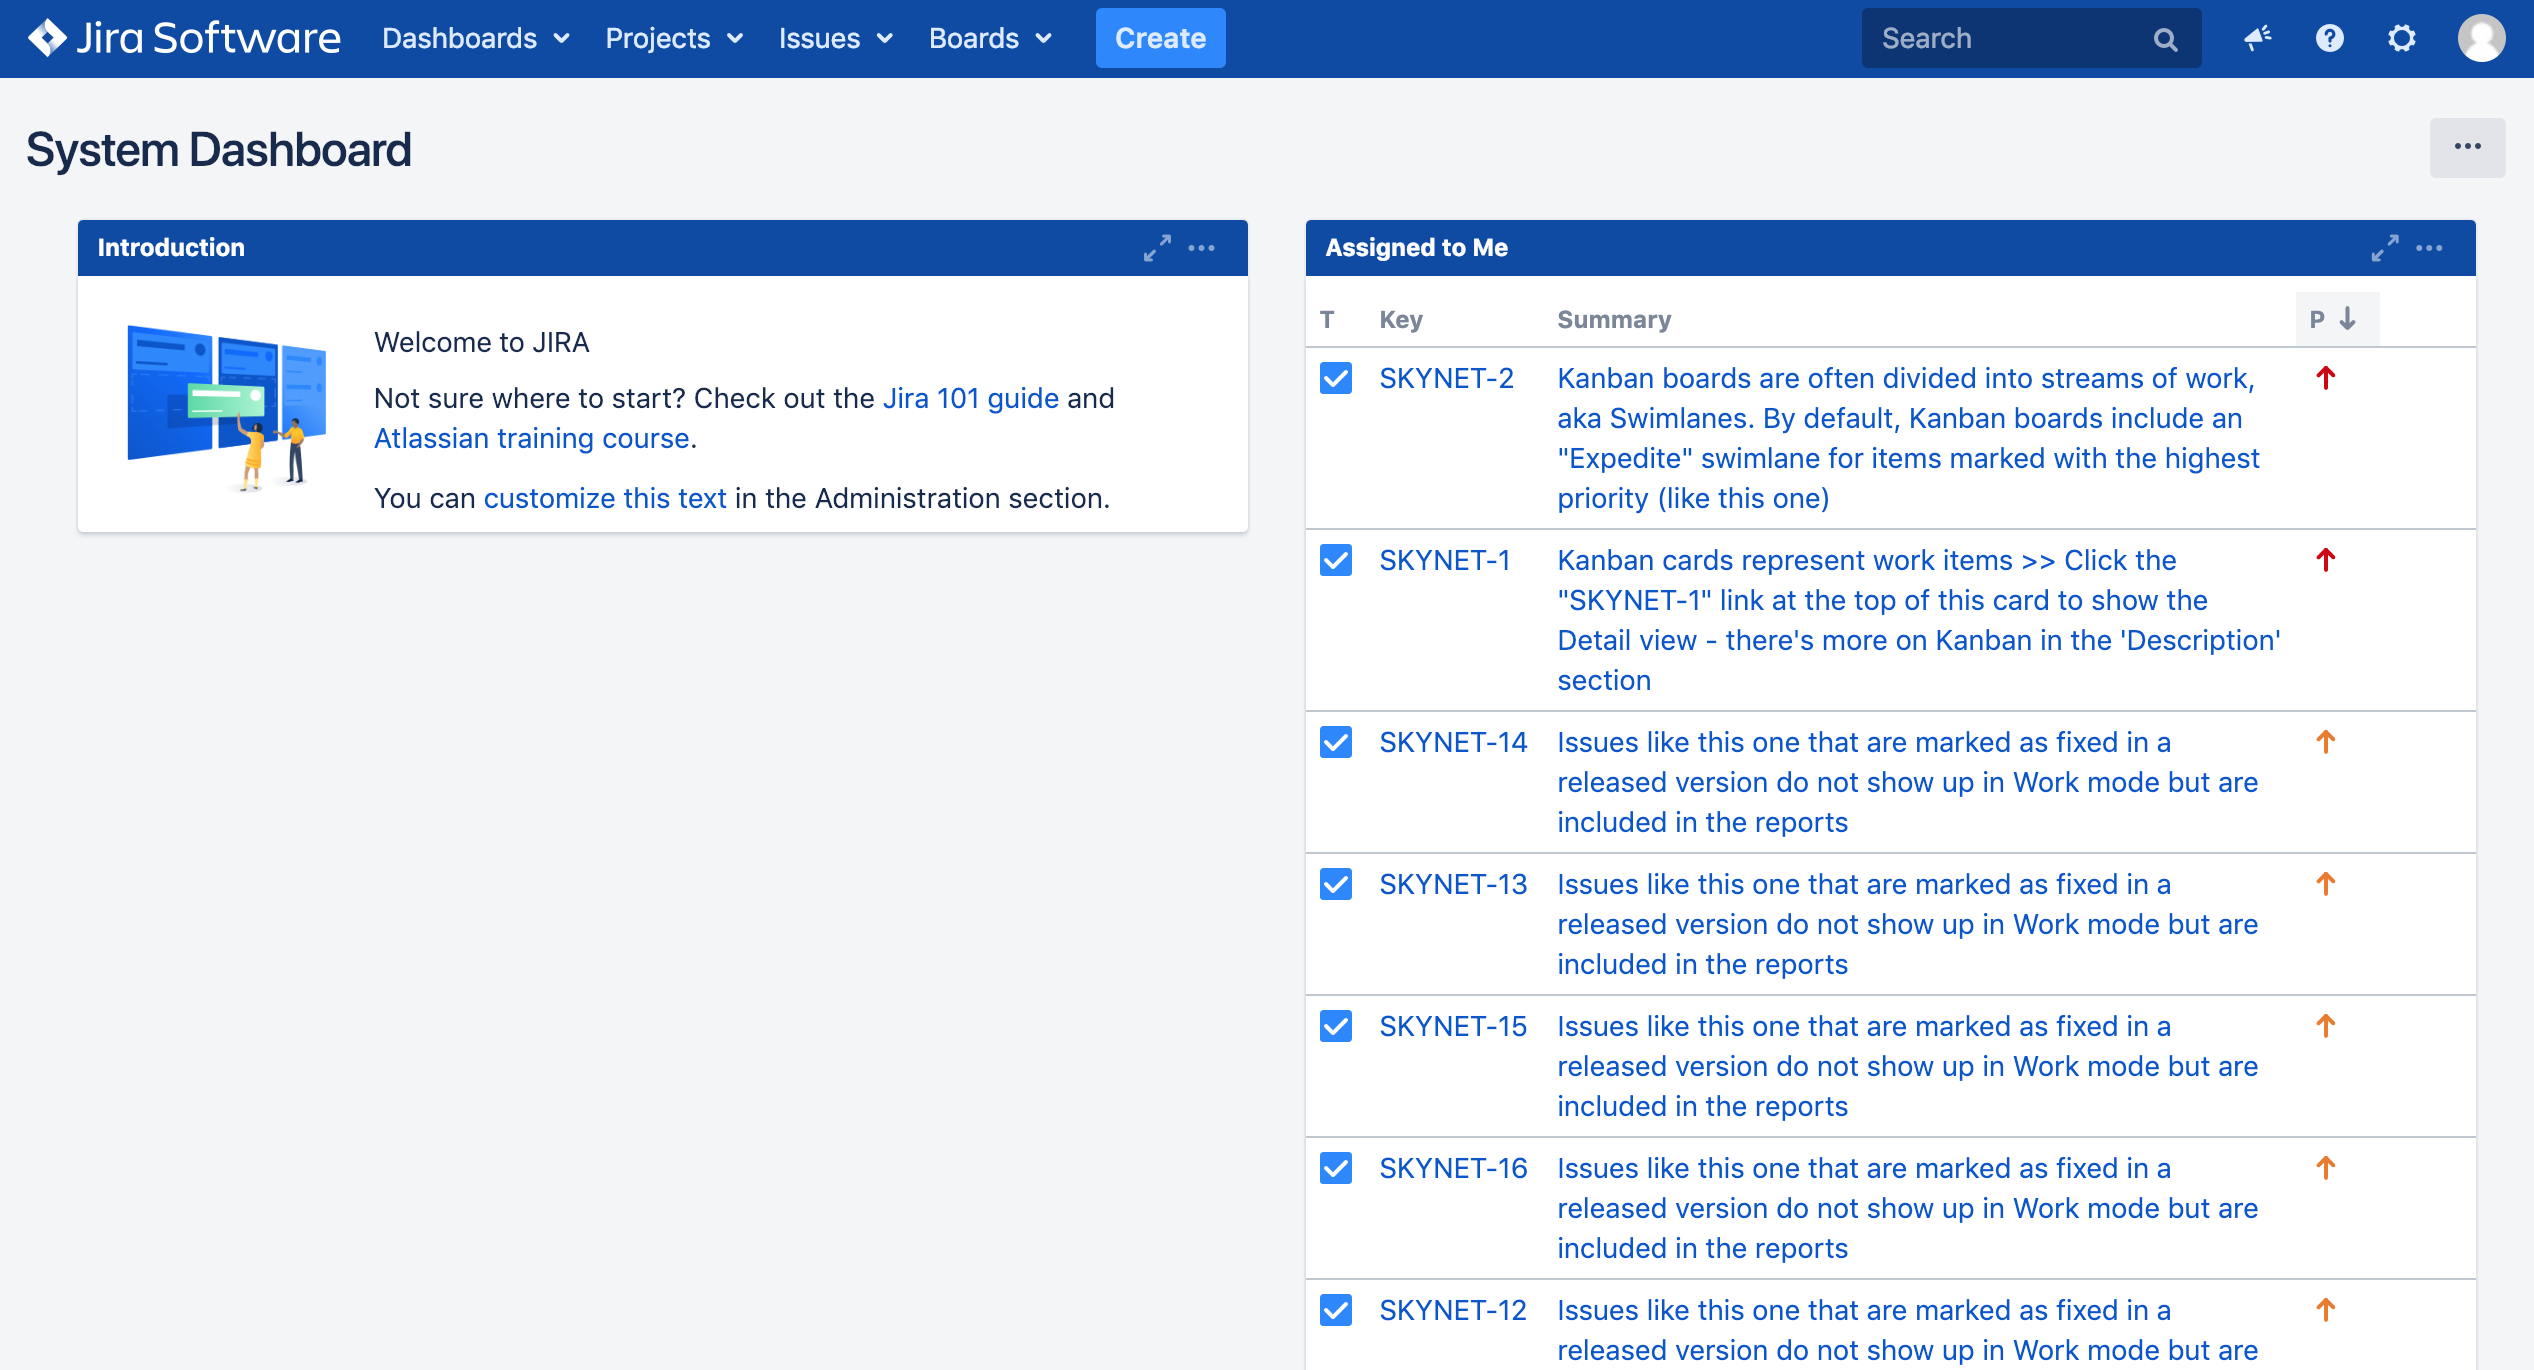
- You are now presented with the sample Jira Kanban SKYNET project board. Close any popups that show up in the right-hand corner:
15. Perform any other exploratory actions within the sample Jira Kanban SKYNET project. When you have finished leave the Jira administration web console open as you will come back to it later on in this Lab.
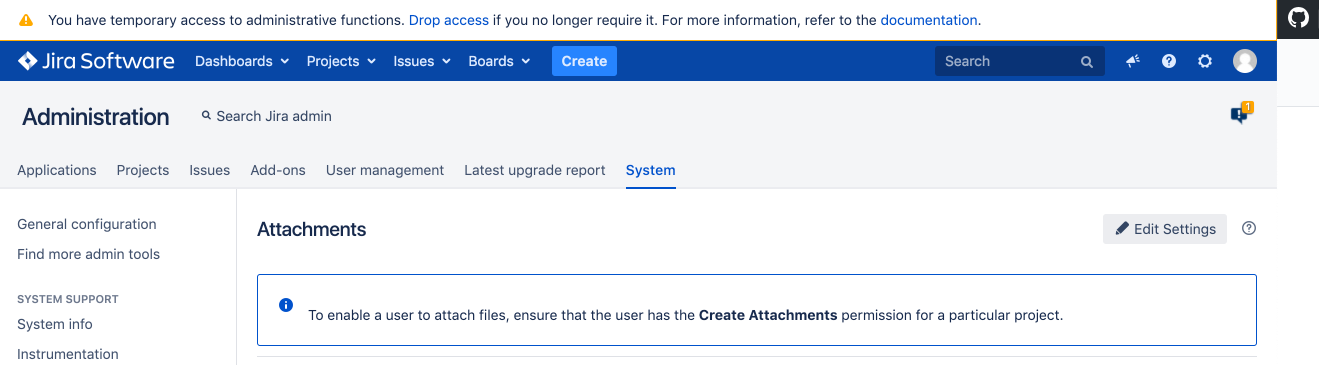
Step 5 : Enable Jira Issue Attachments
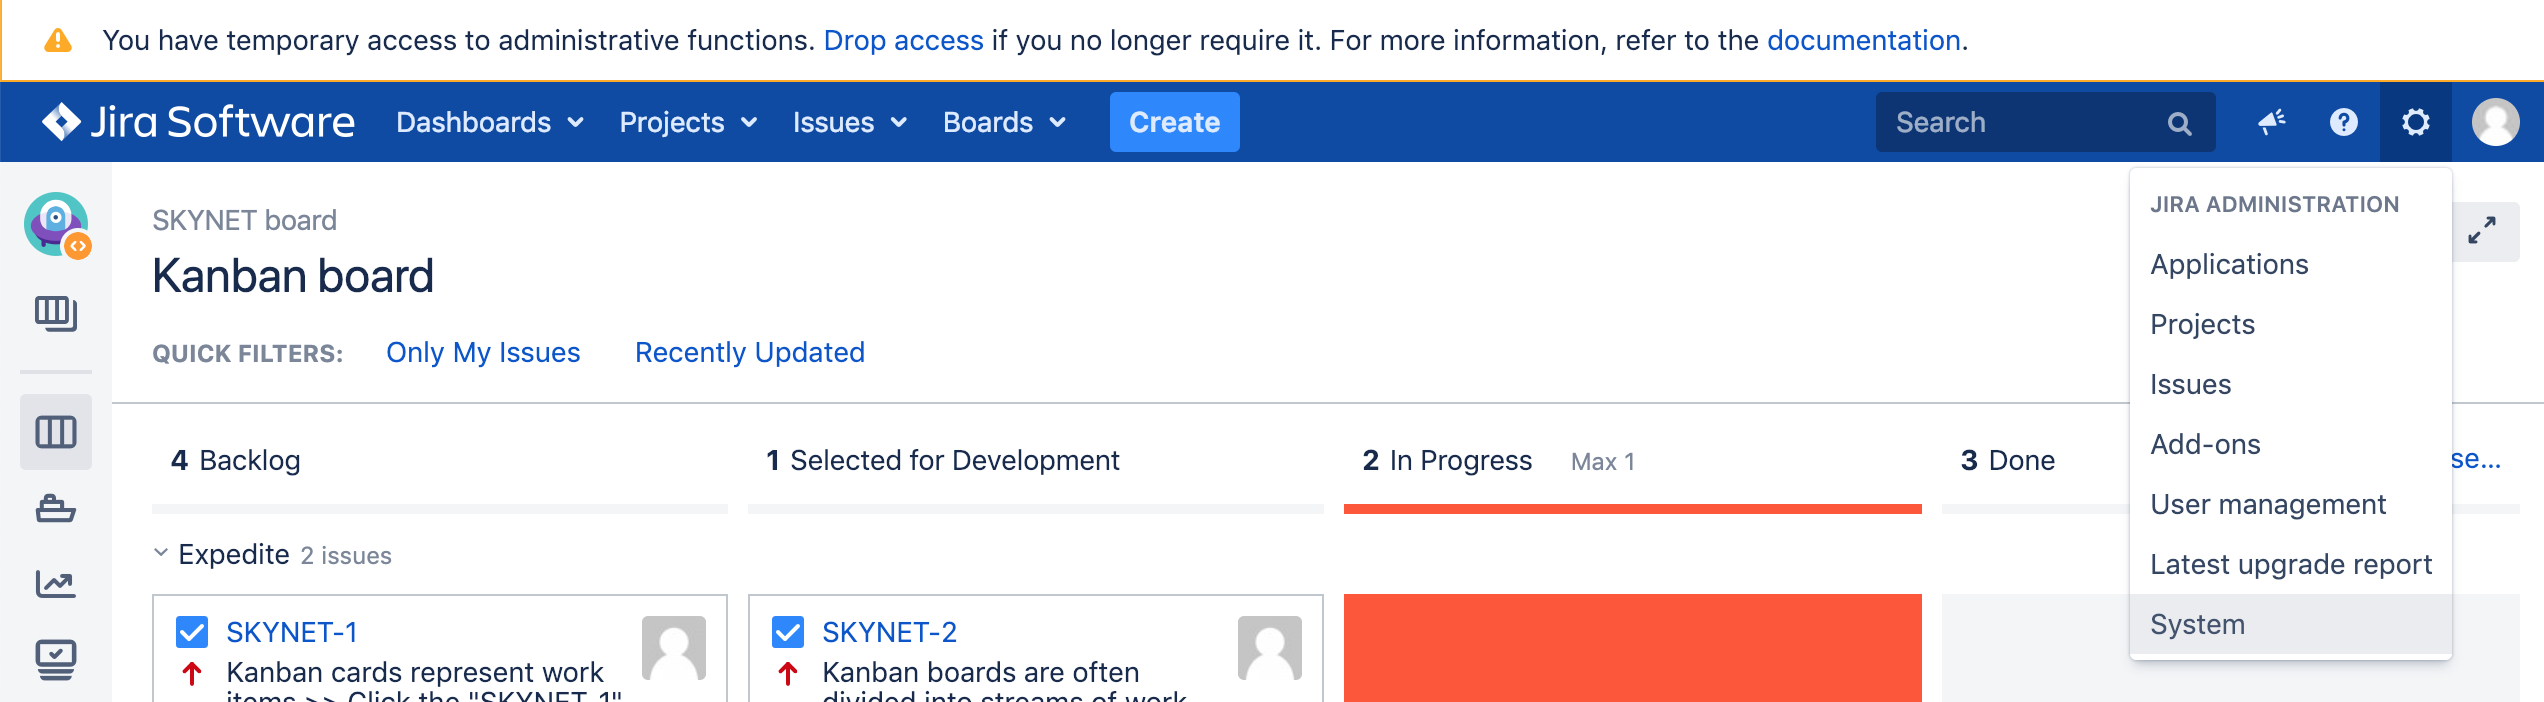
- Click Administration > System:
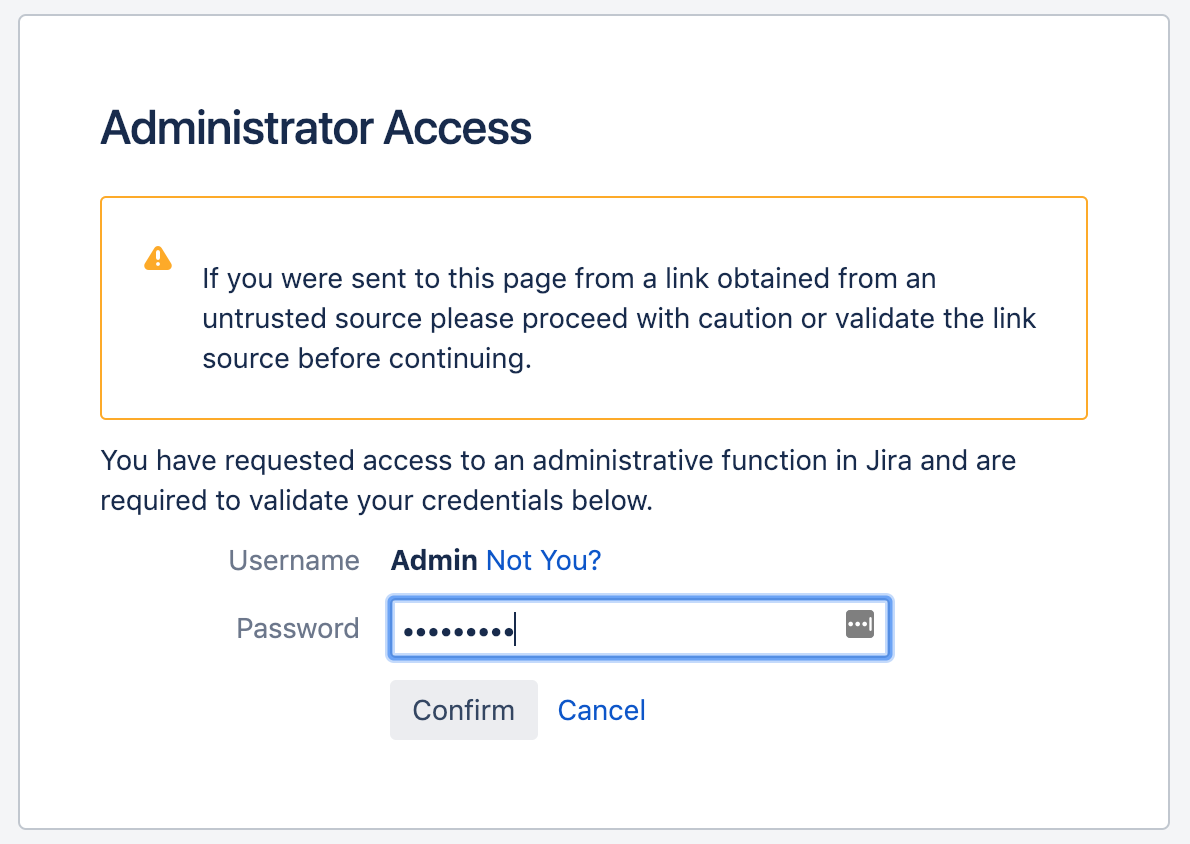
2. You maybe challenged for Administrator Access, if so re-enter the Admin account password:
qwerty123
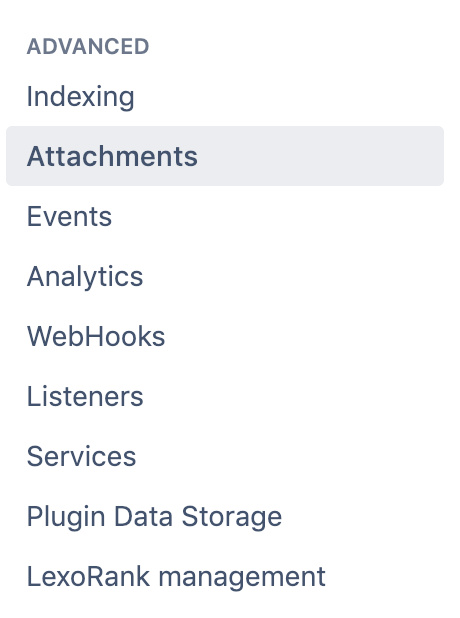
3. Next, within the lefthand side menu, under the ADVANCED section, select Attachments:
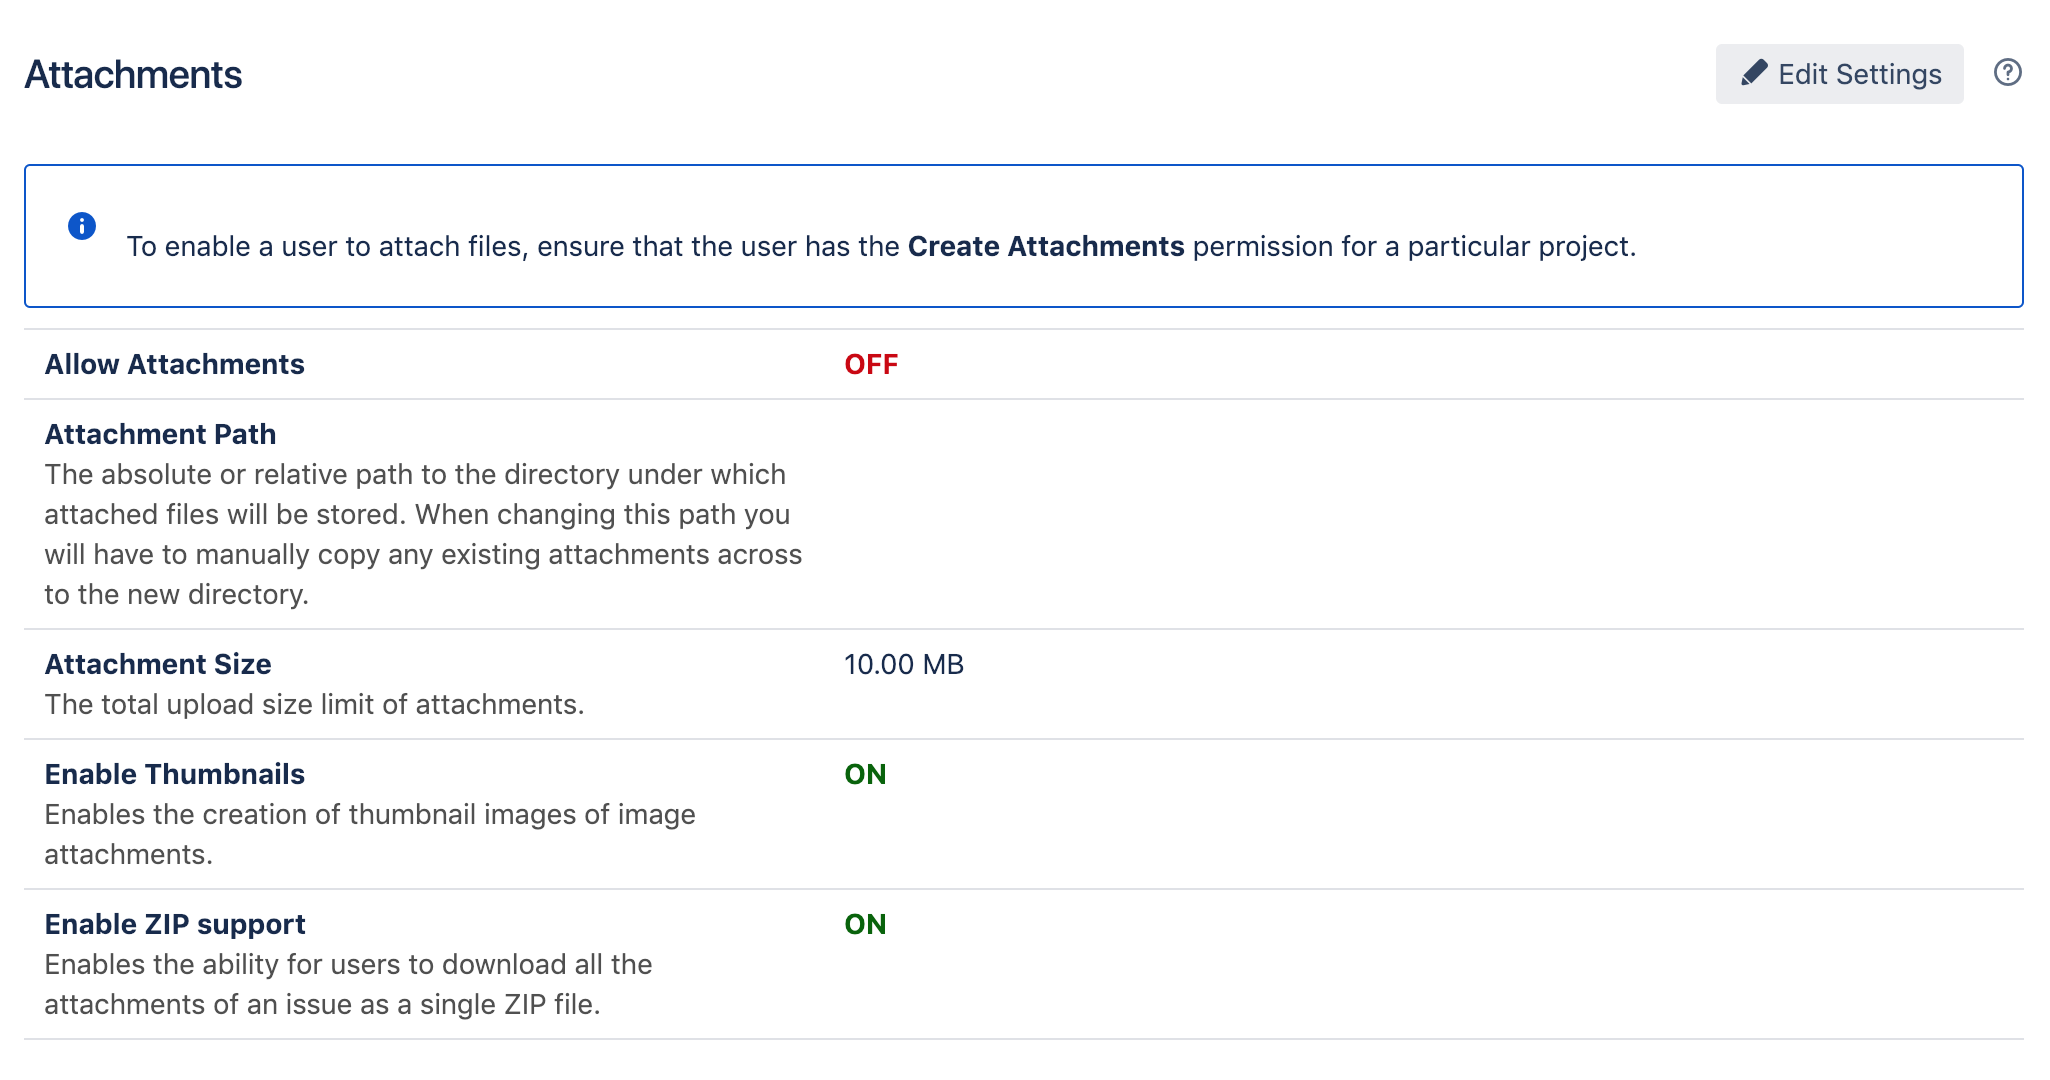
4. This takes you into the default settings for the Attachments feature. Notice that Allow Attachments is currently set to OFF:
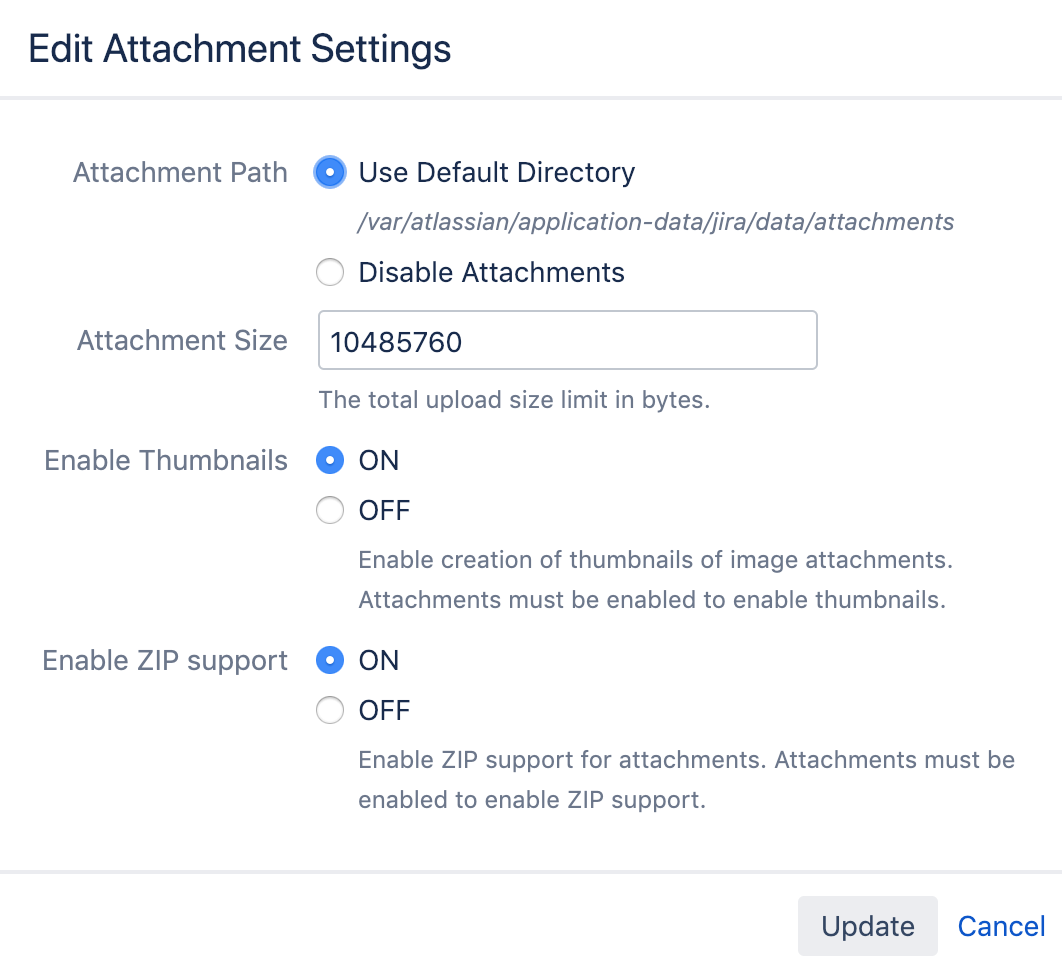
5. To enable Attachments, click Edit Settings. Within the Edit Attachment Settings popup window, select Use Default Directory under Attachment Path, and leave the remaining settings as defaults. Click Update to save and enable Attachments:
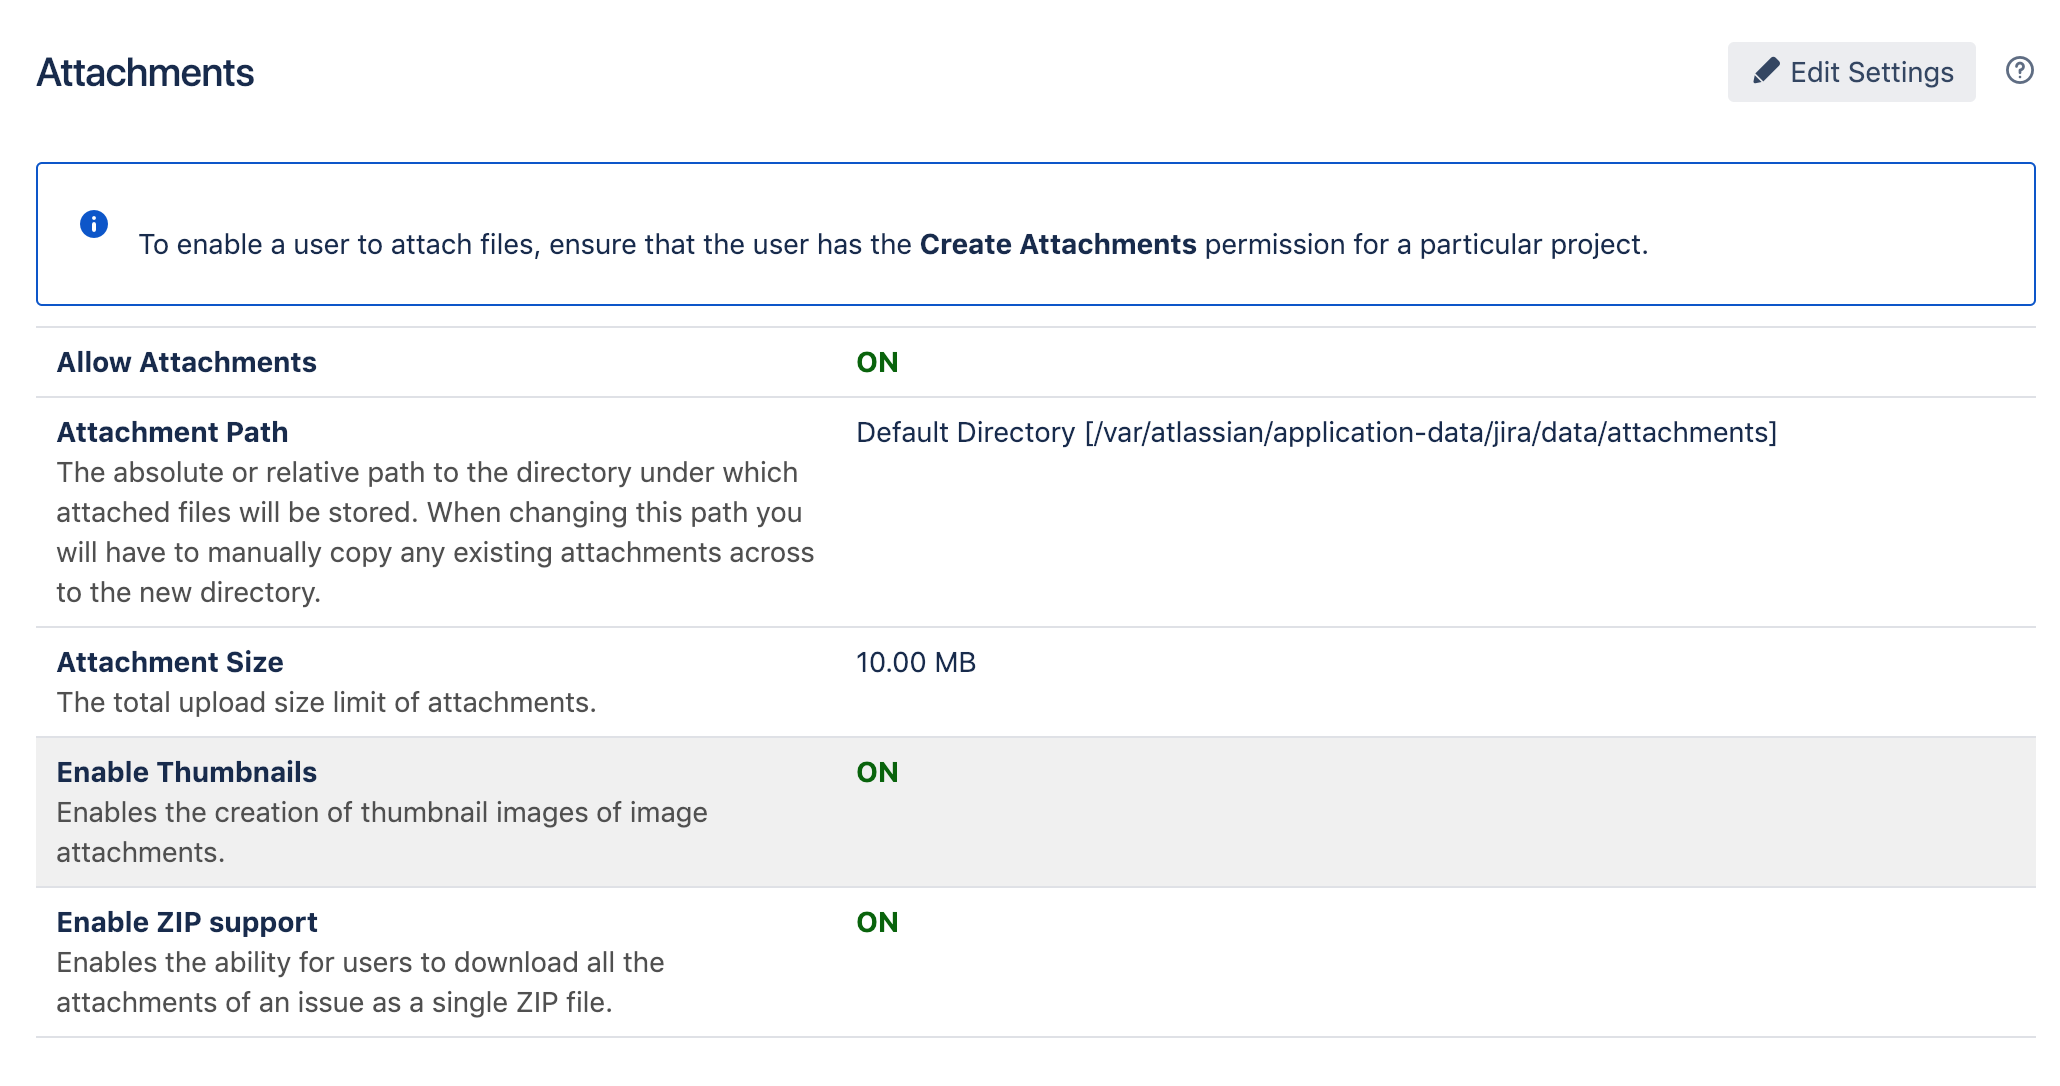
- Confirm that the Allow Attachments is now ON:
- Finally, within the current Administration screen, click Drop access at the top of the screen, to be taken back to the Jira System Dashboard:
8. Confirm that you have been redirected back to the Jira System Dashboard:
Step 6 : Log in to Jenkins and Complete the Default Installation
1. The Jenkins docker container has been configured to listen for inbound connections on port 8080. Using your browser, navigate to the Jenkins home page:
http://instanceip-address:8080
The public IP address assigned to the cicd.platform.instance EC2 instance is the IP being used.
2. Enter the initial administrator password, captured previously using the command: docker exec -it jenkins cat /var/jenkins_home/secrets/initialAdminPassword, and click Continue:
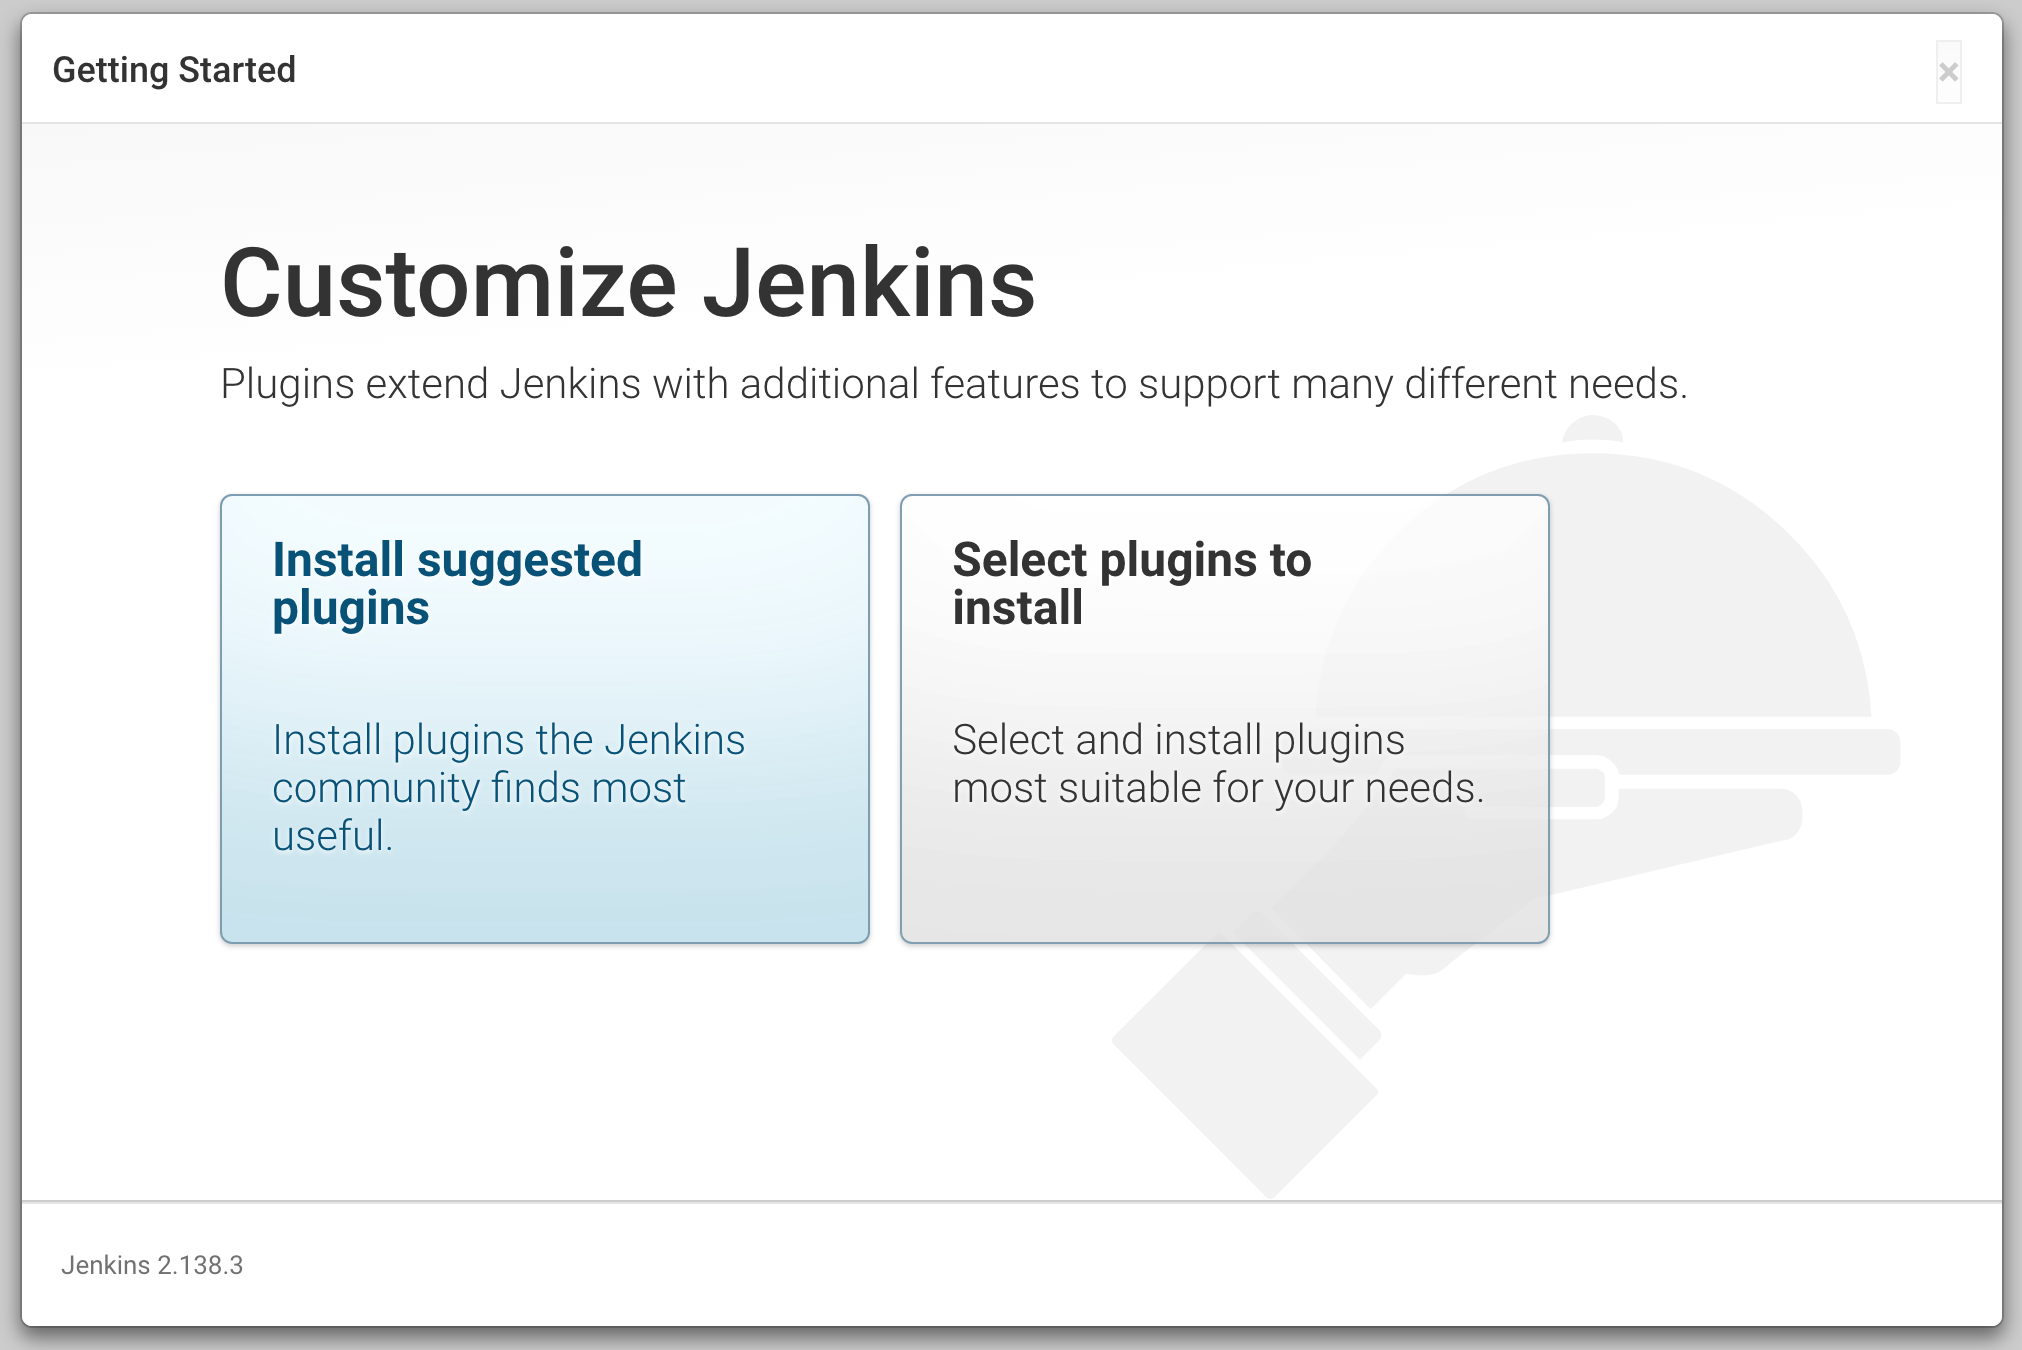
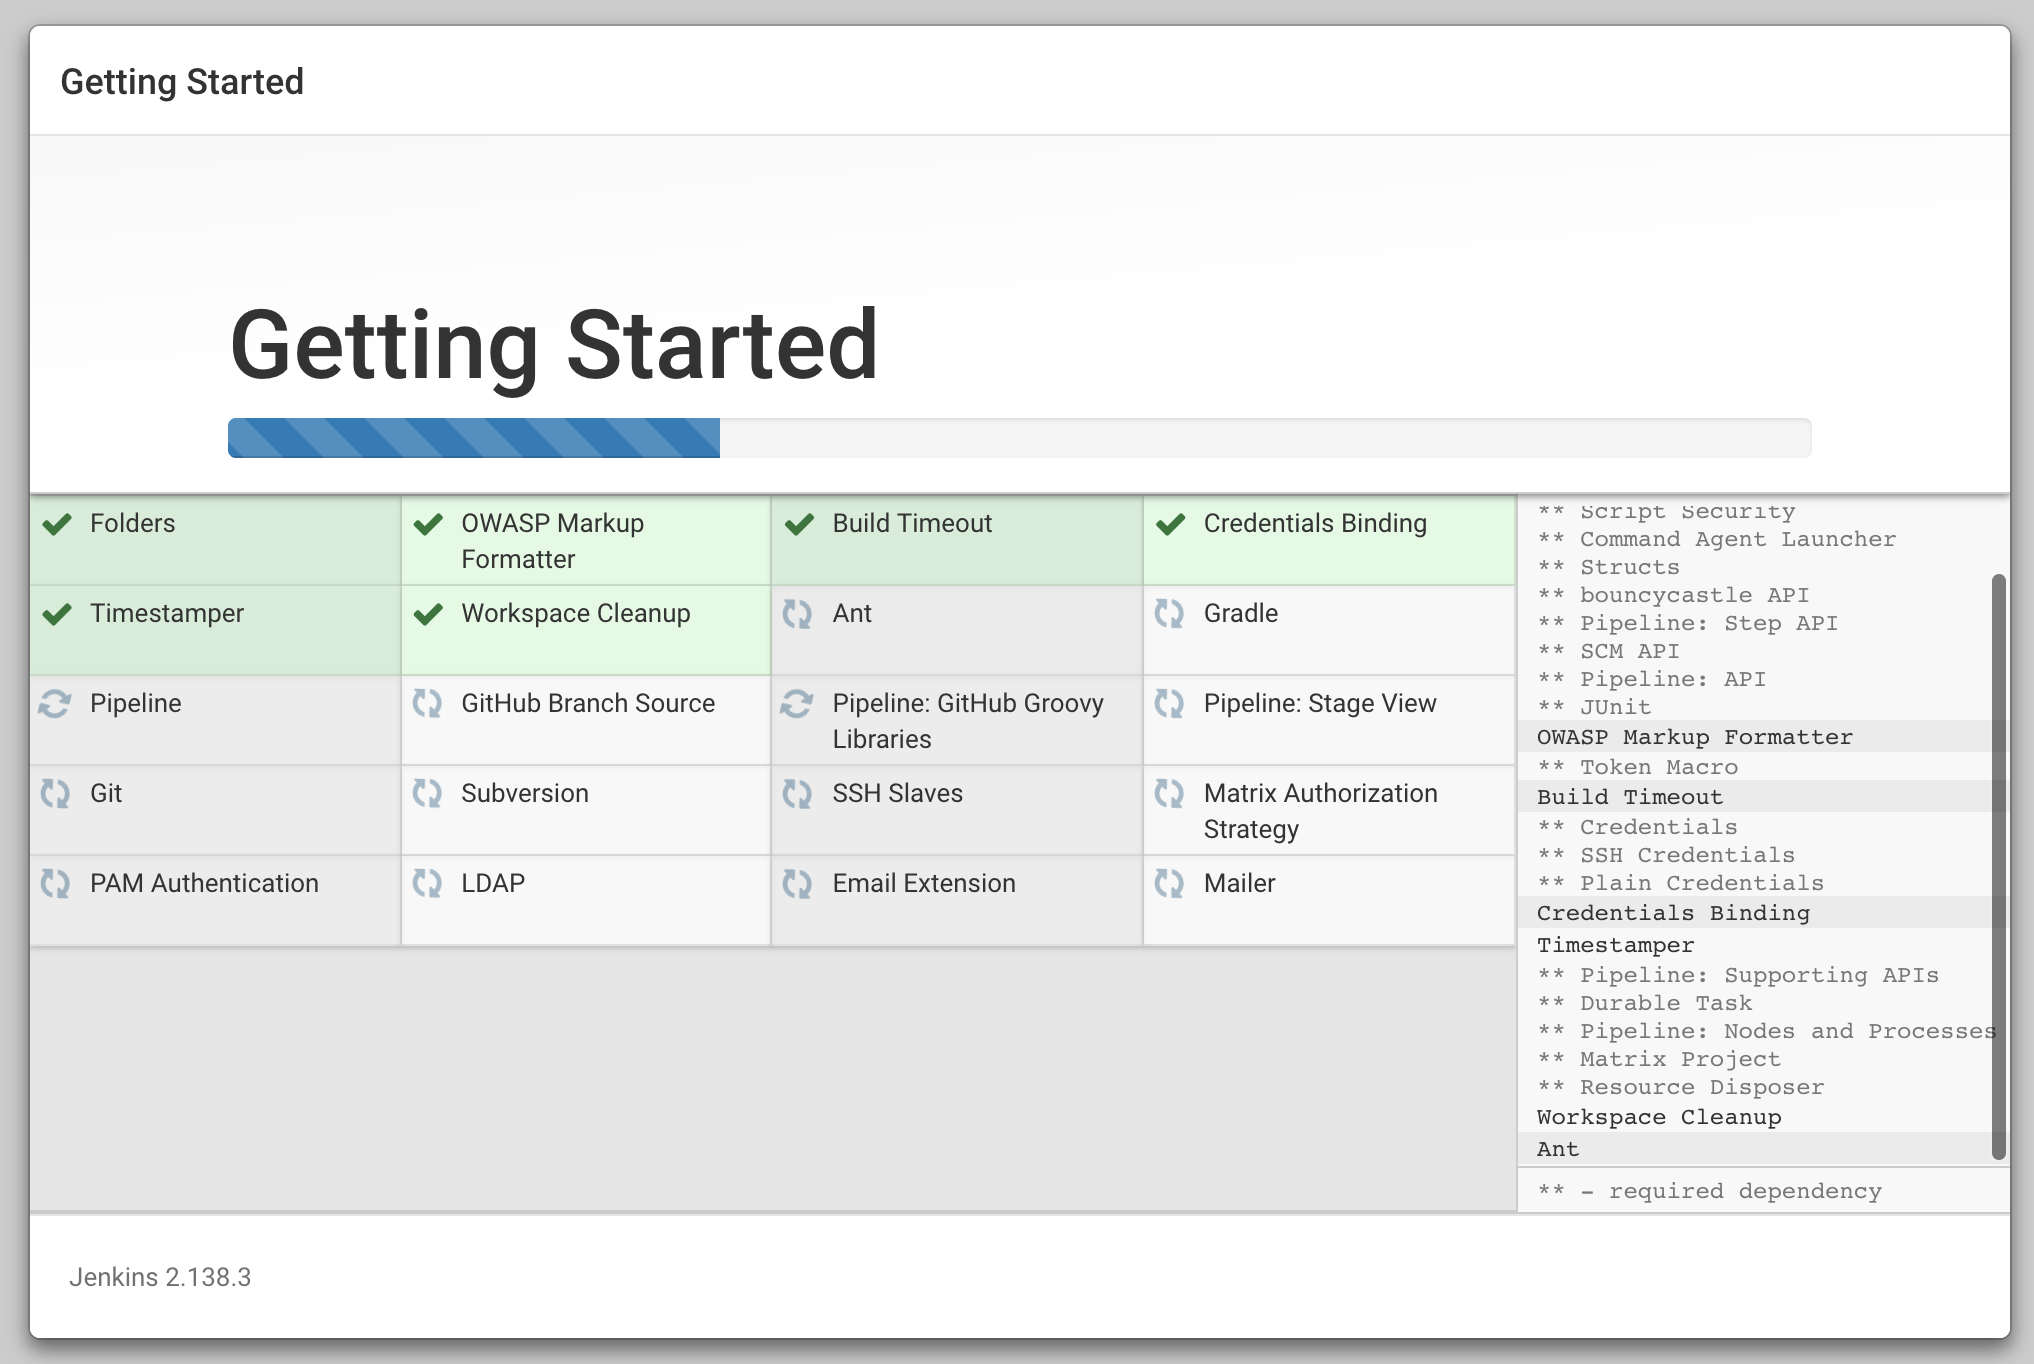
3. Click Install suggested plugins. The plugin installation process takes 1-2 minutes to complete:
4. Create the first administrator user account by entering the following values, followed by clicking Save and Continue:
Username:
Admin
Password:
qwerty123
Fullname:
Administrator
E-mail address:
admin@here.com

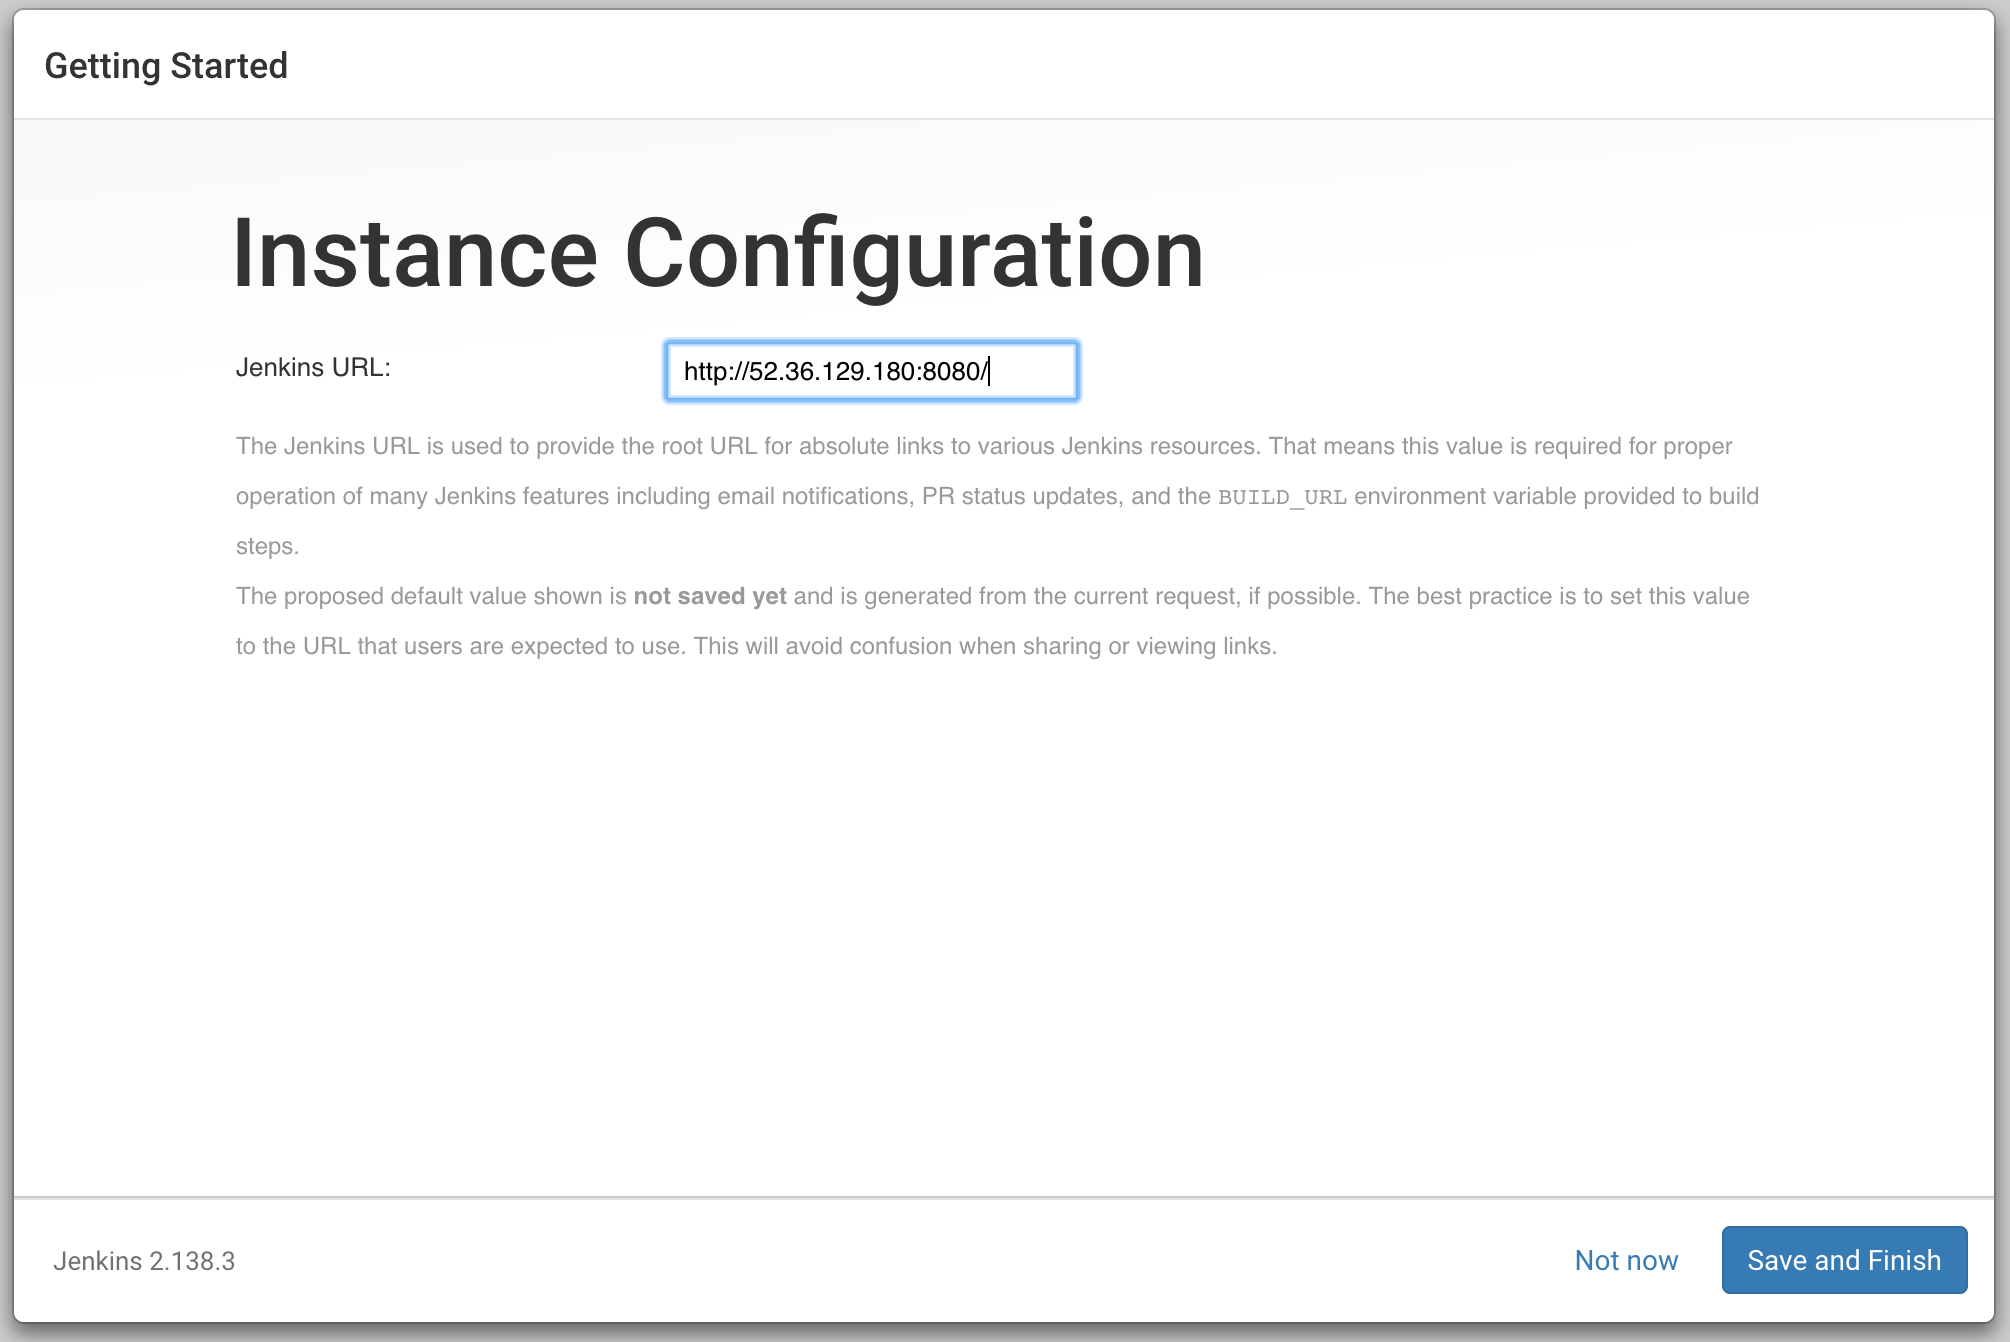
5. Accept the defaults for the Instance Configuration, and click Save and Finish to complete the Jenkins installation:
6. Finally, confirm that Jenkins is ready!, and click Start using Jenkins:
7. Leave the current Jenkins administration web console open, as you will begin to configure it in the next Step
Step 7 : Install and configure Jira and Gradle Plugins
You will now install the Jira Pipeline Steps plugin and the Gradle tool, required to first perform a build, and then publish the resulting build information into Jira. You will configure the Jira plugin to authenticate against Jira using the default administrator credentials configured in the previous step.
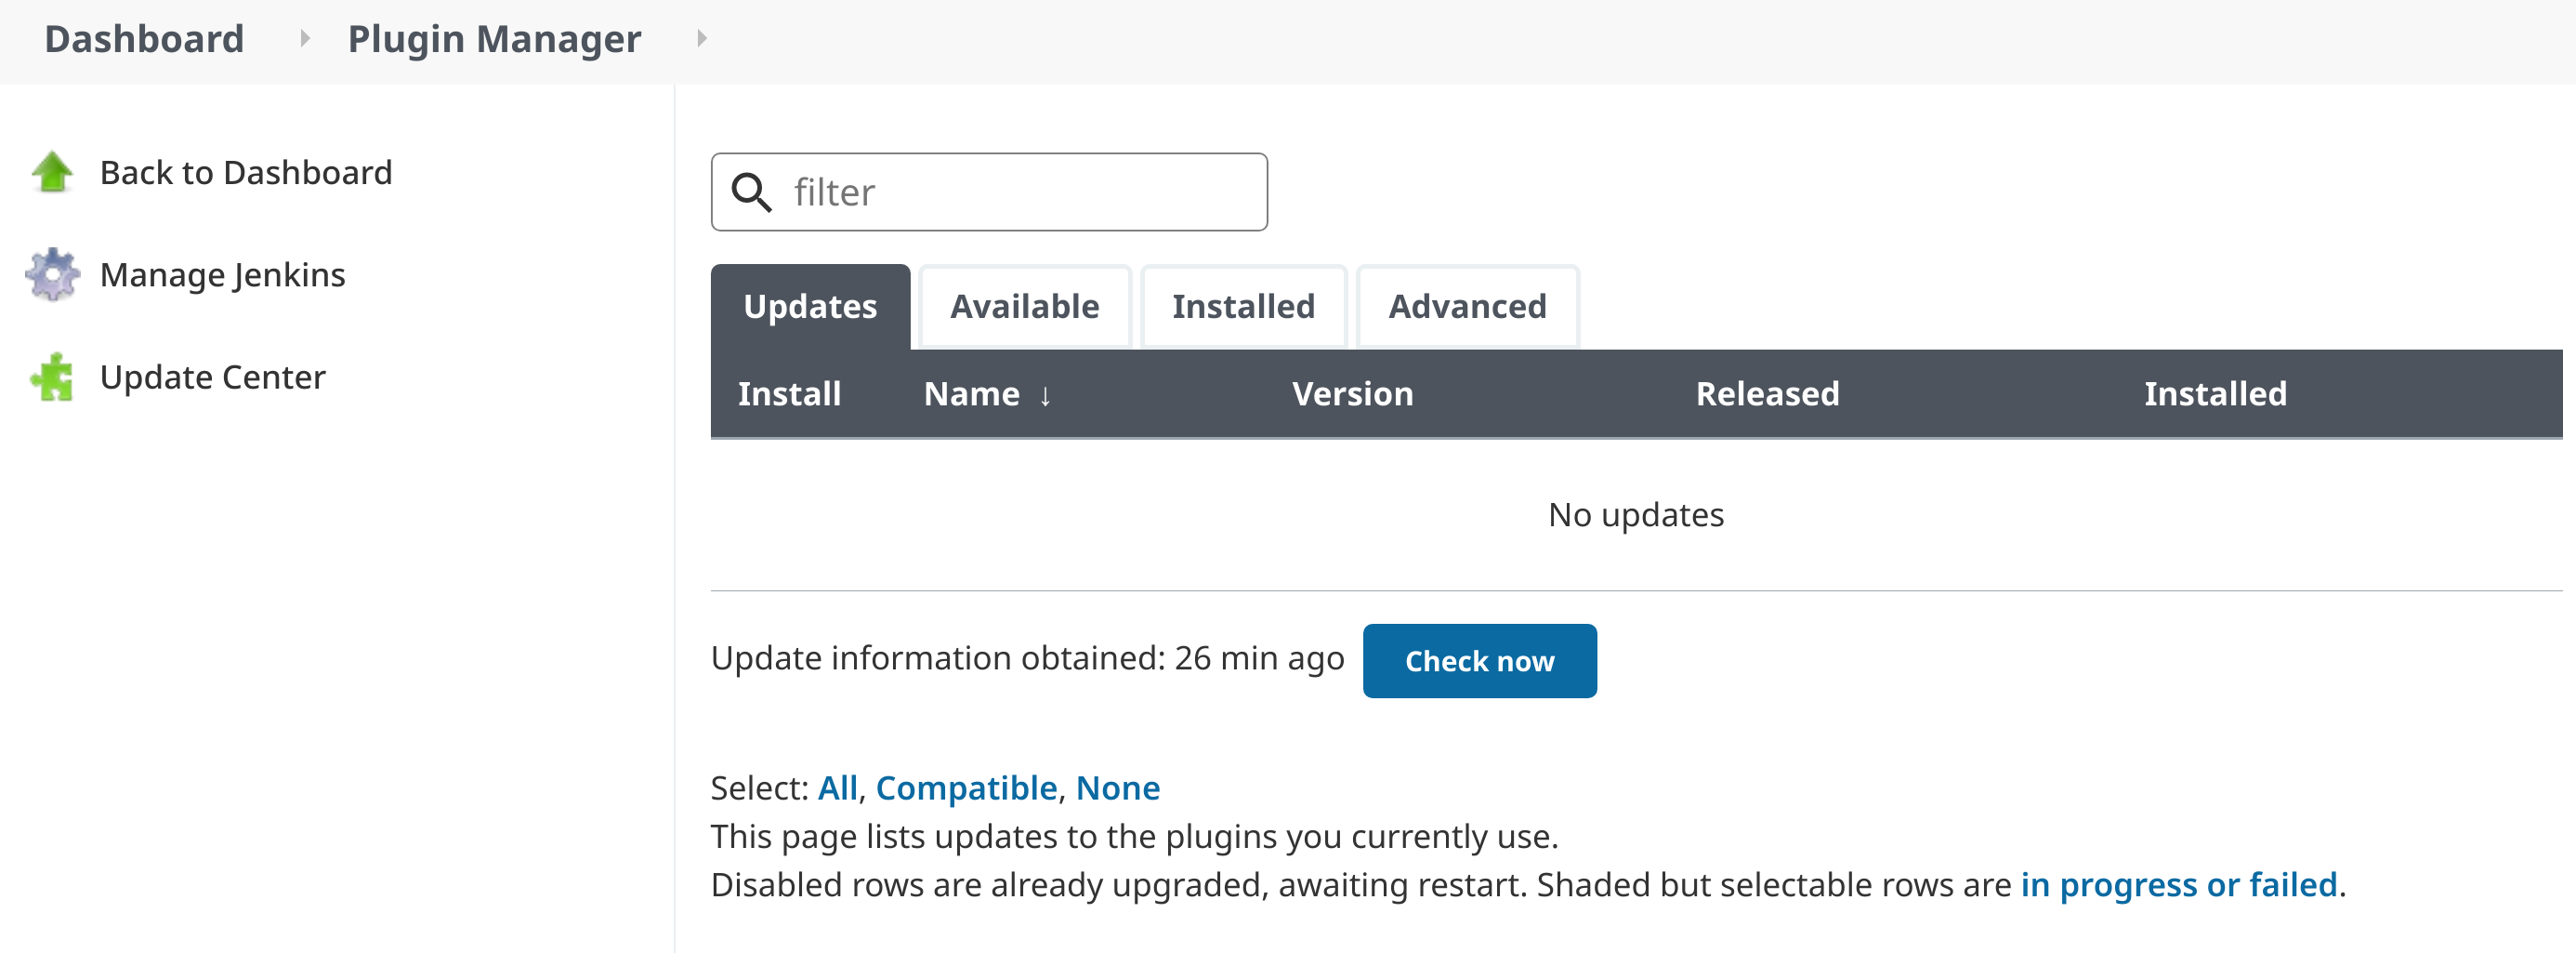
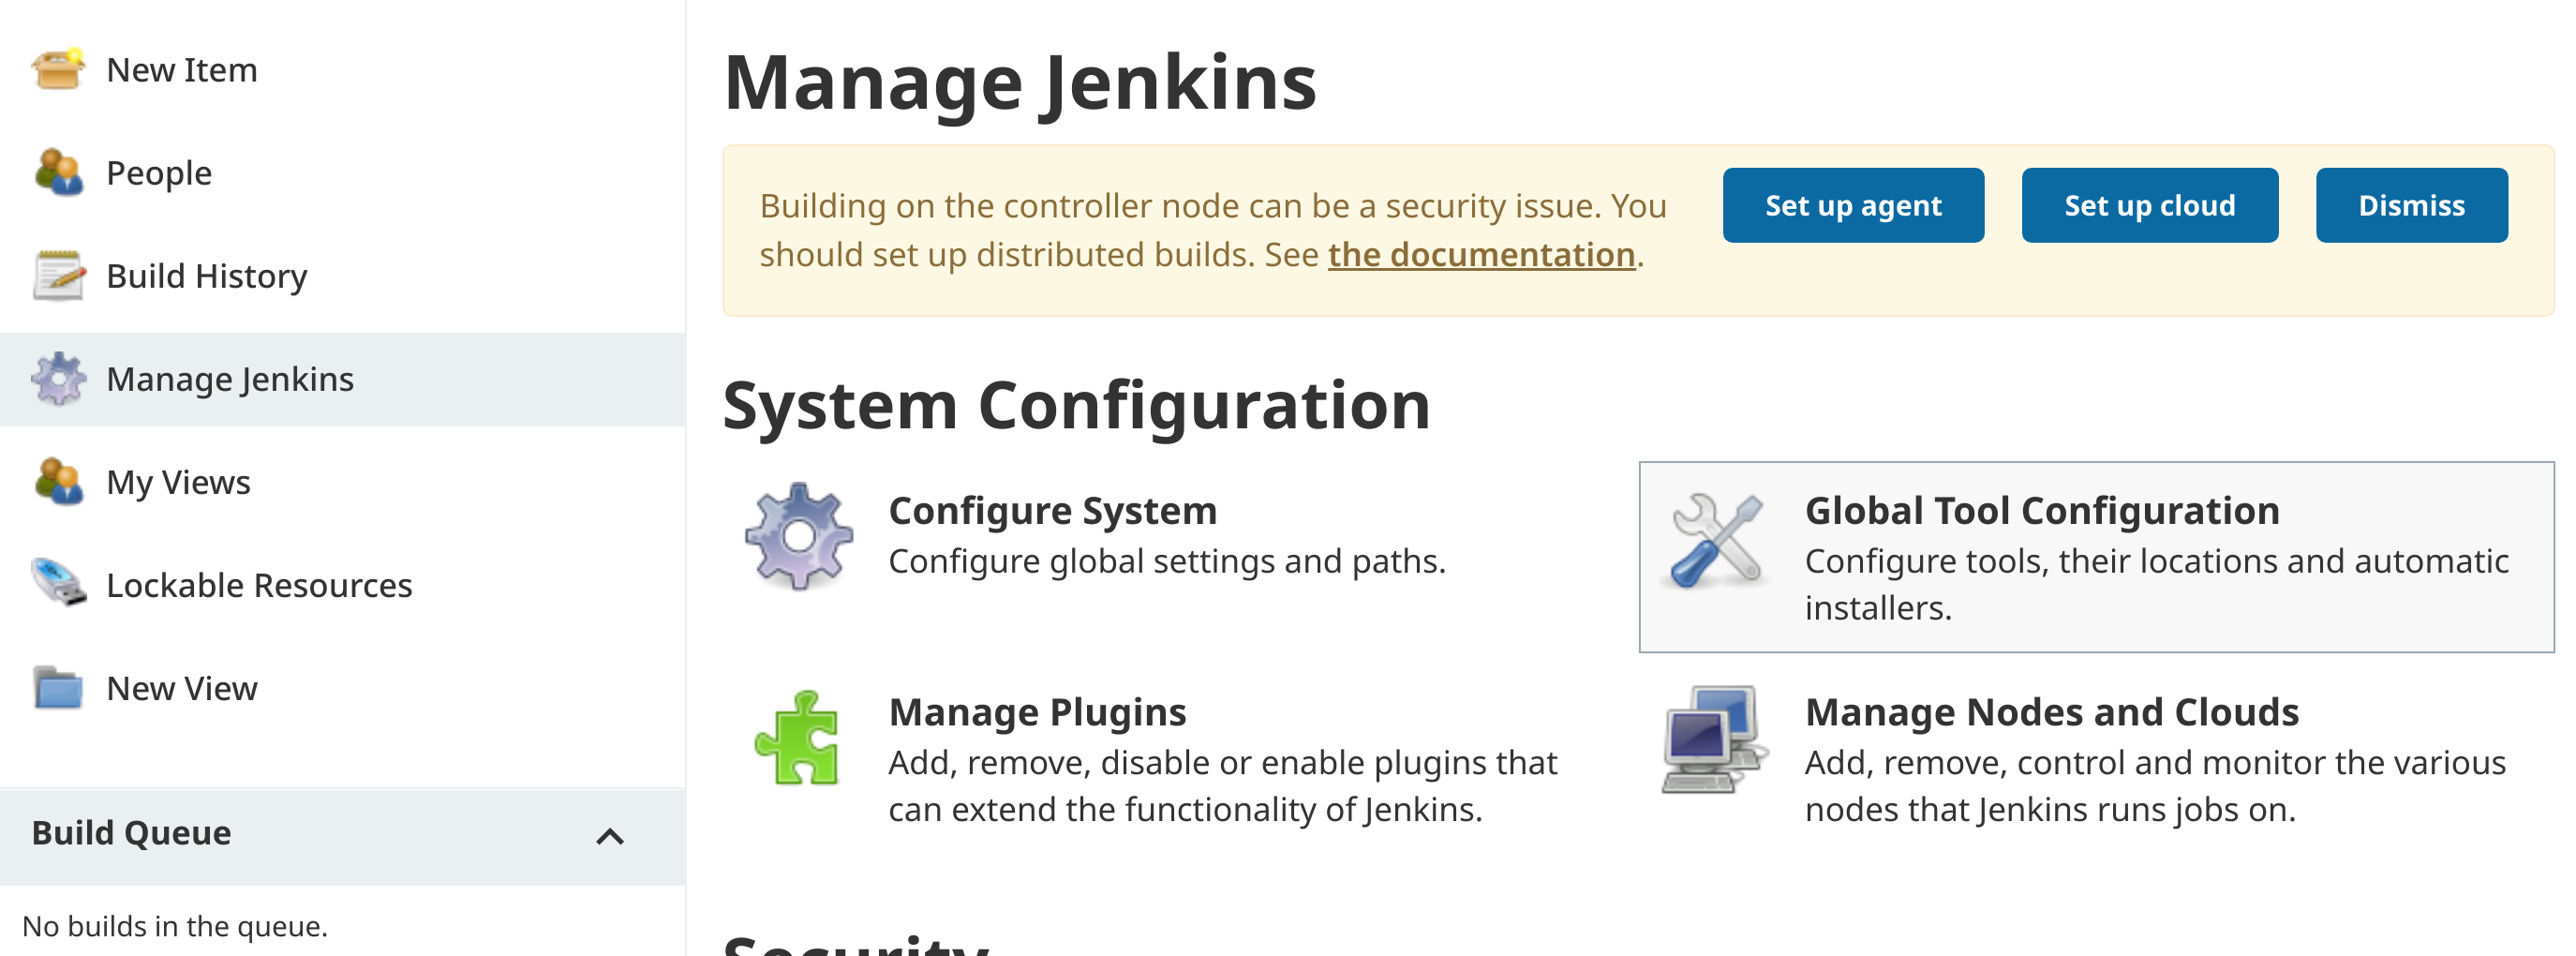
1. Click the Manage Jenkins menu item taking you into the Manage Jenkins screen. Ignore any update and/or security messages that Jenkins may announce as this is a Lab environment only:
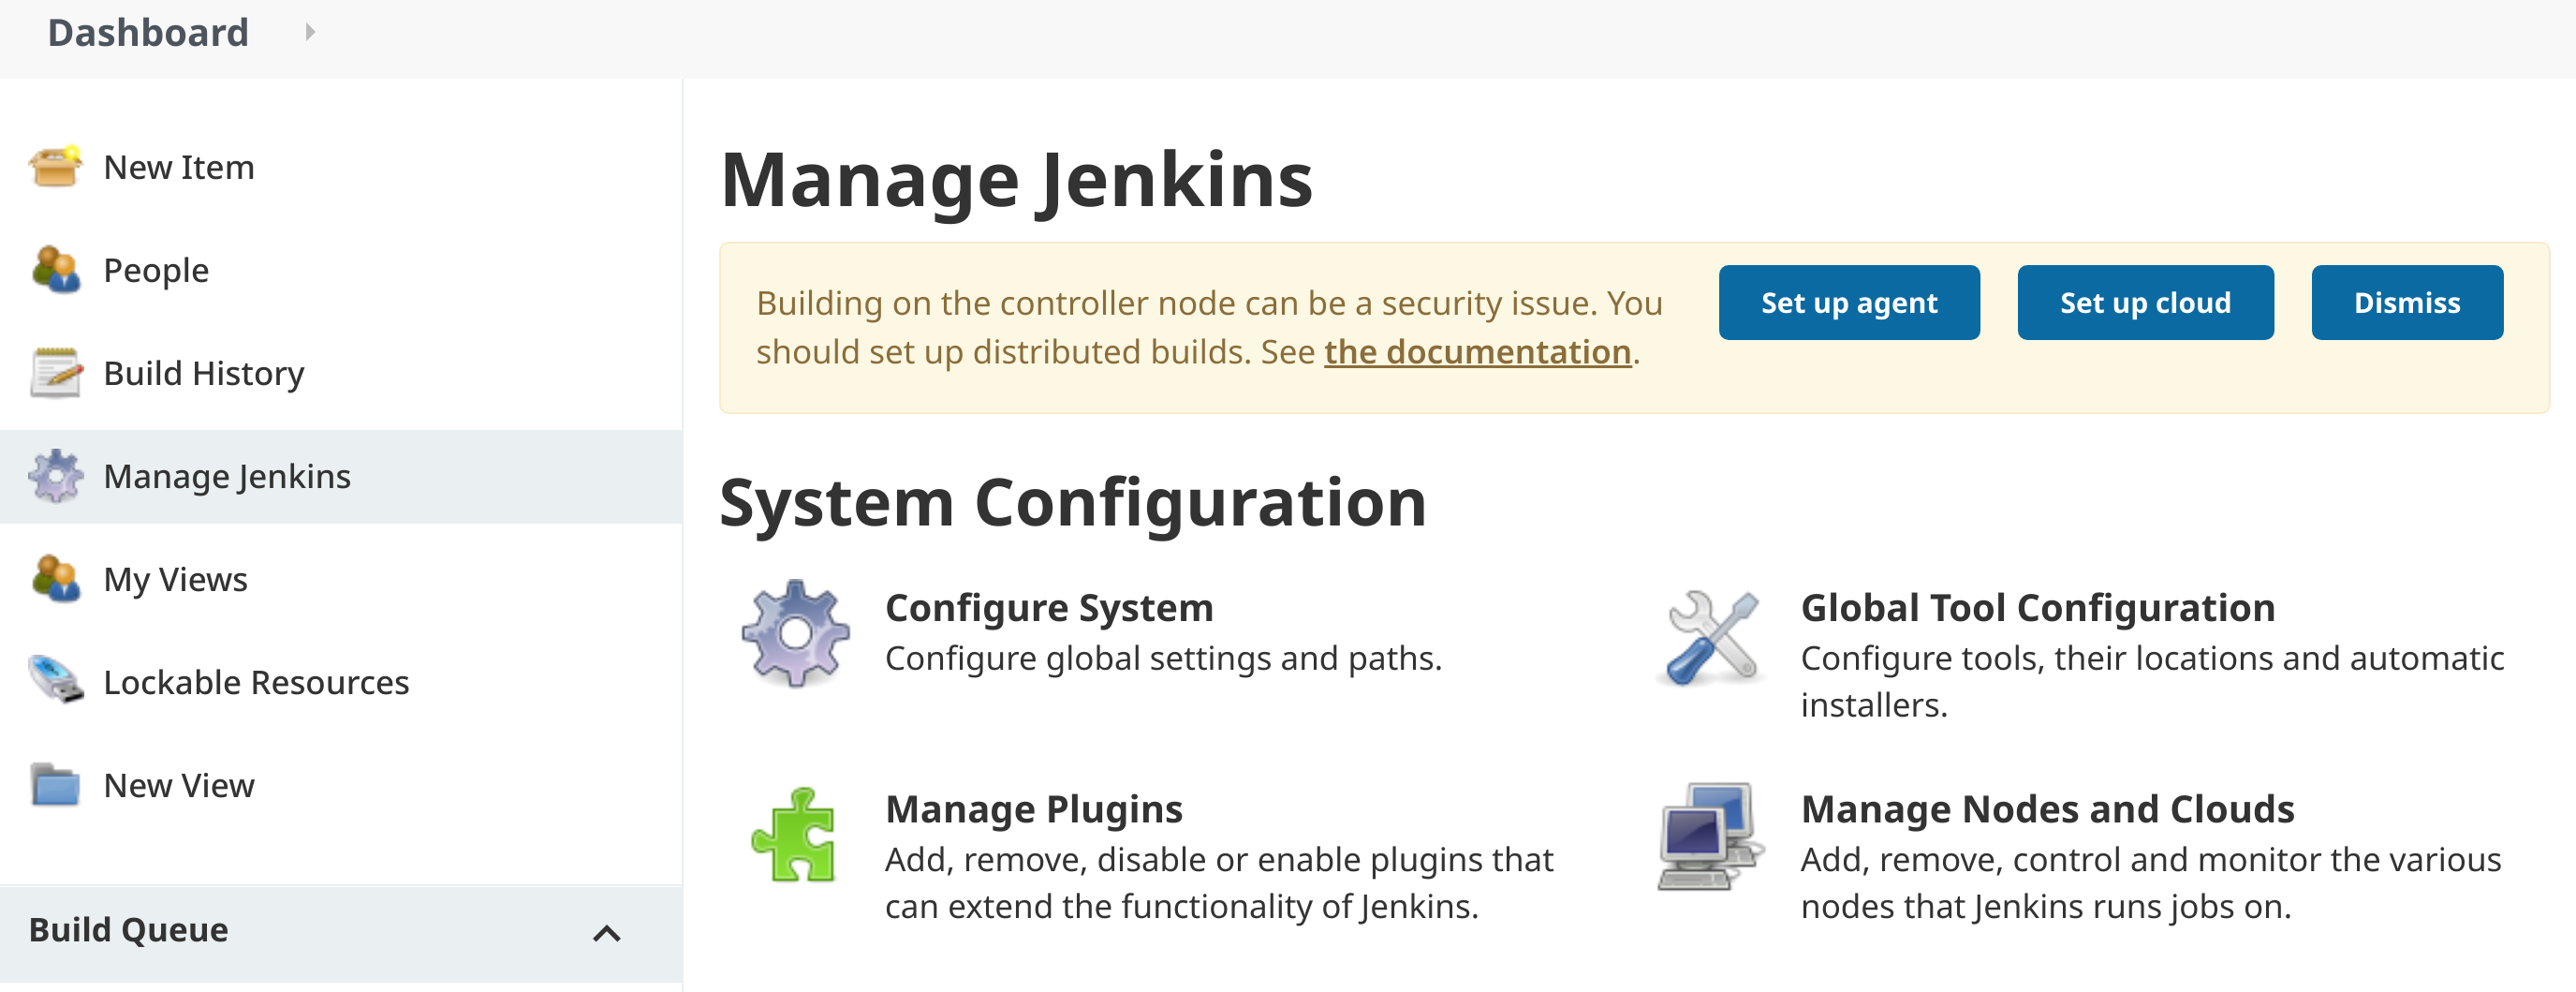
2. Click the Manage Plugins menu item taking you into the Plugin Manager:
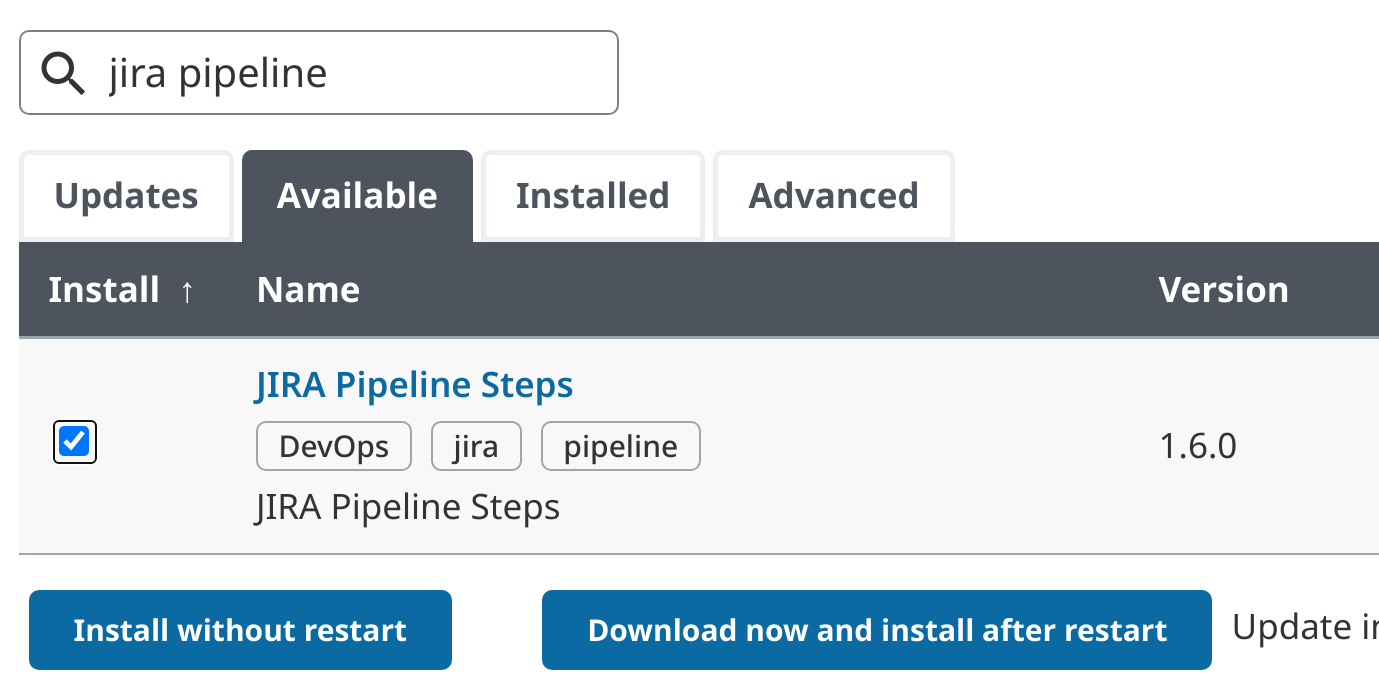
3. Click the Available tab and enter: Jira Pipeline within the search input field associated with the Plugins Manager pane. Select the Jira Pipeline Steps option and click Install without restart:
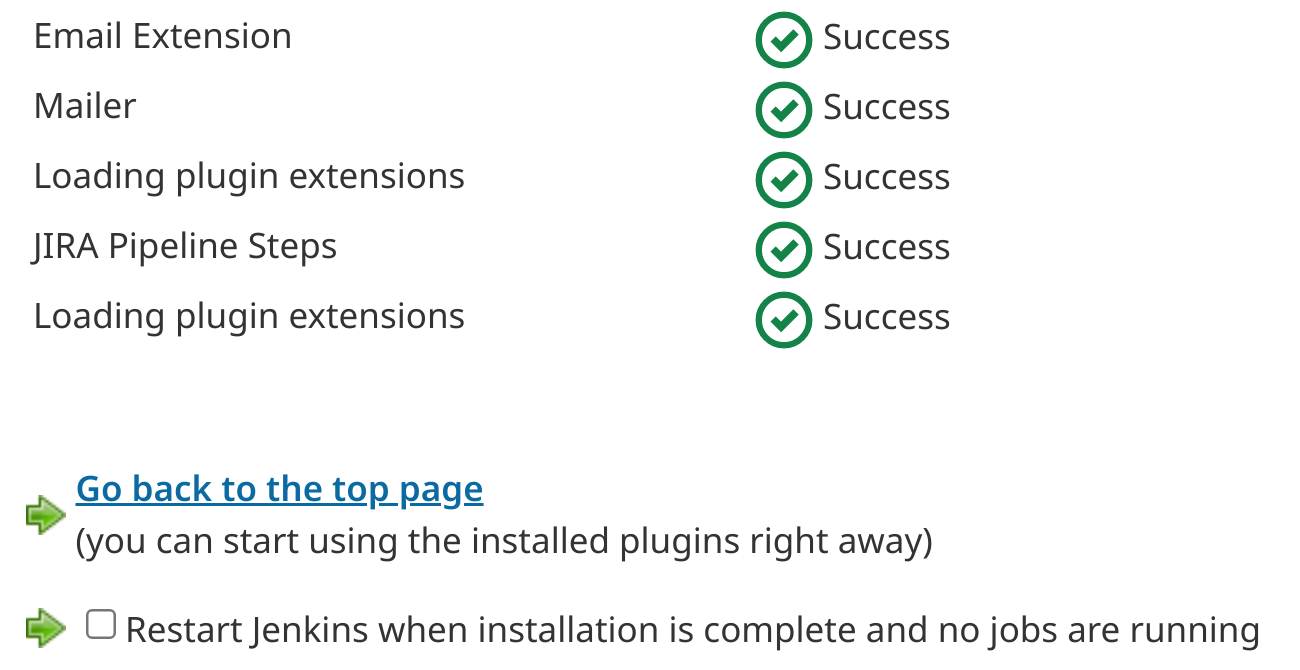
- Ensure that the Jira Pipeline Steps plugin has been installed successfully as per the Success status at the bottom of the plugins list and click Go back to the top page:
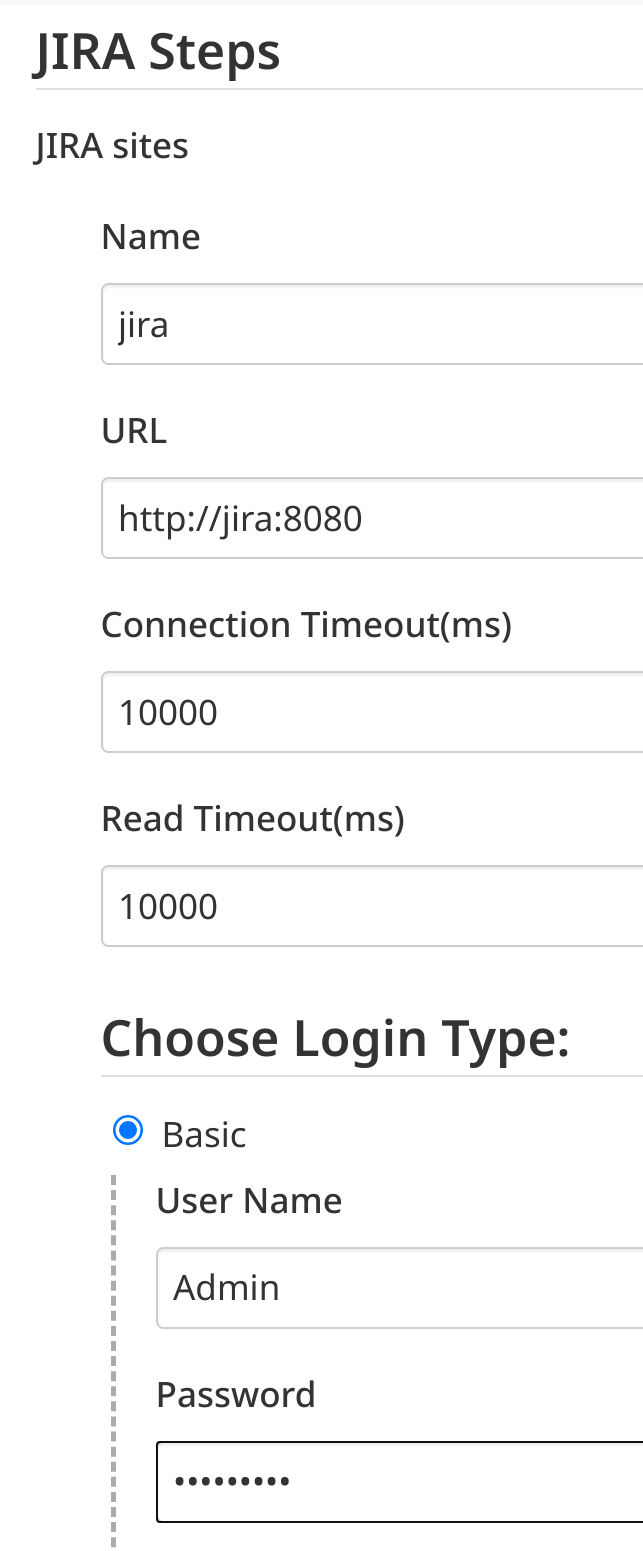
5. Click the Manage Jenkins menu item and then Configure System:

6. Under JIRA Steps, click Add Site. Enter the following Jira Server settings, leaving all others as defaults:
Name:
jira
URL:
http://jira:8080
Login Type:
Basic
Username:
Admin
Password:
qwerty123
7. Click Test Connection and confirm connectivity from Jenkins to Jira is successful as per the Success: JIRA - 7.13.0 message:

8. Click Save to commit the Jira Pipeline Steps plugin settings.
Install Gradle Plugin
9. Click the Manage Jenkins menu item and then Global Tool Configuration:
10. Under Gradle, click Add Gradle. Enter gradle-4.10.2 in the Name field and ensure the Install automatically checkbox is ticked. Then select Gradle 4.10.2 under Install from Gradle.org. Click Apply to commit the Gradle plugin installation settings:
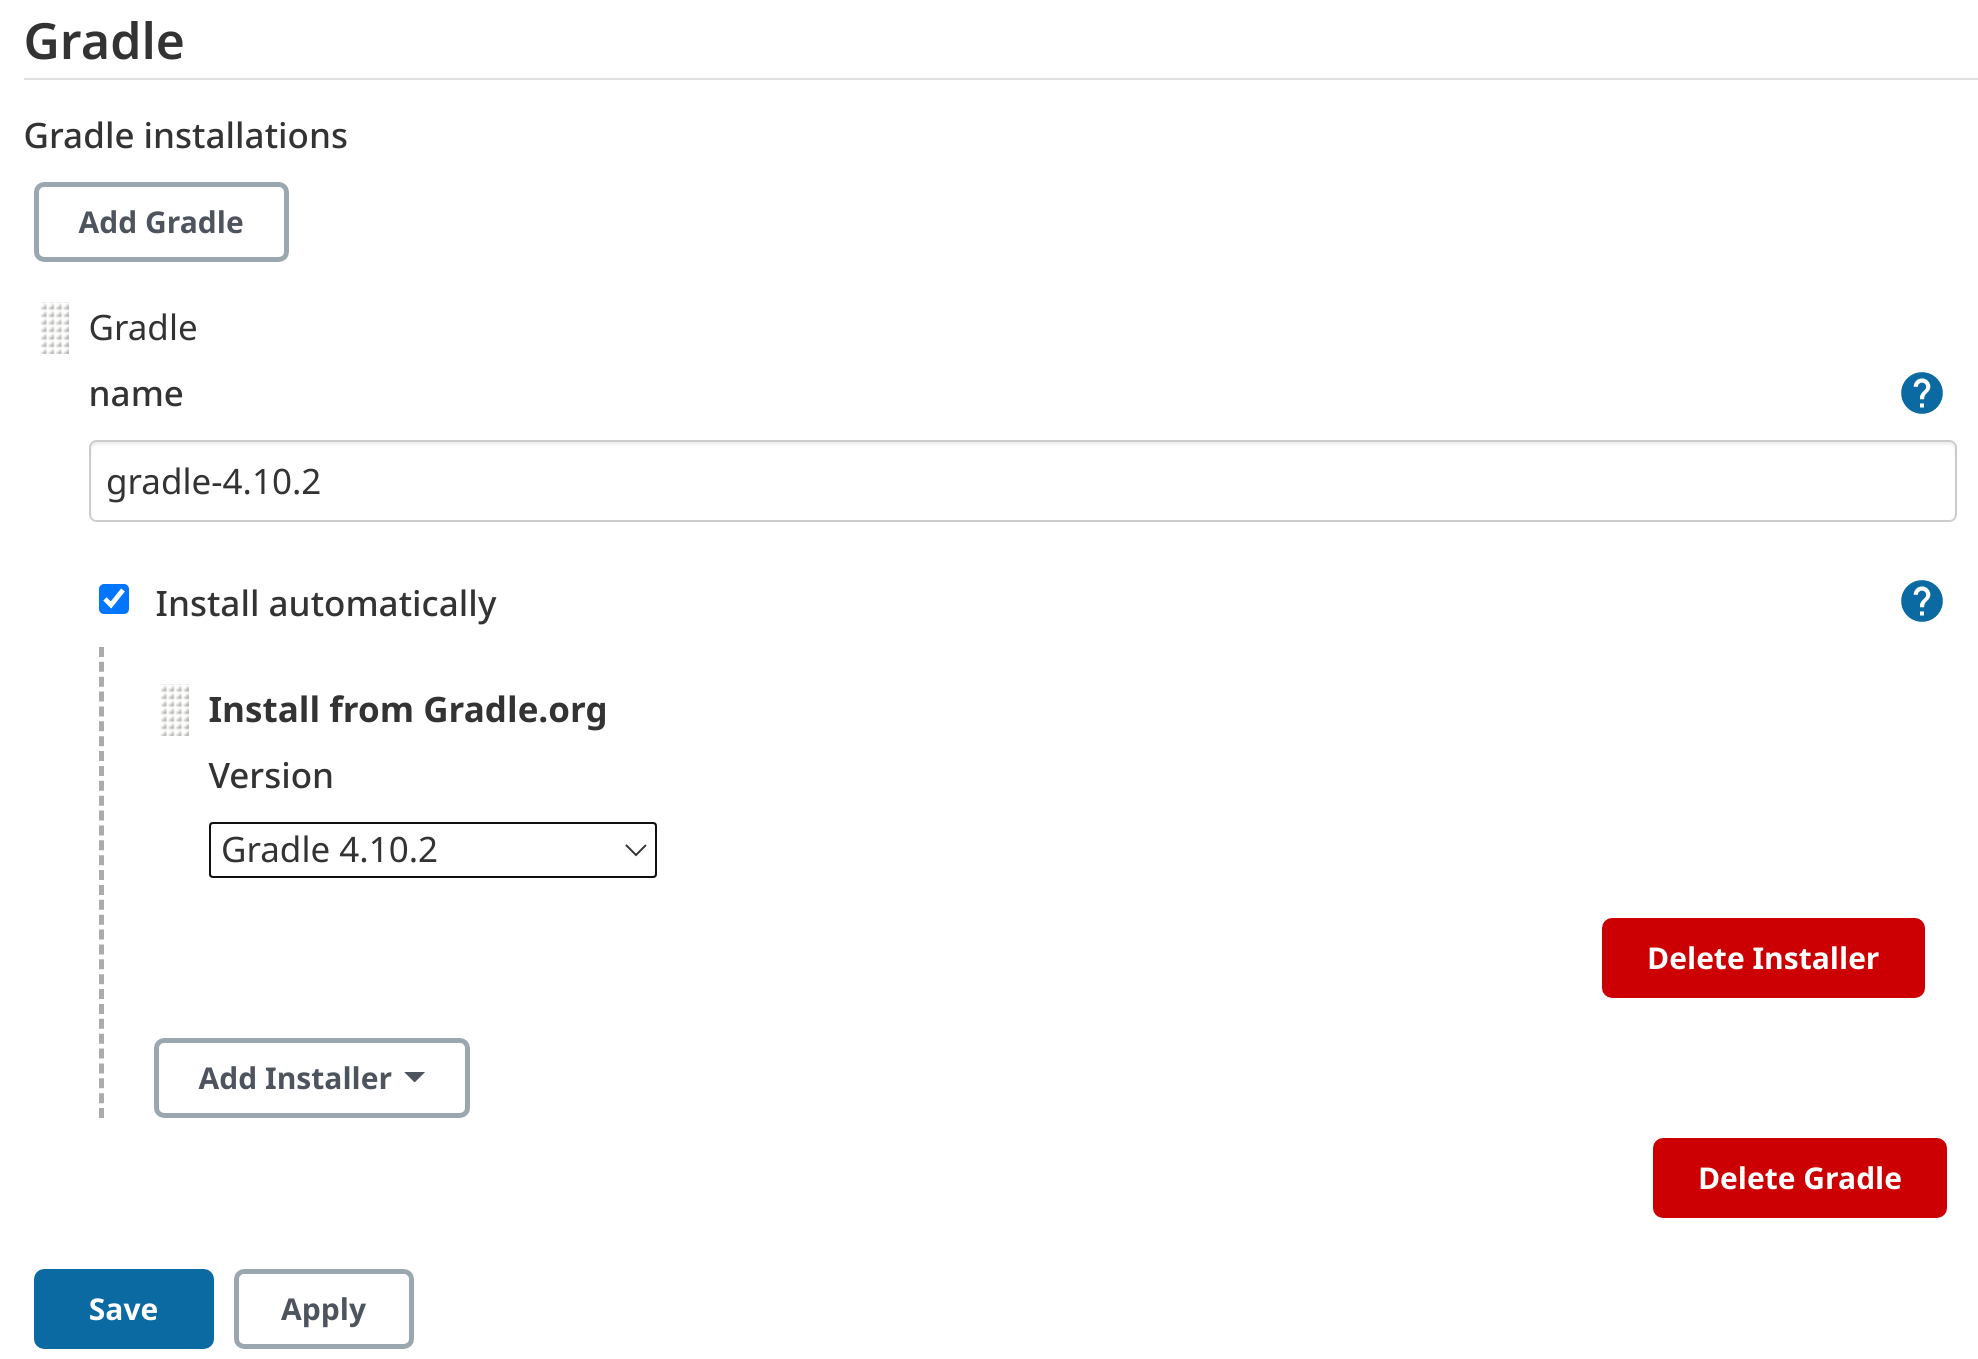
11. Click Save and return to the Jenkins home page:

Step 8: Create and Execute Pipeline Build Job
In this step, you will continue using the Jenkins administration web console. You will create a new build pipeline job. The pipeline job will itself git clone a sample Java servlet web application, opens in a new tab. Gradle, opens in a new tab is used to manage and download all the Java library dependencies, perform a compilation, and package the outputs into a deployable WAR (web archive) file. Finally, the build pipeline will create and raise a new Jira project issue and attach the Gradle build log file to it.
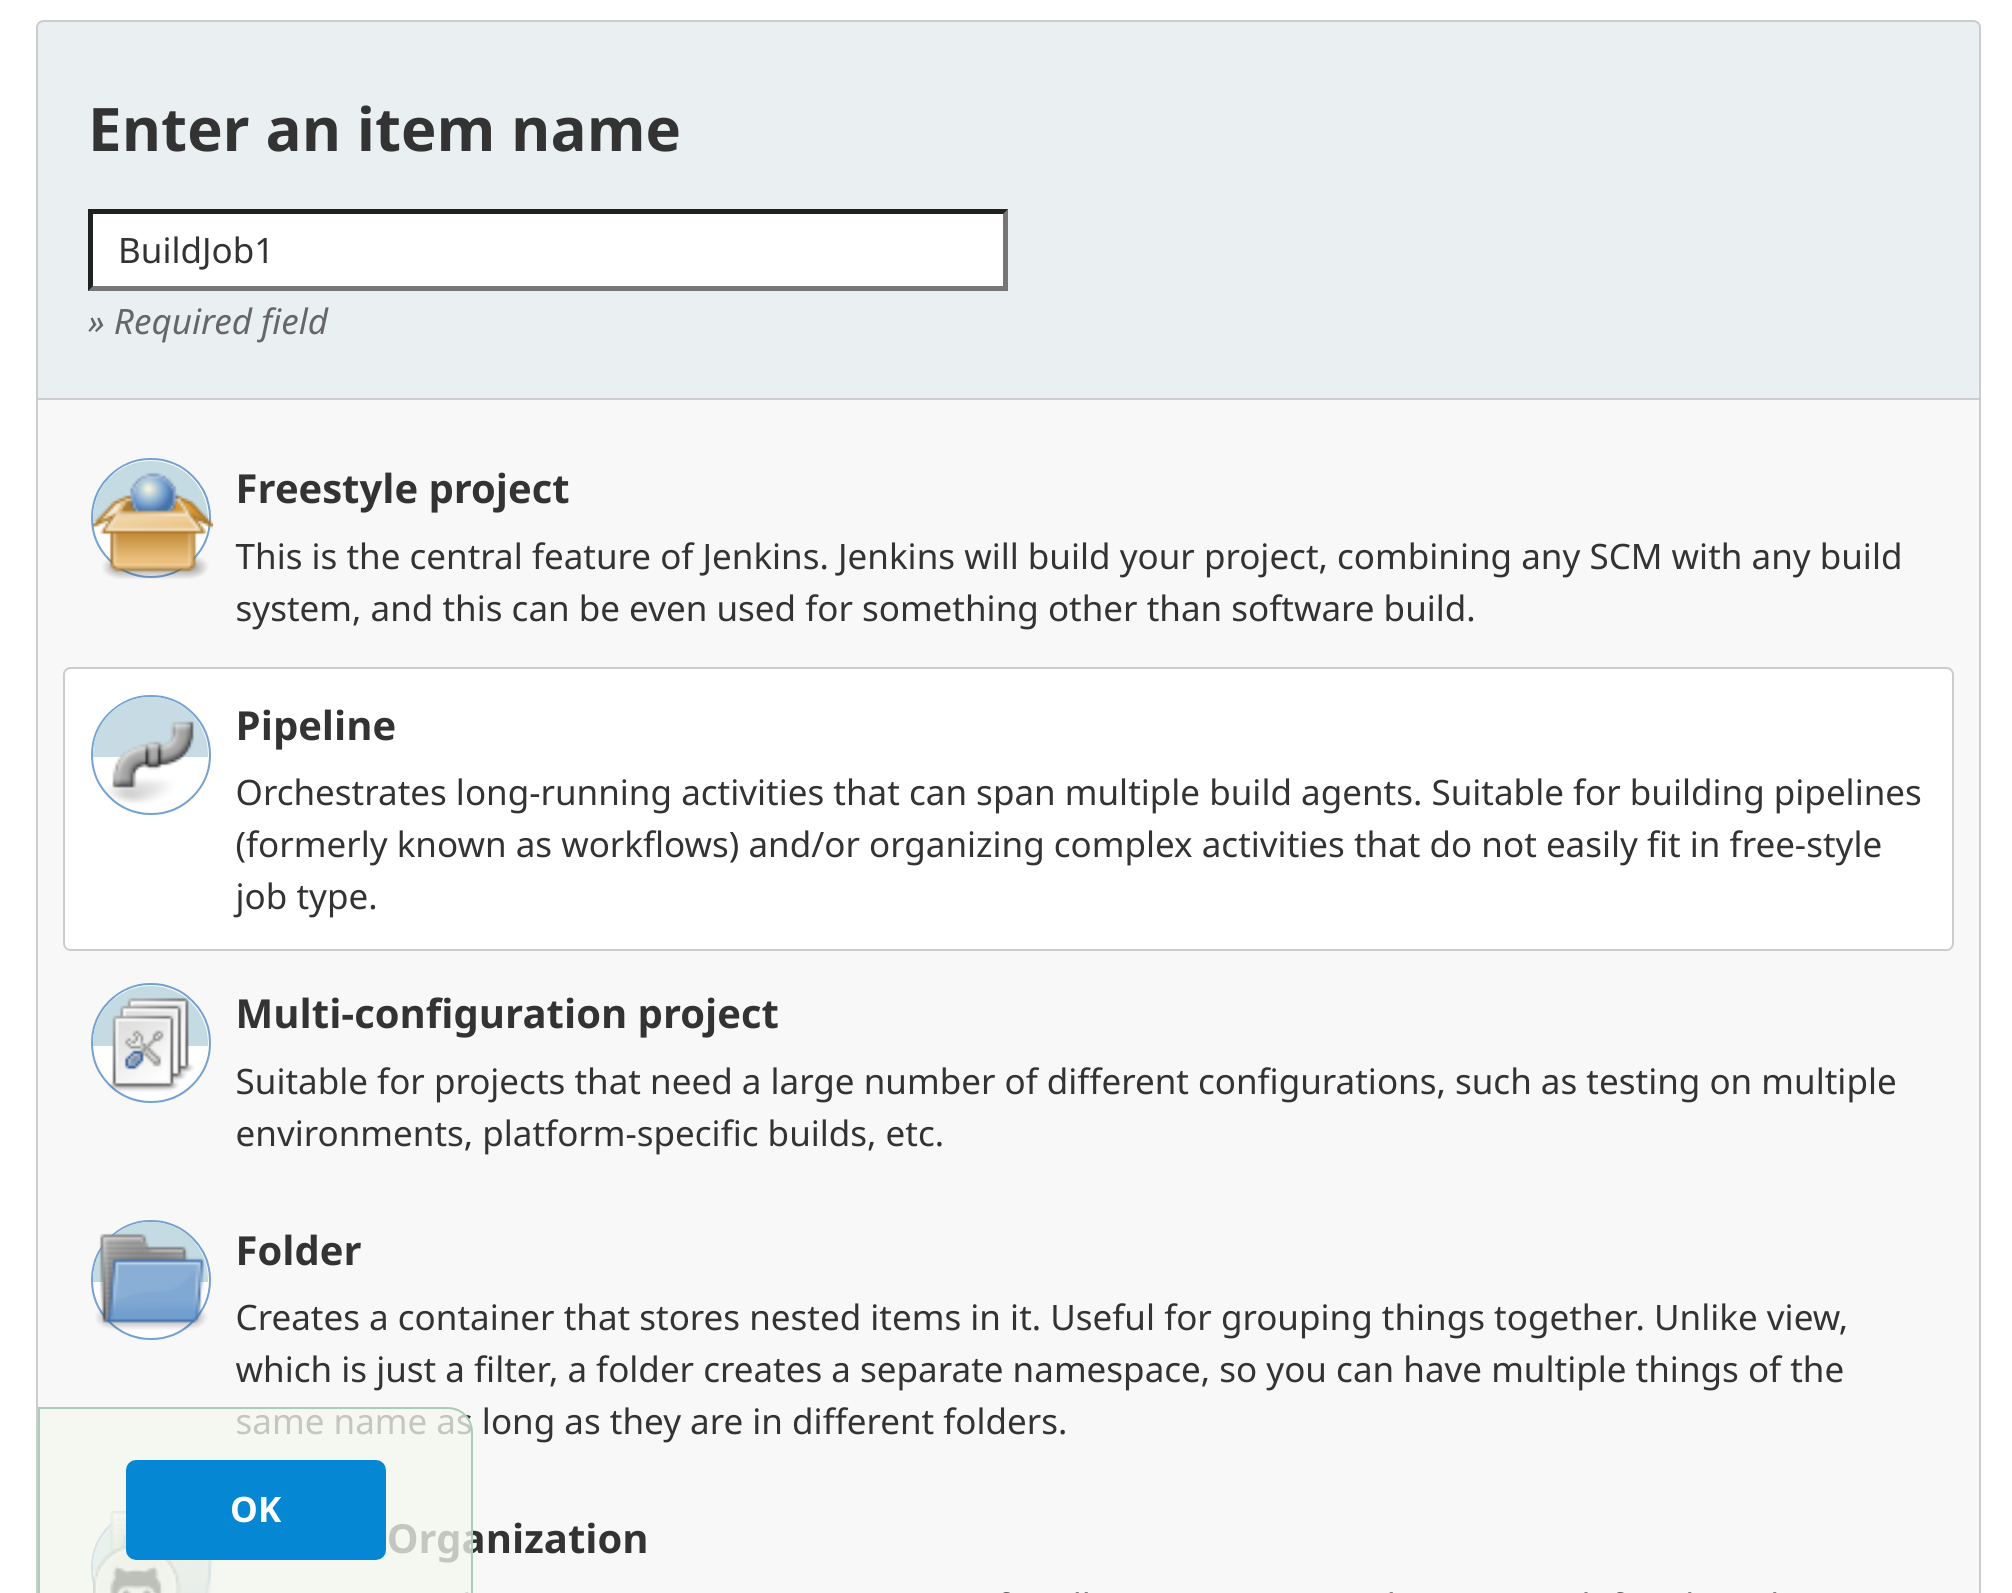
1. Click Jenkins > Create a job on the Jenkins home page:

2. Enter a build job name such as BuildJob1, select Pipeline, and click OK:
3. Within the current build job, click the Pipeline tab to be taken directly to the Pipeline section:
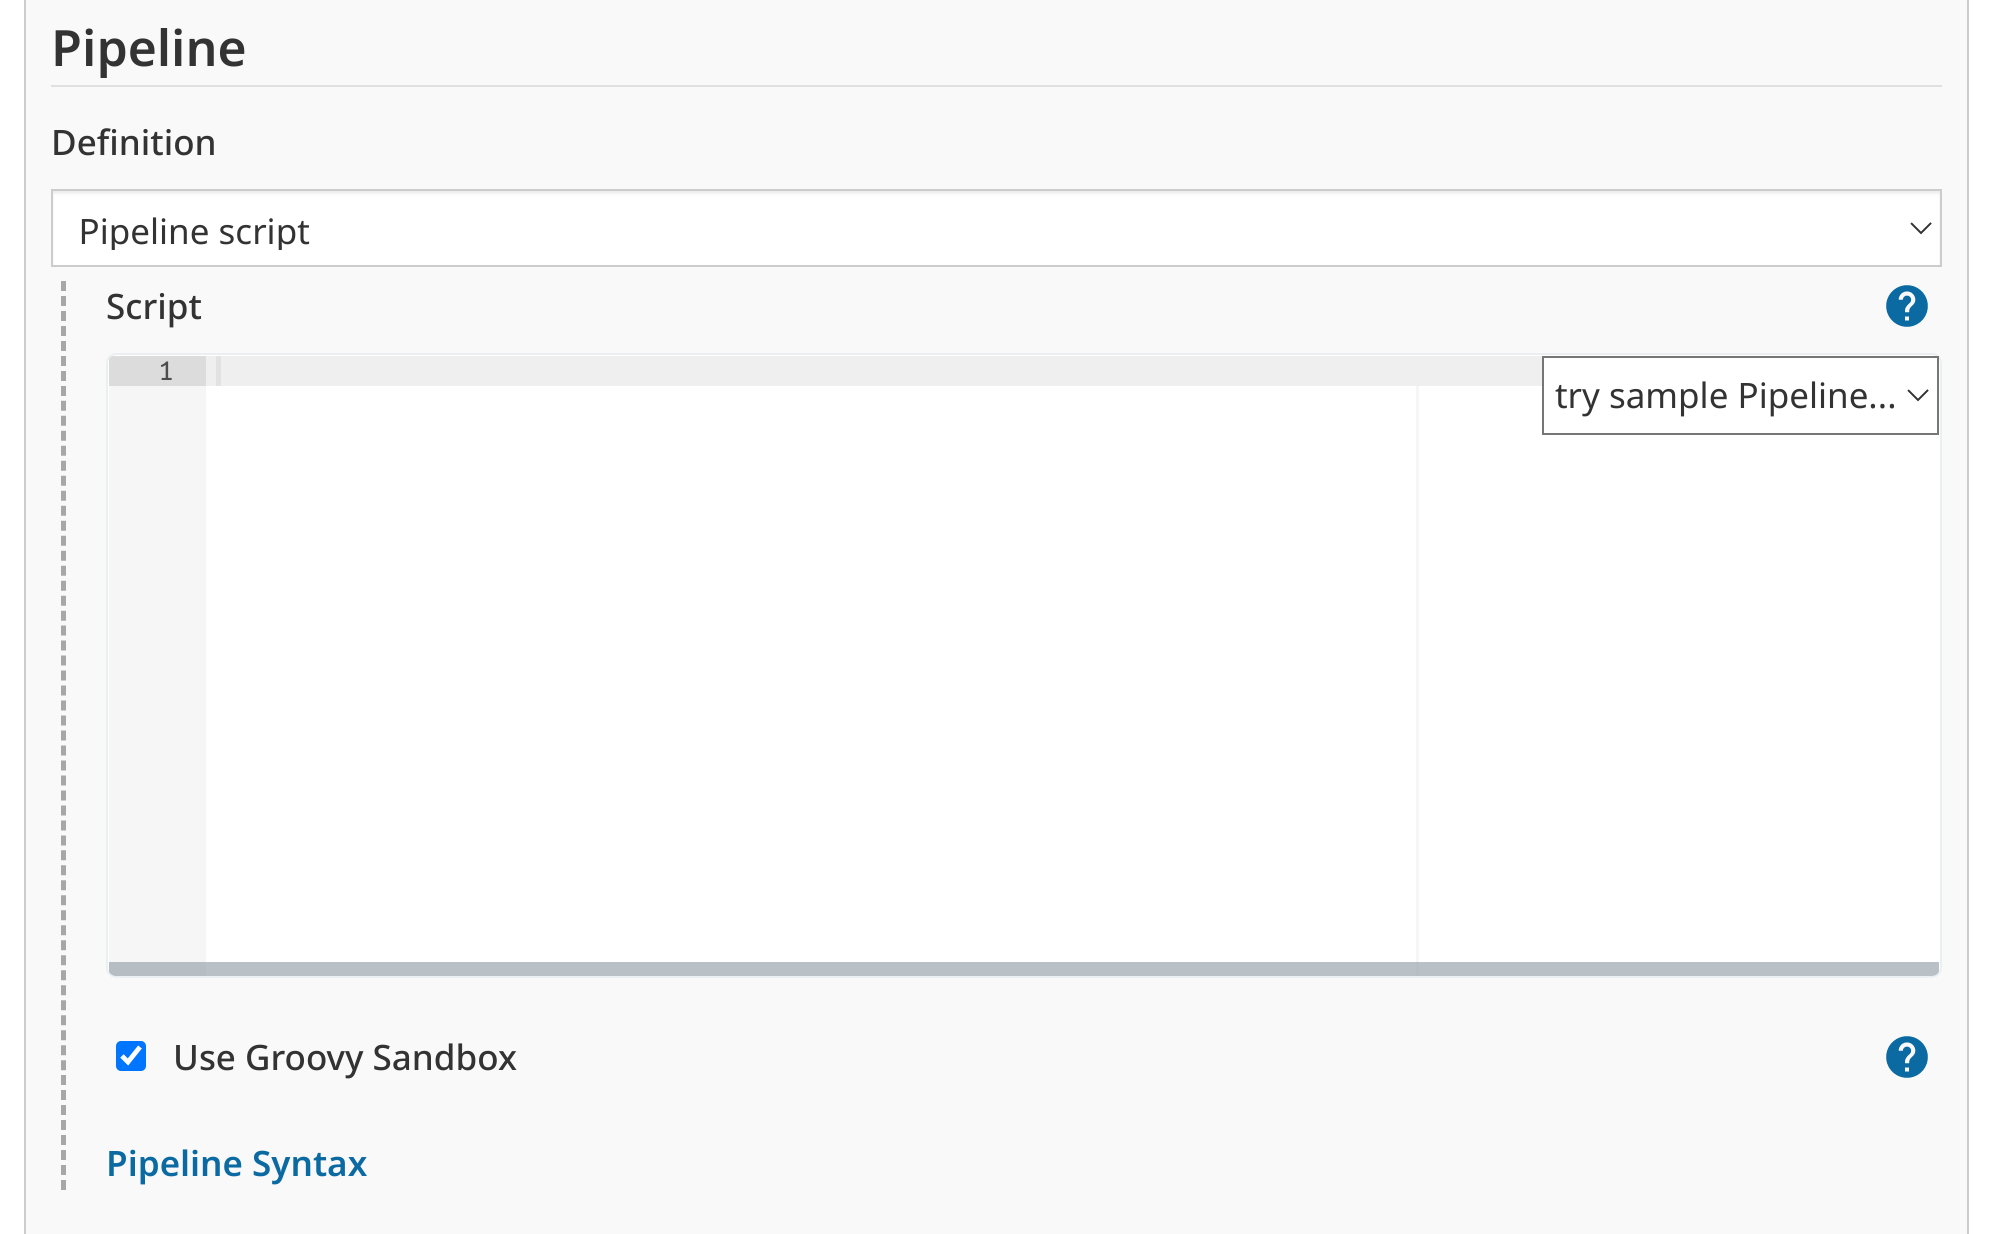
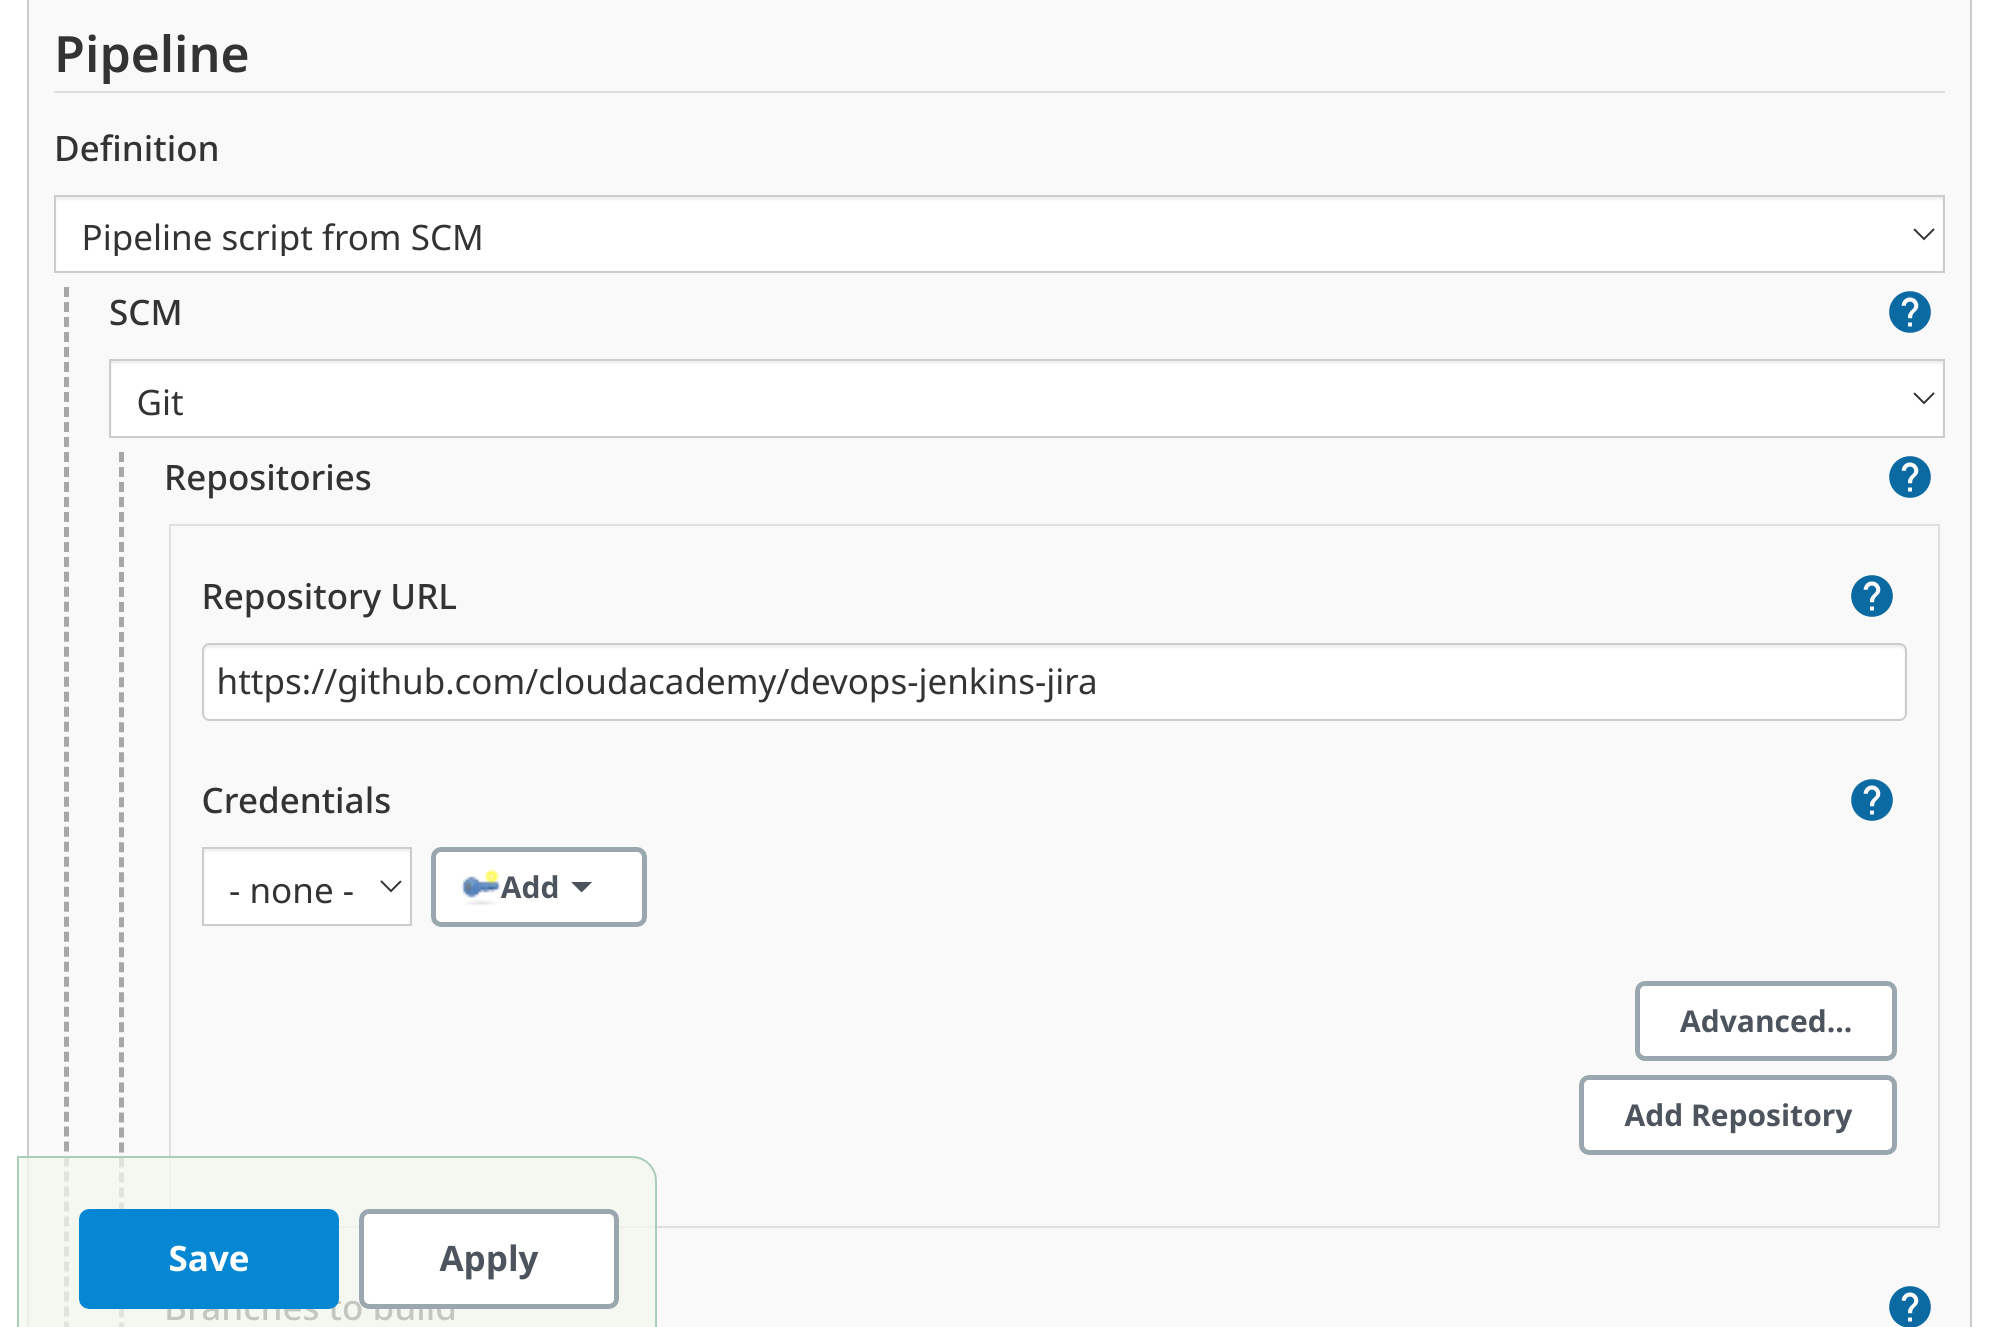
4. Change the Pipeline Definition to Pipeline script from SCM. Set SCM to Git. In the Repositories section, set the Repository URL to github.com/cloudacademy/devops-jenkins-jira and leave all remaining settings as defaults, ensuring in particular that the Script Path setting is set to Jenkins file. Finally, click Save:
5. Before you kick off the Jenkins build job, take a quick look at the Jenkinsfile, located within the GitHub repository (https://github.com/cloudacademy/devops-jenkins-jira) that we just configured in the previous step. For convenience, this is also displayed here:
//START-OF-SCRIPT
node {
    def JIRA_SITE_NAME = 'jira'
    def JIRA_PROJ_NAME = 'SKYNET'

    def GRADLE_HOME = tool name: 'gradle-4.10.2', type: 'hudson.plugins.gradle.GradleInstallation'
    def REPO_URL = 'https://github.com/cloudacademy/devops-webapp.git'
    def DOCKERHUB_REPO = 'cloudacademydevops/webapp'
    stage('Clone') {
        git url: REPO_URL
    }
    stage('Build') {
        sh "${GRADLE_HOME}/bin/gradle build --info 2>&1 | tee gradle.build.${BUILD_NUMBER}.log"
        sh "ls -la build/libs/*.war"
    }
    stage('Raise JiraIssue') {
        def issue = [fields: [ project: [key: JIRA_PROJ_NAME],
                       summary: 'New JIRA Created from Jenkins.',
                       description: 'New JIRA Created from Jenkins.',
                       issuetype: [name: 'Task']]]

        def newIssue = jiraNewIssue issue: issue, site: JIRA_SITE_NAME

        def newIssueId = newIssue.data.key
        echo newIssueId

        def attachment1 = jiraUploadAttachment site: JIRA_SITE_NAME, idOrKey: newIssueId, file: "gradle.build.${BUILD_NUMBER}.log"
    }
}
//END-OF-SCRIPT
The Jenkinsfile is a scripted pipeline and drives the overall Jenkins CICD build process. It contains three main build stages:
Clone:git clones the sample Java servlet web application, opens in a new tab
Build: compiles the Java source code using Gradle
Raise JiraIssue: creates a new Jira project issue and attaches the Gradle build log file to it
6. Click Build Now. This will queue up and execute the build, eventually indicated by the build progress bar in the Build History section:
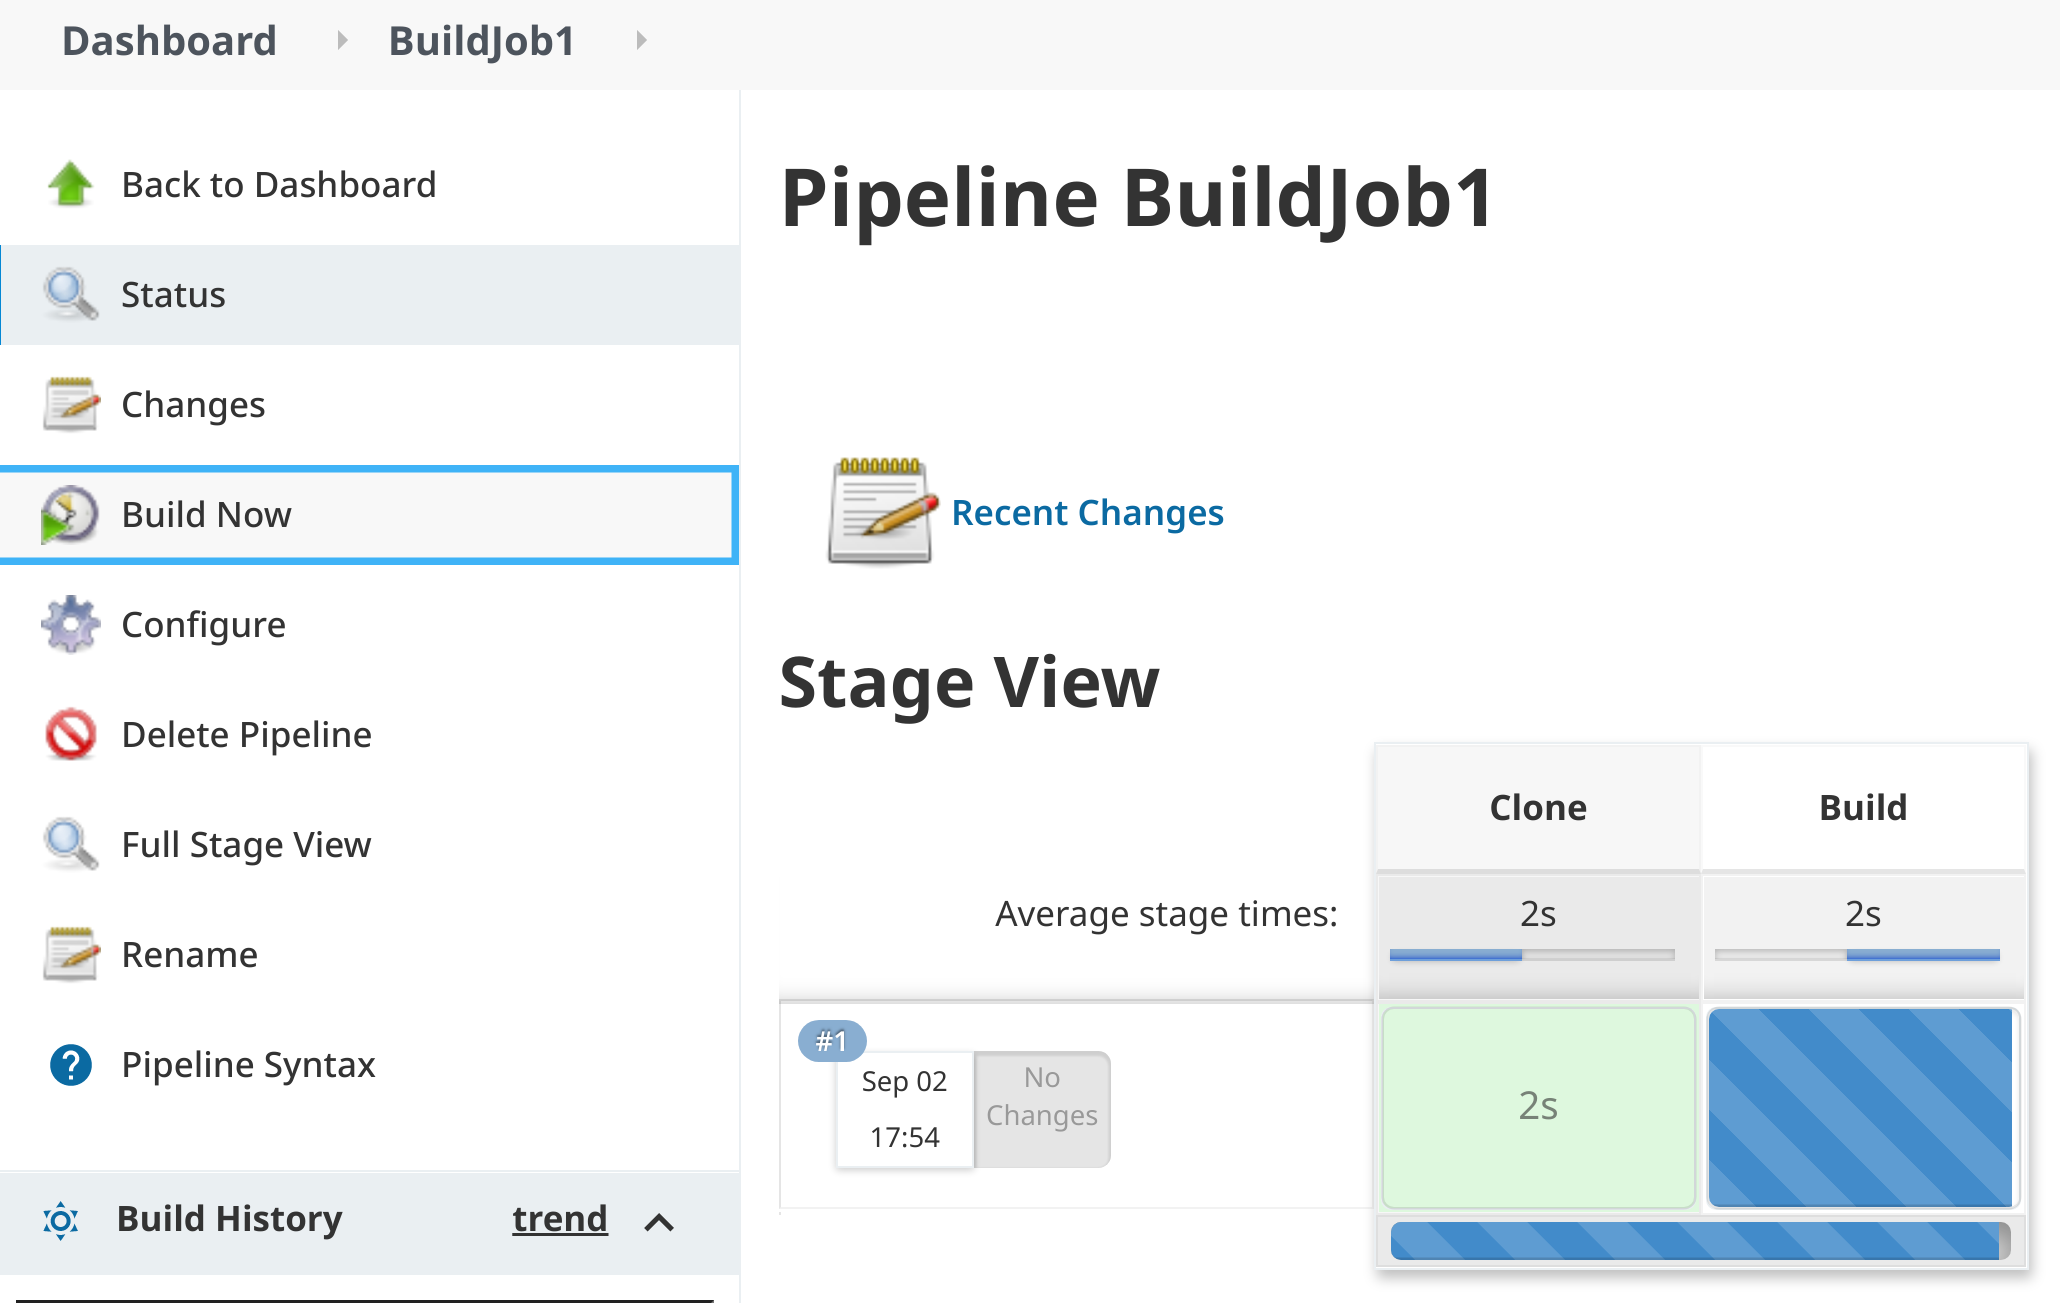
- Once the build becomes active, within the Build History pane, click the build progress bar to be taken to the Console Output view for the current build. Alternatively, you can click the build number, and select Console Output from the resulting context menu:
8. Within the Console Output view, examine the logged output for the build. In particular, take note which agent the job was executed on. In this Lab setup, this build job is executed on the Jenkins (master) agent, as indicated by the Running on Jenkins in /var/jenkins_home/workspace/BuildJob1 message. Knowing which build agent the build job runs on can help with troubleshooting in multi node setups:
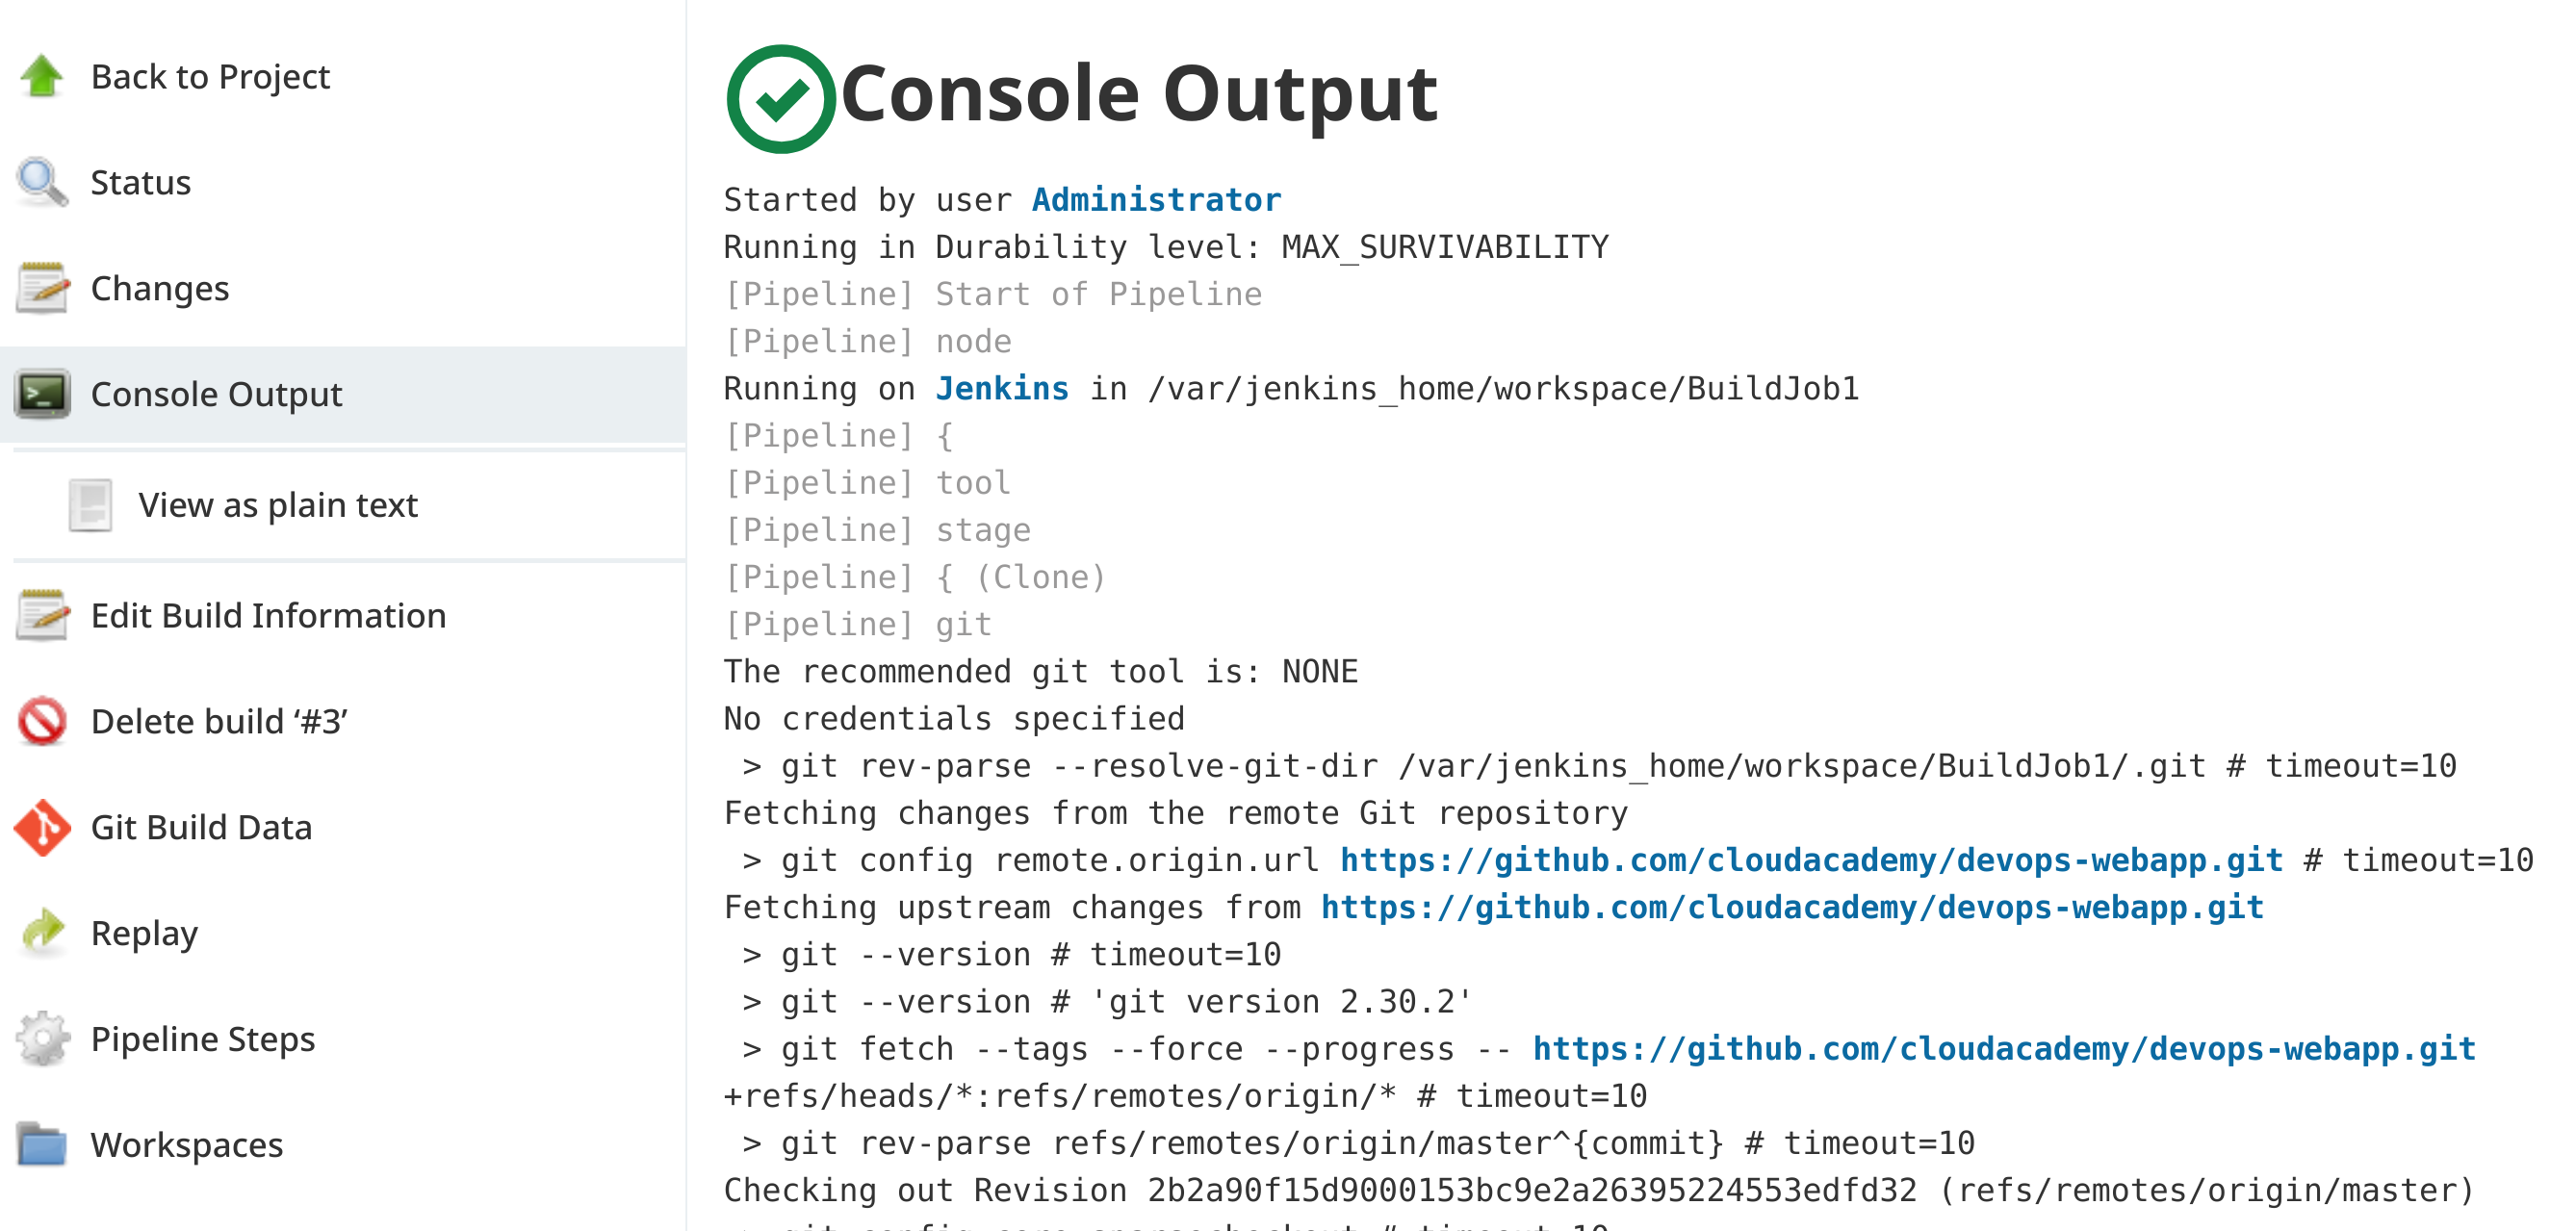
9. Scroll through the Console Output build details to the bottom, confirming that there are no build errors, and that the build has completed successfully as per the Finished: SUCCESS message at the end:
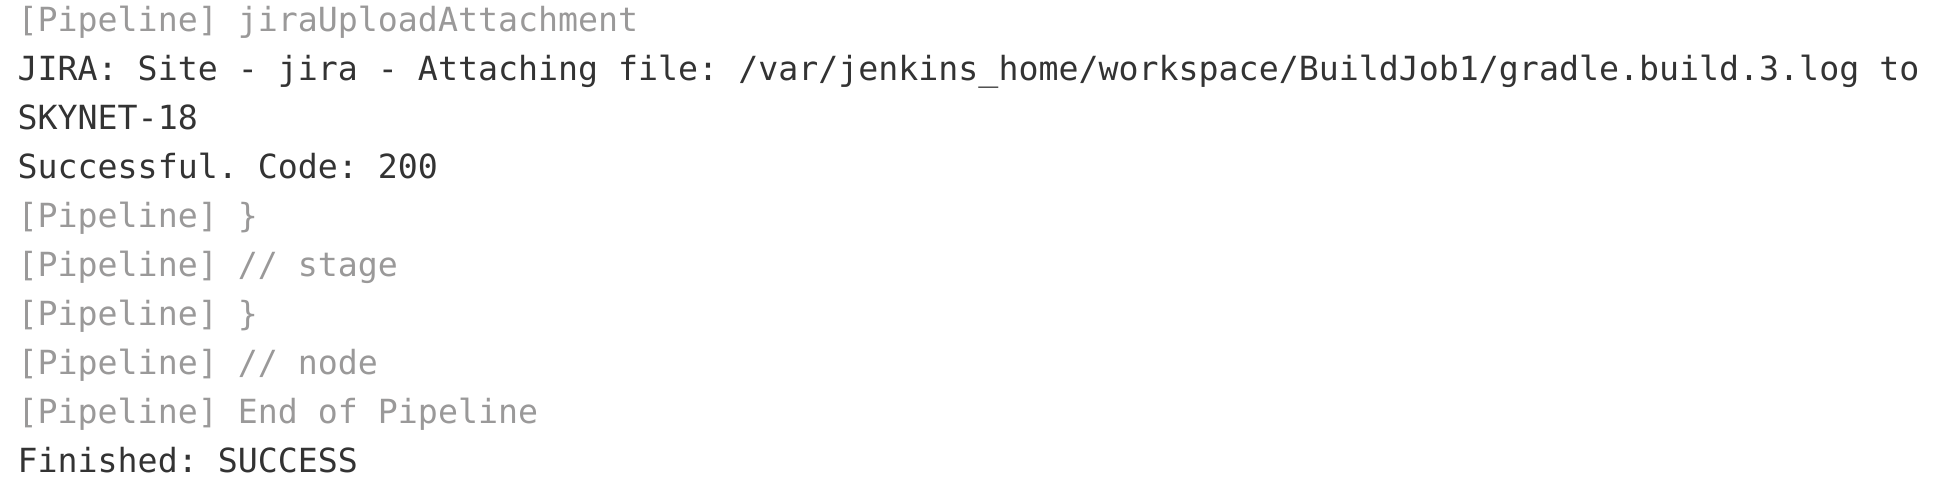
Also, note how there are logging statements regarding:
Creating a new Jira issue: JIRA: Site - jira - Creating new issue
The new Jira issue ID: SKYNET-17
Attaching the Gradle build log to the Jira issue: JIRA: Site - jira - Attaching file
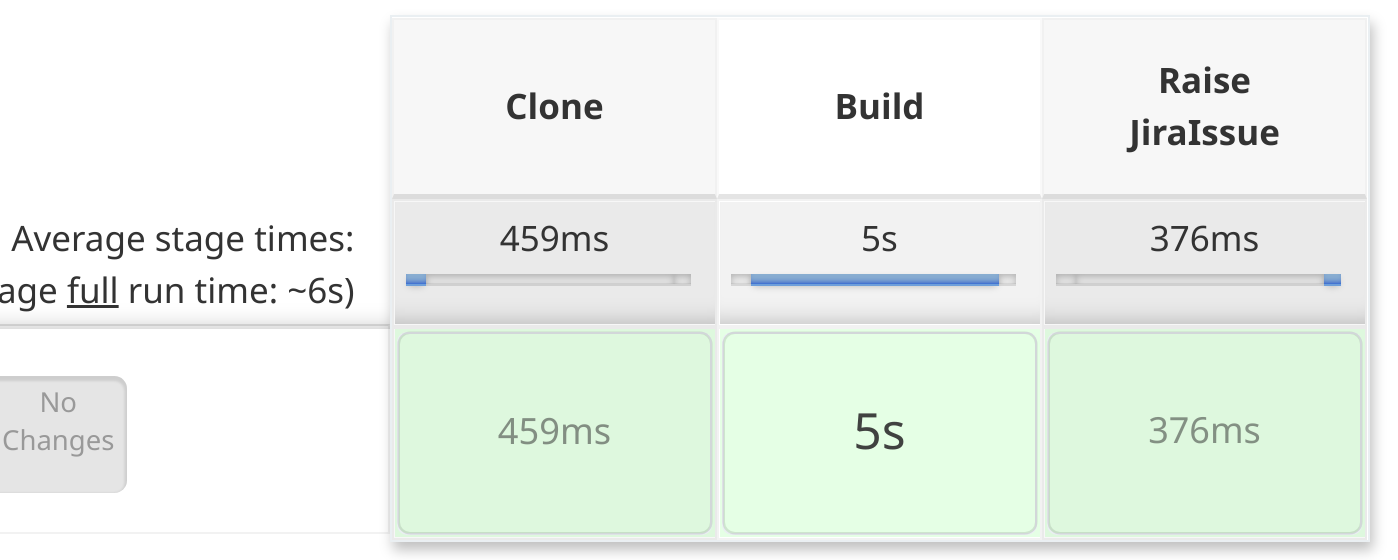
10. Click Back to Project and review the Stage View, confirming that all stages have completed successfully as indicated by the color green (red indicates a failure of some kind):
Step 9 : Review New Jira Project Issue
In step, you will again use the Jira administration web console. Reloading the Kanban board, you should then see that a new issue has been automatically created and added to the Jira project. You will then manage the issue by moving it between states within the Kanban board. You will also open up the issue and download the attached Gradle build log.
Instructions
1. Using your browser, navigate to the Jira home page:
http://instanceip-address:8888
The public IP address assigned to the cicd.platform.instance EC2 instance is the IP being used.
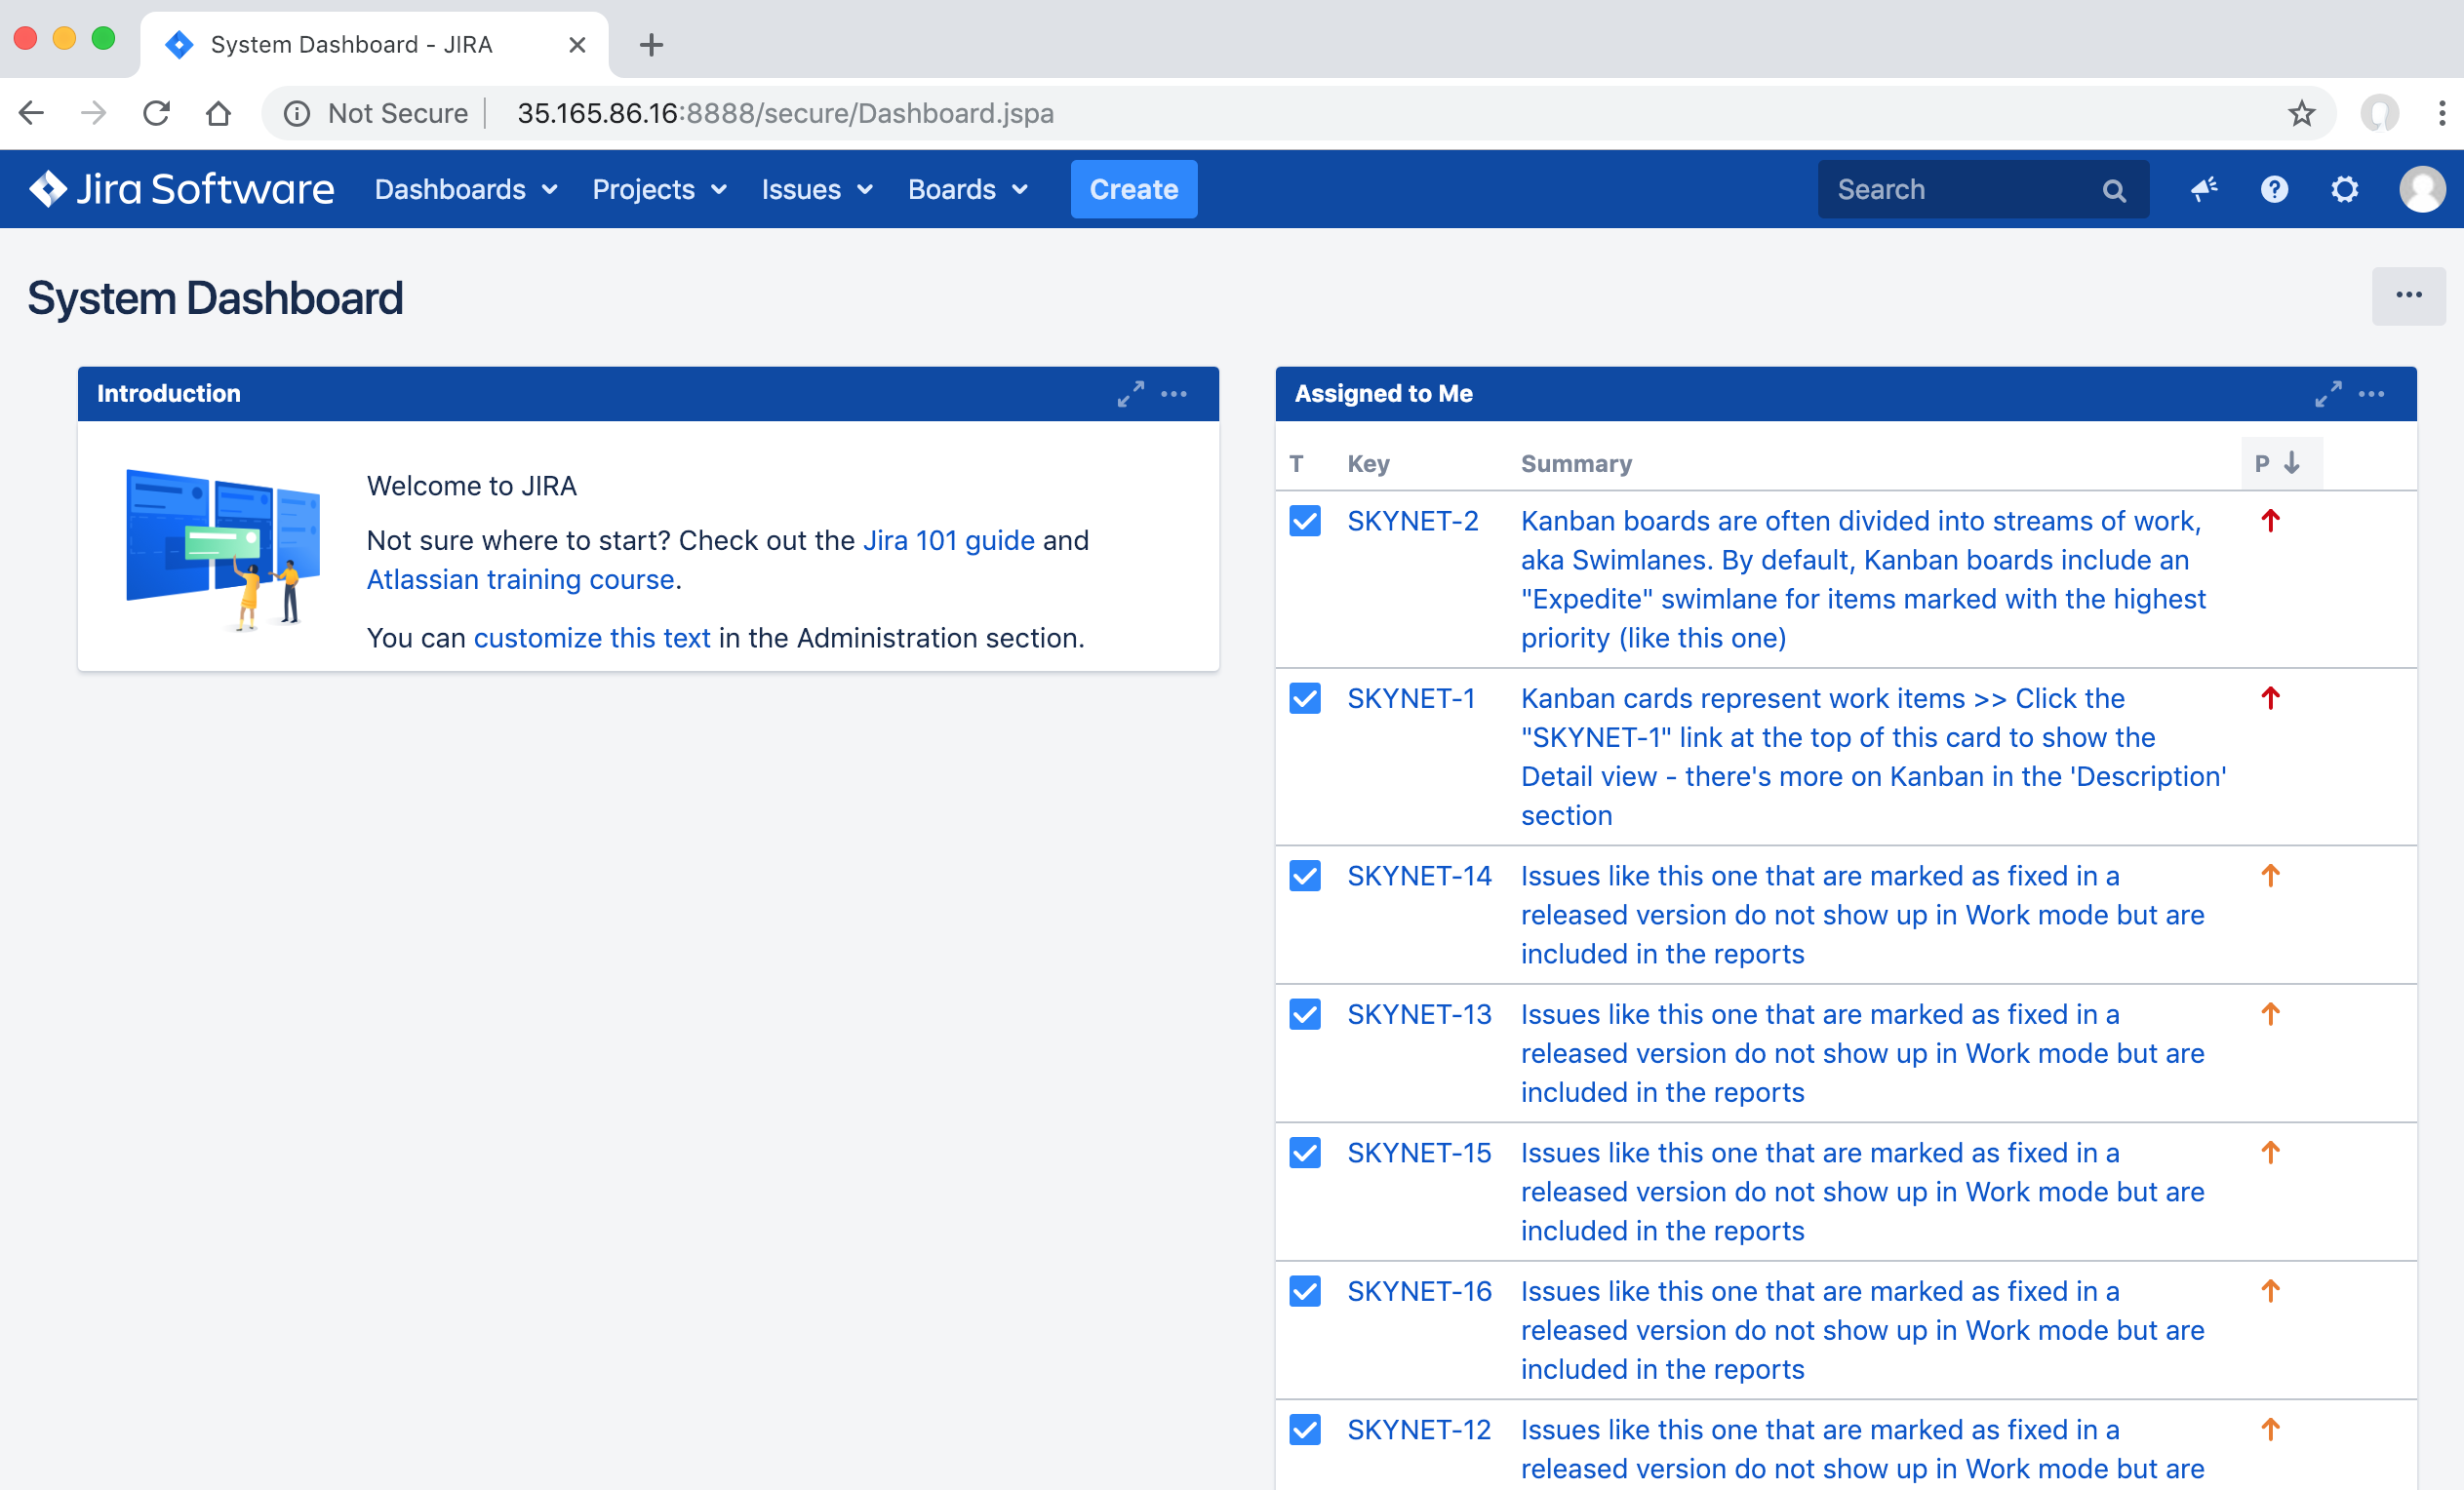
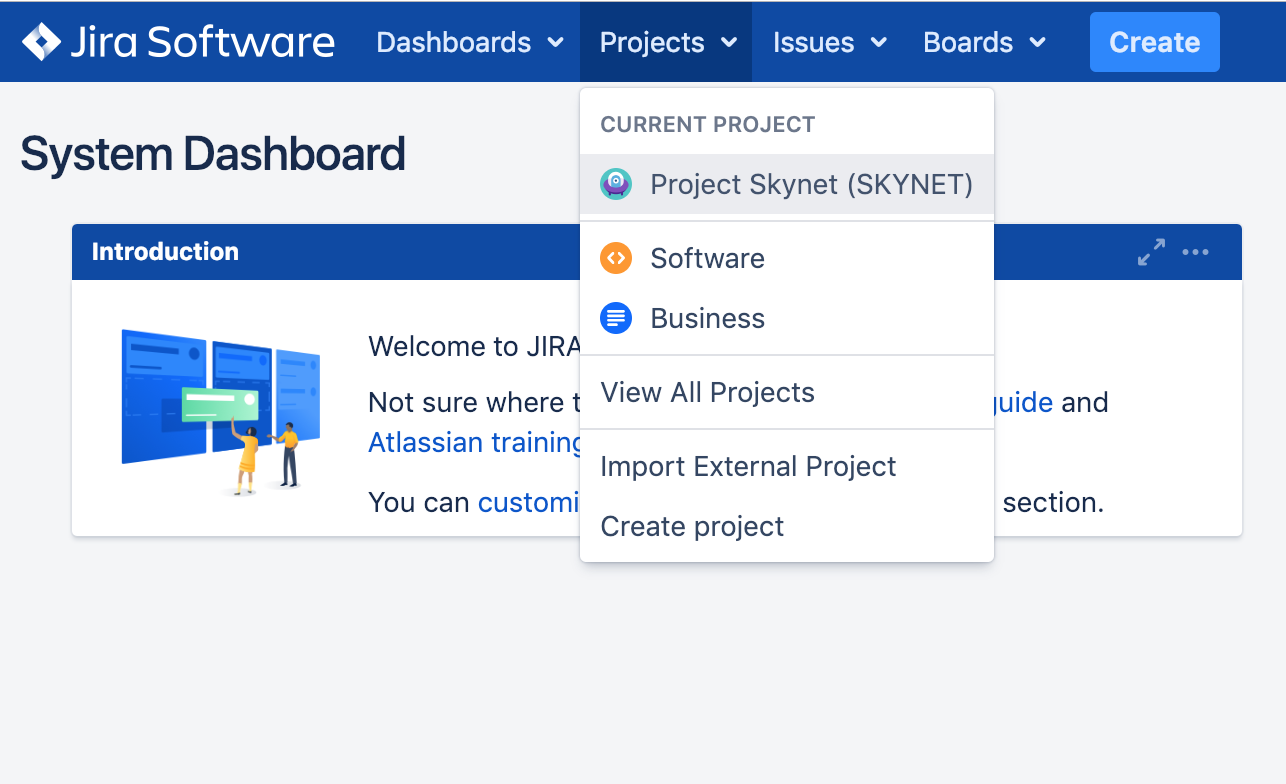
2. On the top main menu, click Projects > Project Skynet:
- The SKYNET Kanban board is now displayed. Scroll to the bottom of the Backlog column and note the new SKYNET-17 issue, which has been created and added by the Jenkins build pipeline you executed in the previous Lab Step:
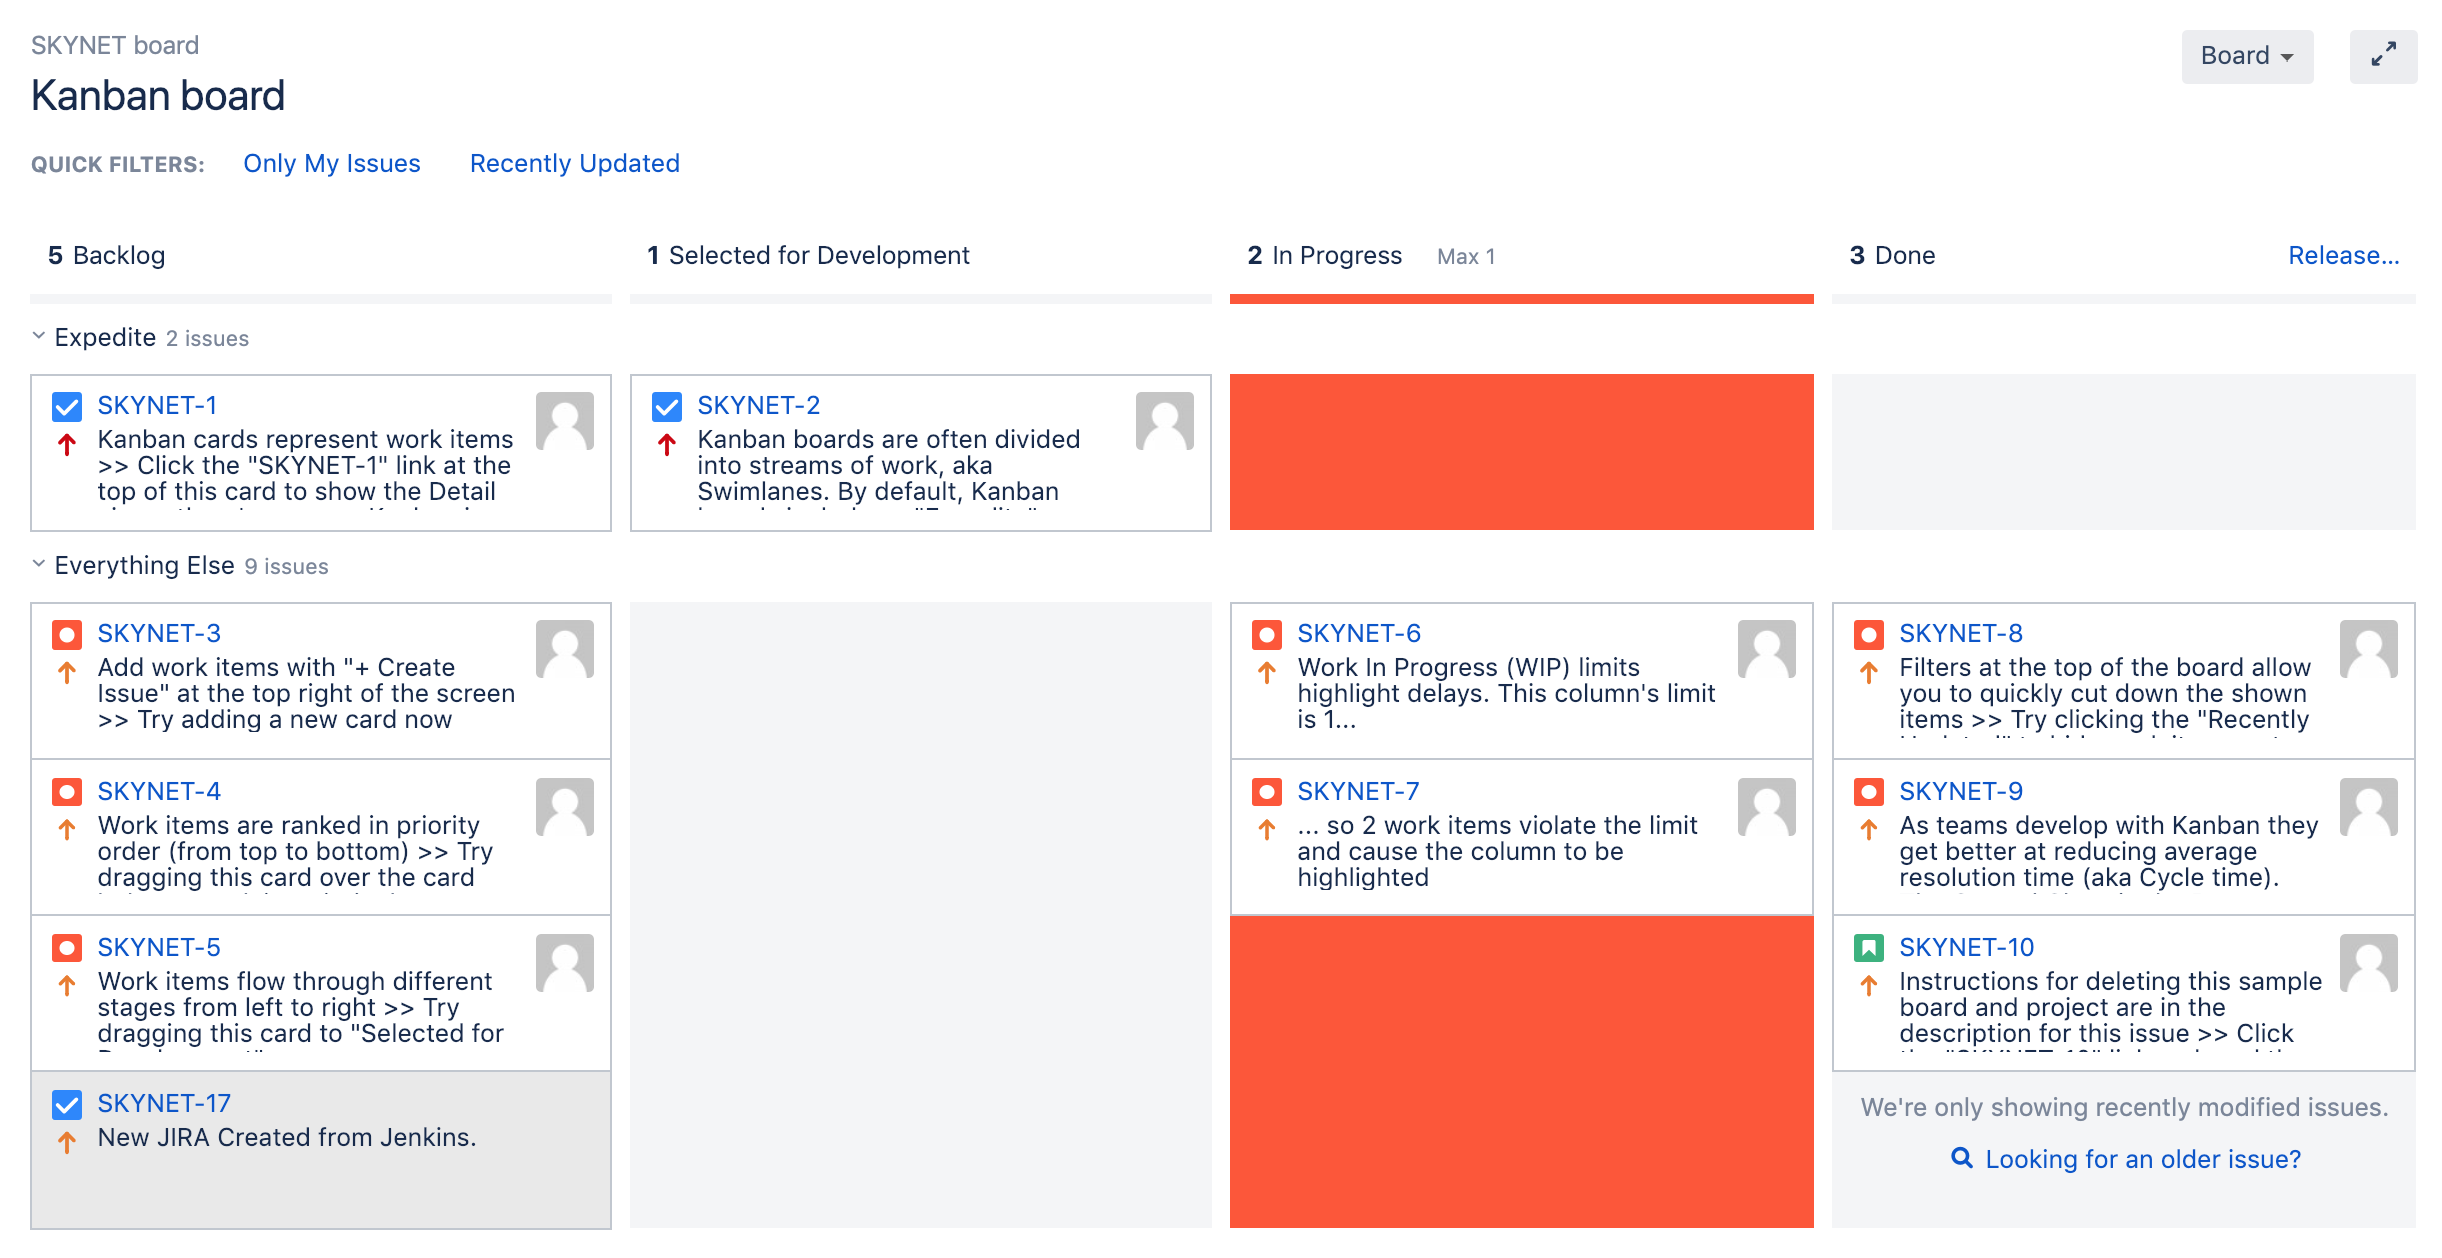
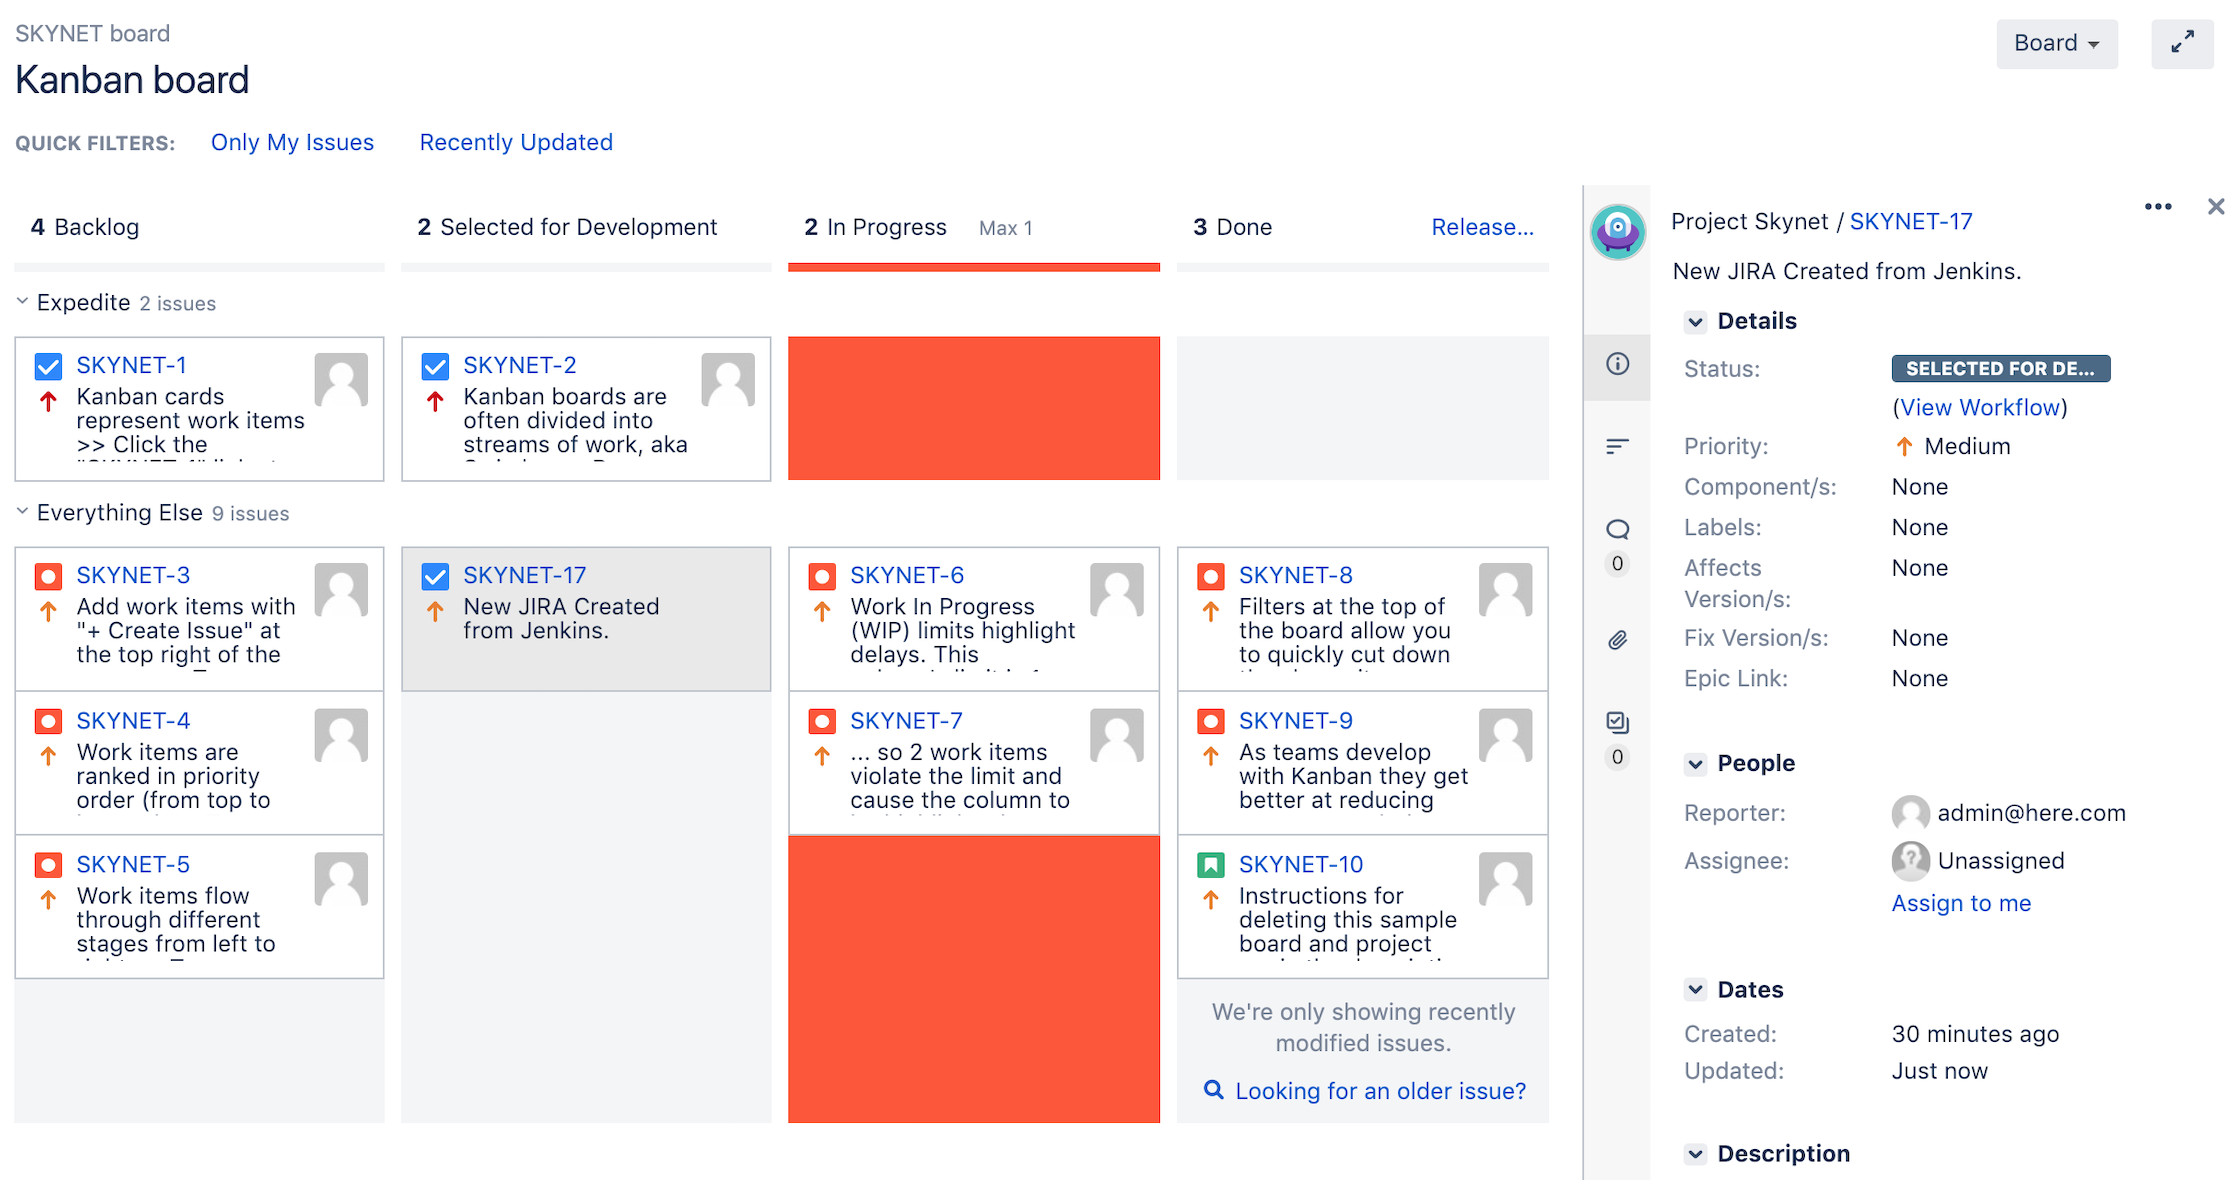
Click and drag-and-drop the SKYNET-17 issue from the Backlog column to the Selected for Development column:
Notice how the Jira application notifies you of any state changes to the issues as you manage them between the Kanban columns:

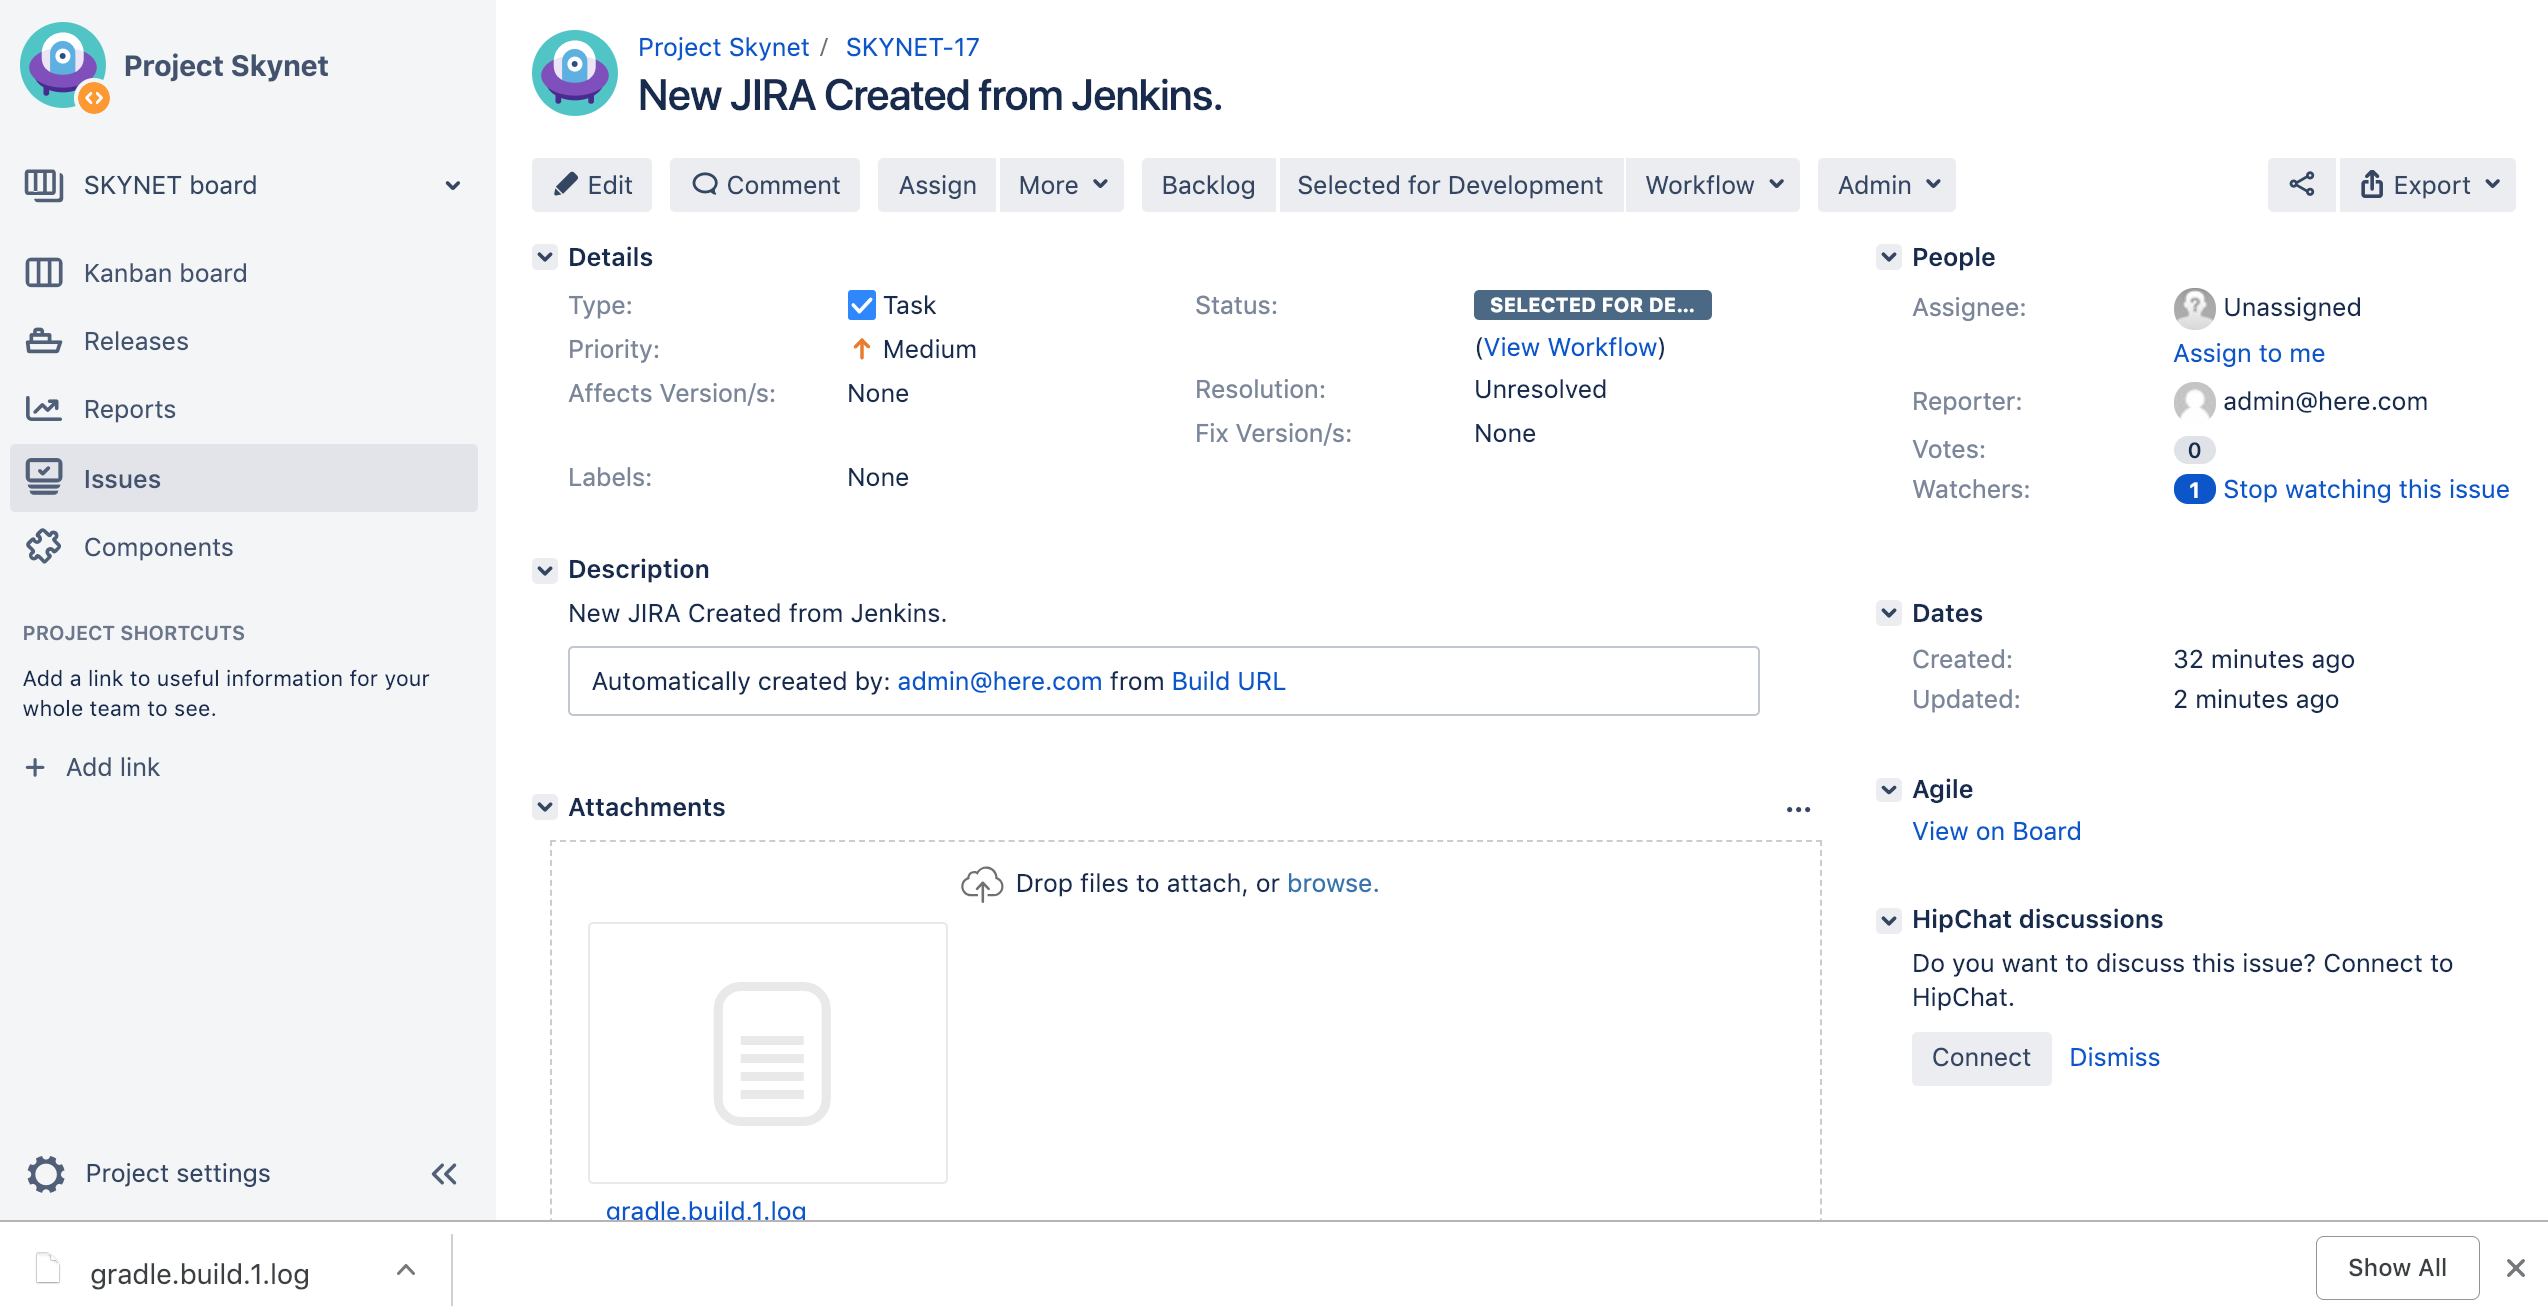
6. Click anywhere within the SKYNET-17 issue (not the blue link itself). The Jira application now presents the SKYNET-17 issue details:
7. Now, click the SKYNET-17 blue link to be taken into the issue view. Notice that the Gradle build log has been attached, and that the file name gradle.build.1.log contains a reference to the actual Jenkins build number:
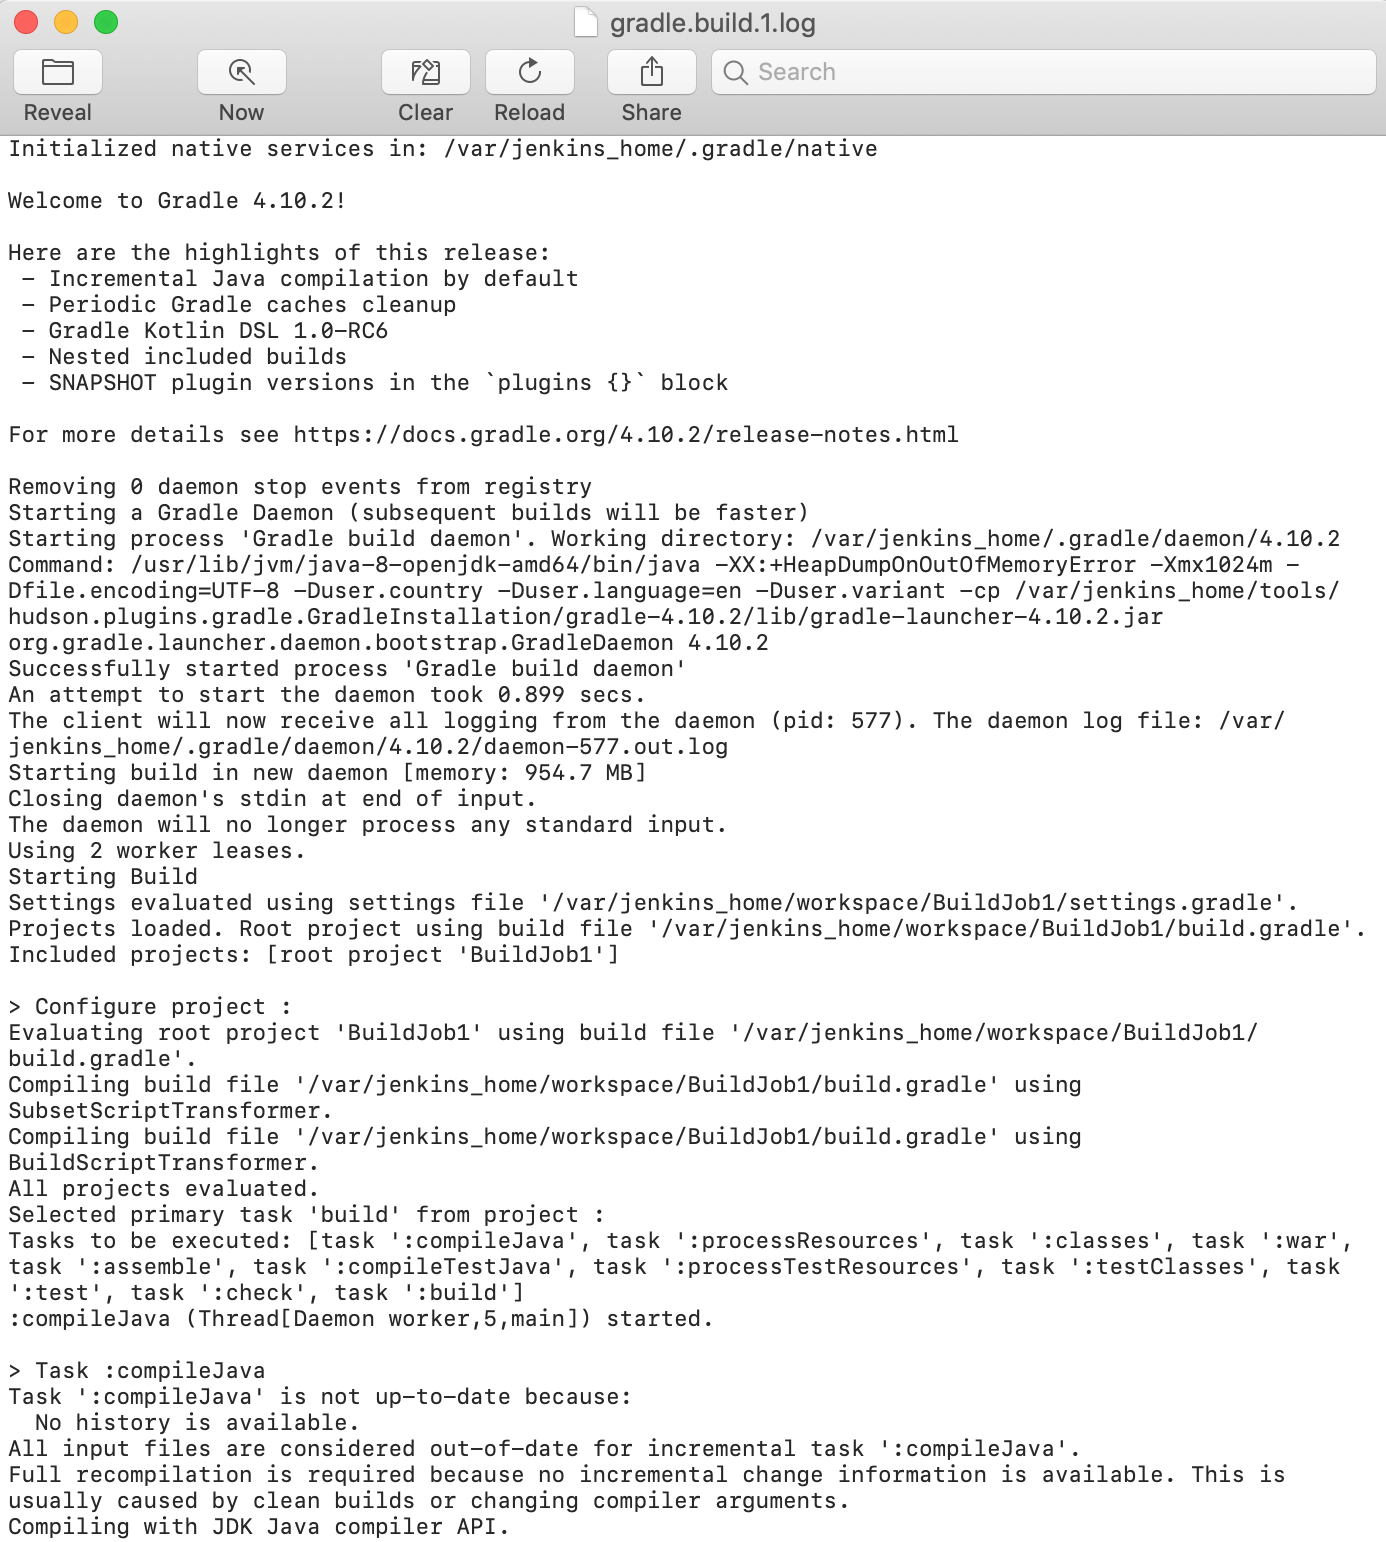
- Click the gradle.build.1.log attachment to download a copy of the Gradle build log locally:
- Open the gradle.build.1.log file using your local default text editor. Review the Gradle build:
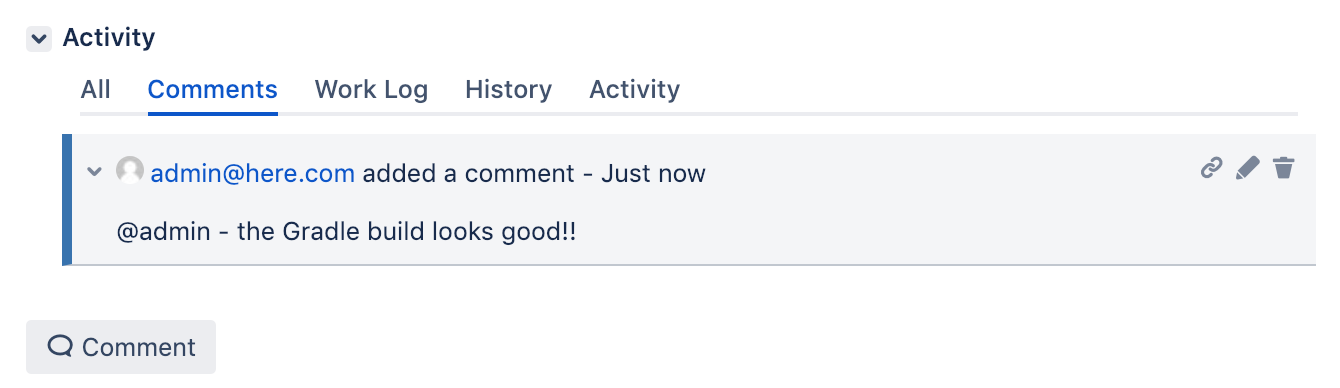
10. Back within the SKYNET-17 issue, click Comment and leave the following comment. Then click Add to add it to the issue:
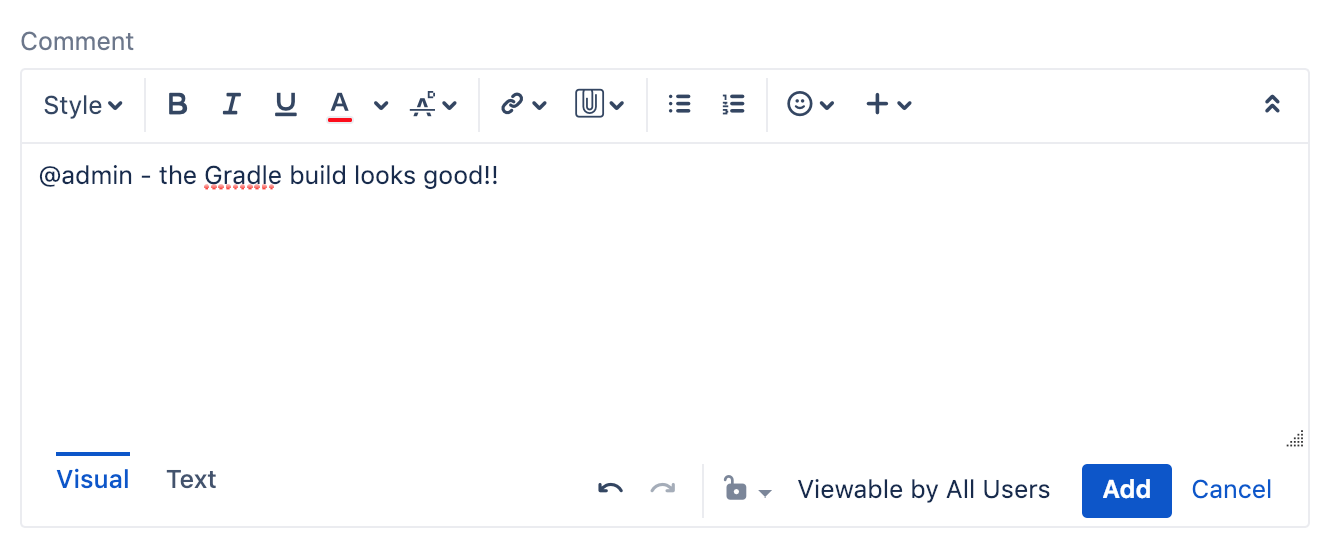
- Notice how Jira expands the text @admin to the users email address. In the background, an email will have also been sent to the user in question to notify them that the issue has been updated:
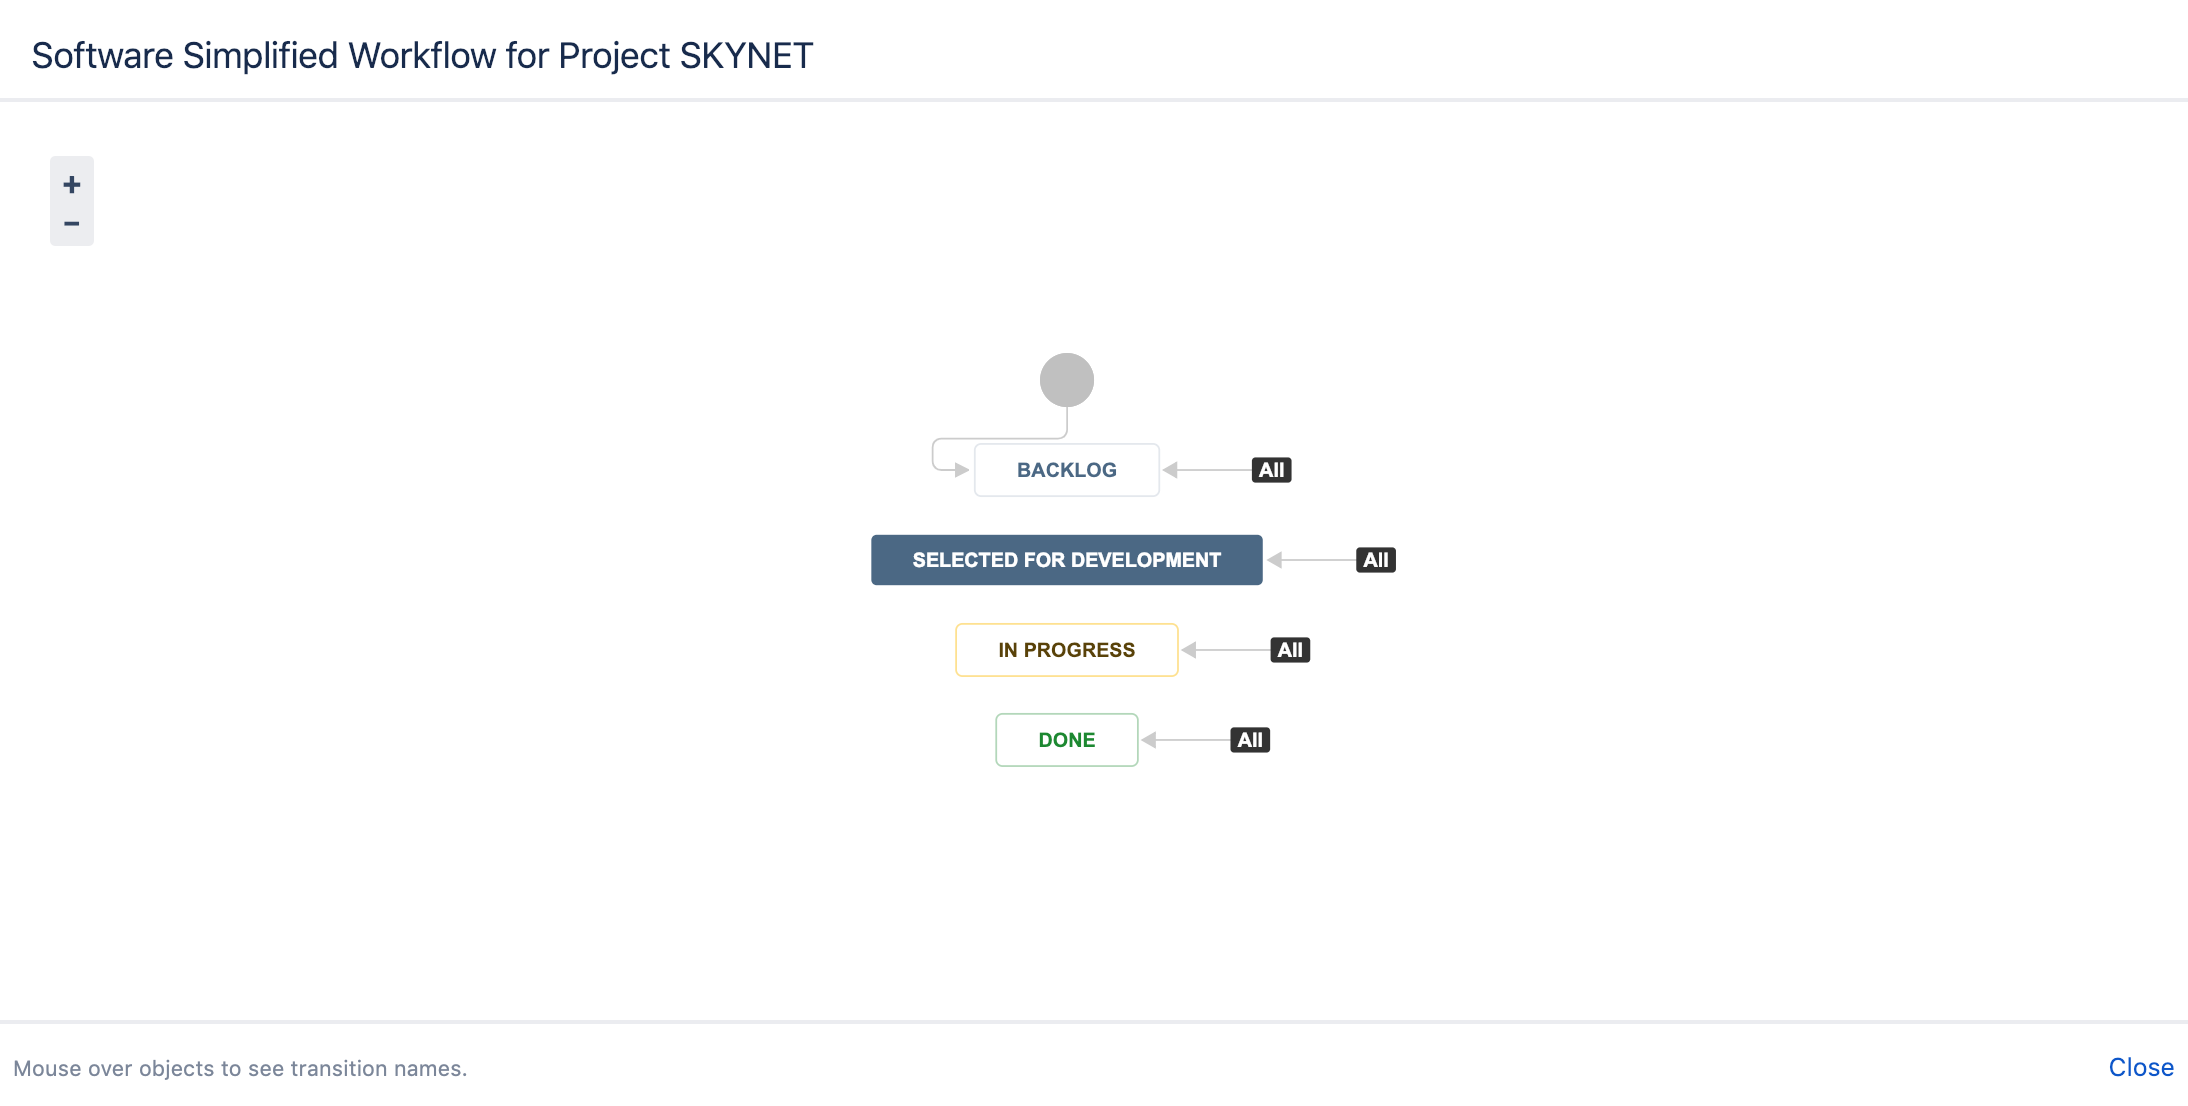
12. Click View Workflow to be presented with the workflow being used to manage the flow of issues within SKYNET project. Close the popup window by clicking Close at the bottom:
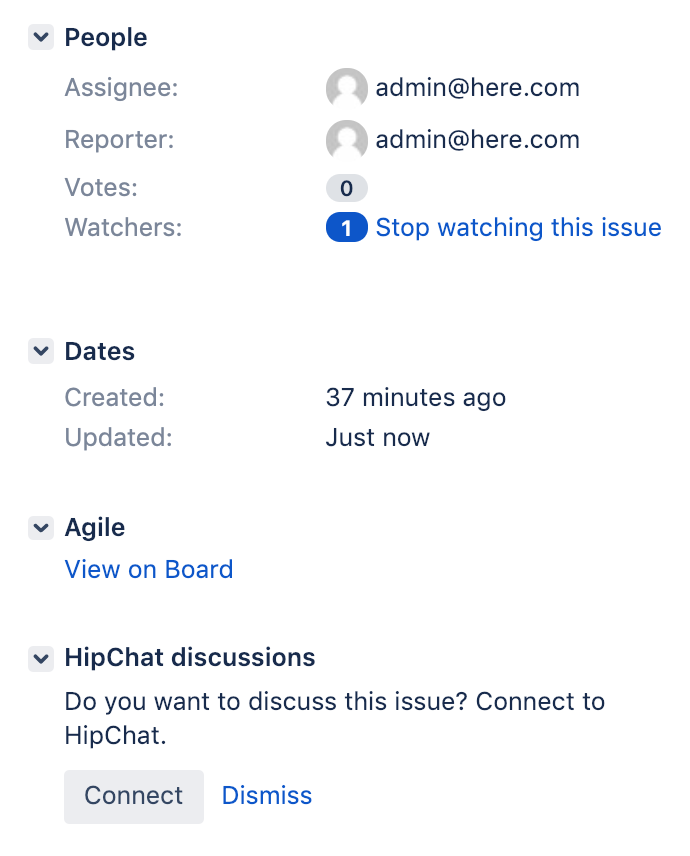
- Under the People section, click Assign to me to assign the current issue to yourself:
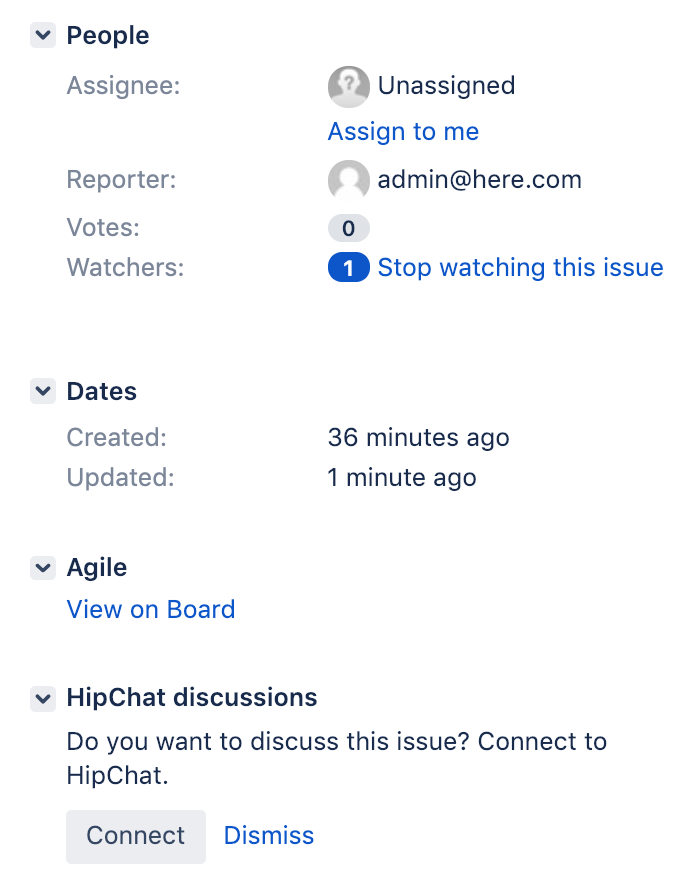
14. Confirm that the issue has now been assigned to yourself (admin@here.com):
Note: Some screenshots are from older versions of Jenkins and Jira but should still work.